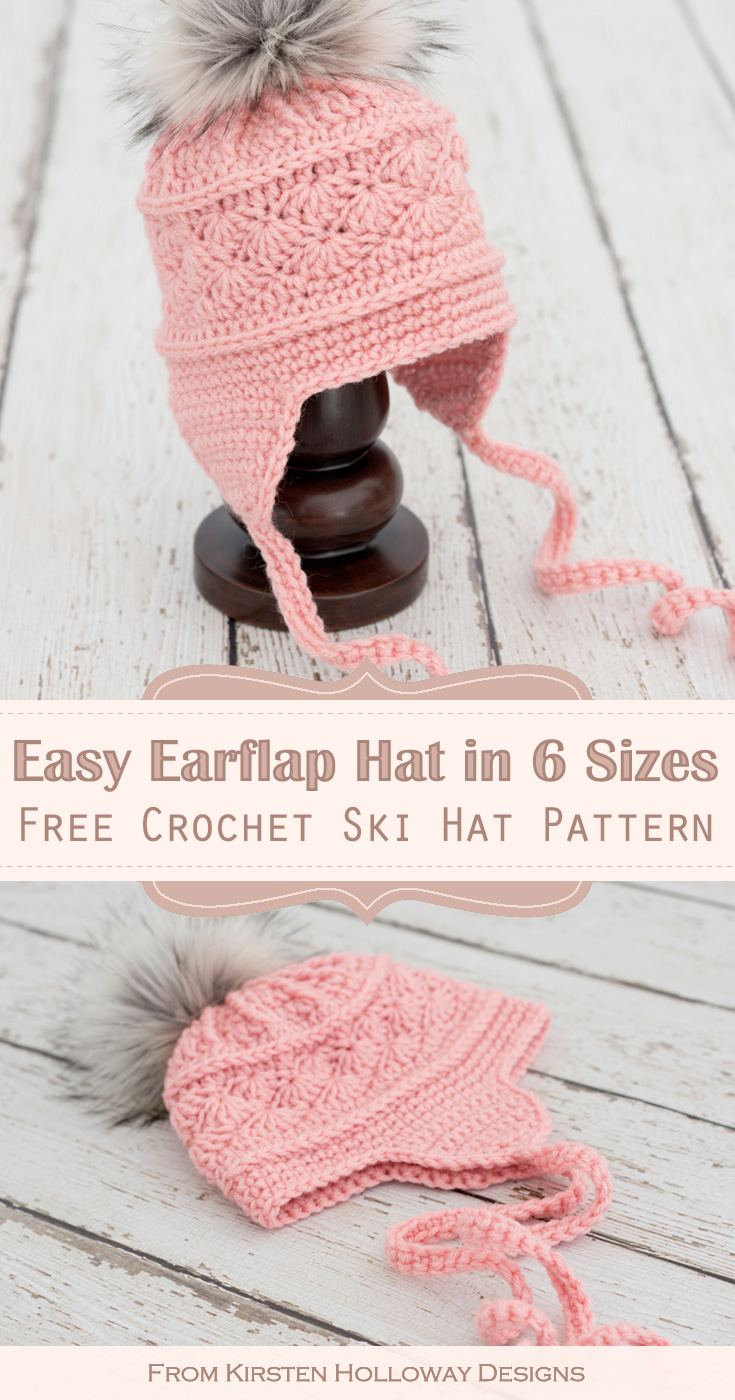
This sweet ski hat crochet pattern for babies-adults is simple, yet stylish and makes a great winter hat for those crocheters who are comfortable with beginner patterns, and want to try their hand at something a little more complex (but still “easy”). Six sizes are included so you can crochet one for each person in your family! Find the free crochet pattern instructions below, or purchase a print-optimized, ad-free PDF by clicking here.
A crochet ski hat for everyone in your family!
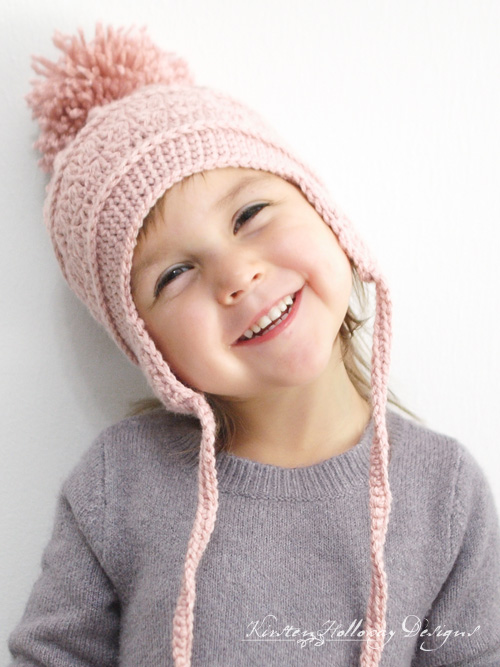
This sweet ski hat pattern with earflaps is not just for babies–I’ve included 6 sizes so you can make this hat for everyone in your family including kids and adults! It is an instant classic that will help keep you and your kiddos warm on the ski or sledding slopes this winter, and who doesn’t love the look of pom-poms and string ties?!
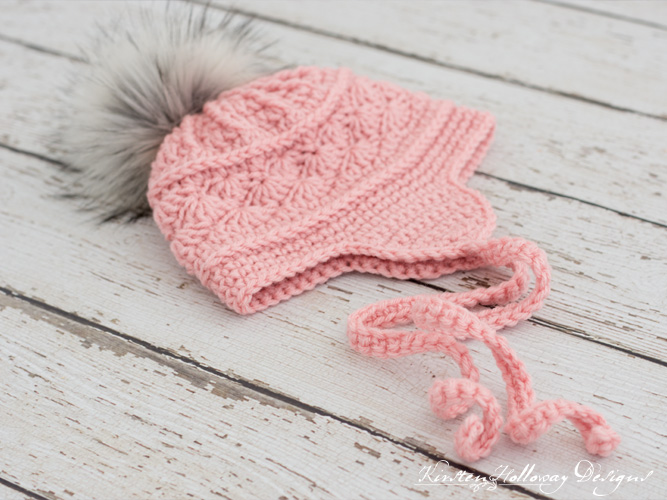
I used a sturdy, but soft acrylic yarn for this hat pattern. Acrylic is ideal for babies, kids, and anyone who wants a no-fuss care for their hat. I recommend using either Red Heart Soft in “Rose Blush”, or Red Heart Comfort in “Petal Pink” if you want to achieve the same look as the hat in the picture.
Click here to add this to your Ravelry Queue!

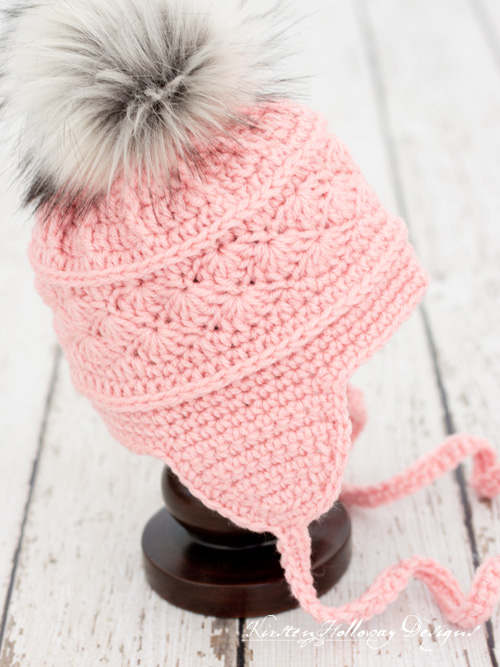
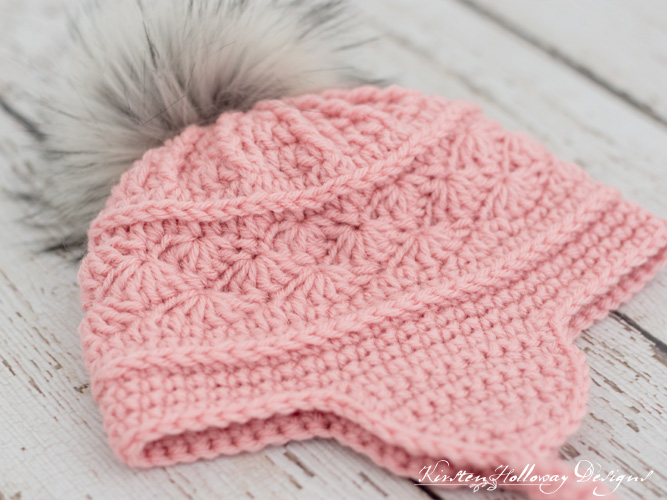
This hat uses basic stitches such as the single crochet, double crochet (for the shell stitch) and half double crochet, The ridge around the middle of the hat is created by working in the 3rd loop of a half-double stitch. This “3rd loop” is located at the back of the stitch and pushes the top of the stitch forward to create the texture. The ties are made with the single crochet stitch, but if you want a different style of ties on your hat please feel free to modify the hat to fit your needs.
Crochet from the heart for charity
A fun little back-story on this pattern before we start:
I originally crocheted this ski hat to donate to a local women’s/children’s shelter, but then the post I shared in a Facebook crocheting group blew up with requests for the pattern! I hurriedly wrote down the size I’d been working on, and got that up the same day, then updated with several other sizes throughout the next week. The crochet pattern is now offered in sizes from 3 months to adult. If you enjoy charity crochet, please consider making this hat to donate to shelters that help women and kids. <3
It’s been fun to see all the pictures of finished hats that you’ve shared on Ravelry. The greatest reward for a designer is to know people like their patterns! <3
I would love to see even more pictures when you’re done, so please feel free to come by my Facebook group and show it off! Be sure to tag @kirstenhollowaydesigns when you share pictures of your finished ski hat on Instagram, and use hashtag #lavieenroseearflaphat
You can also find me on Facebook, Pinterest, and Instagram!
Did you know there is also a matching ladies scarf pattern for this design now?
Disclaimer: This post contains affiliate links. If you purchase something using these links, then a small amount of the sales price goes to me to help keep this site, and the patterns on it free. However, you do not pay any extra for the item you purchase.
Difficulty:
Easy
Materials Needed:
3.75 mm (F) hook (Or hook needed to obtain gauge) for 3-6 mos, and 9-12 mos
4mm (G) hook (Or hook needed to obtain gauge) for 6-9 mos, toddler, child, and adult sizes
Approximately 100-200 yards, depending on the size chosen, of #4 worsted weight Red Heart Comfort in “Petal Pink”, or Red Heart Soft in “Rose Blush” .
Yarn needle for weaving in ends
Scissors
Optional: Clover Large Pom-pom Maker
Optional: 1/4 yd Fashion Faux Fox Fur Fabric – Silver. See instructional video at bottom of post.
Stitches Used:
sl st = slip stitch
sc = single crochet
hdc = half double crochet
dc = double crochet
FPdc = front post double crochet
sc2tog = single crochet 2 together
st/sts = stitch/stitches
sk = skip
prev = previous
Additional terms:
Shell = 5 dc in designated stitch
Stitching in the “3rd loop” of hdc. Work all stitches for that row in the 3rd loop of the hdc from previous row.
Instructions: Look at the top of the stitch, and locate the sideways “V”, bend the stitch to look at the back, and you should see another “V”. You’ll be working into the back loop of that “V”, this is called the 3rd loop. If you’re still stuck, try watching this video that explains how to work the stitch.
Gauge:
2 1/4″ across after round 2 using a 3.75mm hook, or 2 1/2″ across after round 2 using a 4mm hook. 15 hdc in 4″ using 3.75mm hook.
Measurements:
(Does not include pom-pom, earflaps or ties)
They should be at least this big unstretched:
3-6 month hat: 5” tall by 7 1/2″ wide.
6-9 month hat: 5 ½” tall by 8” wide.
9-12 month hat 6” tall by 8 ½” wide
Toddler hat: 7” tall by about 9” wide.
Child hat: 7 ½” tall by 9 ½” wide.
Adult hat: 8” tall by 10” wide.
Additional Notes:
-This pattern is written using US terms.
-ch-1 at beginning of round does not count as a stitch.
-Ties and pom-pom instructions for all hats are at the bottom of the post.
-When increasing, FPdc stitches are worked around the same stitch as the last dc was worked in. This will be the top of the FPdc from the previous round. When working regular, non-increase rounds you will only work a FPdc arpund FPdc stitches. Do not work a dc in the top of the FPdc as well or you will keep increasing.
–Try using a 3.25mm hook to make the 3-6 month hat size work for 0-3 month old babies.
-Are you stuck? Check out the extra instructions and pictures in the La Vie en Rose CAL.
-Stuck at the beginning? Here is a tutorial that explains how to work the first 2 rounds (never mind that I join in the wrong place at the end–follow what I say, not what I do). 😉
La Vie en Rose Earflap Hat Crochet Pattern Instructions (US Terms):
Click here to purchase an ad-free, print-optimized PDF of this pattern on LoveCrafts
OR
Pick up the printable version of this pattern on Etsy instead
Size 3-6 months (use 3.75mm (F) hook), or 6-9 months (use 4mm (G) hook):
Round 1: 12 dc in magic circle, join with sl st to first dc. (12)
Round 2: ch 1, FPdc around first dc, dc in next st *FPdc around same dc, dc in next st; repeat from * around, final dc is worked in the join, you should have one FPdc around each dc with one dc in between, join with sl st to first FPdc. (24)
Round 3: ch 1, FPdc around first FPdc from prev round, dc in next 2 sts, *FPdc around FPdc from prev round, dc in next 2 sts; repeat from * around, join with sl st to first FPdc. (36)
Round 4: ch 1, FPdc around first FPdc from prev round, dc in next 3 sts, *FPdc around FPdc from prev round, dc in next 3 sts; repeat from * around, join with sl st to first FPdc. (48)
Round 5: ch 1, FPdc around first FPdc from prev round, dc in next 4 sts, *FPdc around FPdc from prev round, dc in next 4 sts; repeat from * around, join with sl st to first FPdc. (60)
Round 6: ch 1, hdc in each st around, join with sl st to first hdc. (60)
Round 7: ch 1, working in the 3rd loop of hdc, hdc in each st around, join with sl st to first hdc. (60)
Round 8: *sk 2 sts, shell in next st, sk 2 sts, sl st in next st; repeat from * around, final sl st counts as join. (10 shells)
Round 9: sl st to center of shell from prev round, *sk 2 sts, shell in sl st from prev round, sk 2 sts, sl st to top of shell from prev round; repeat from * around, final sl st counts as join. (10 shells)
Round 10: sl st to center of shell from prev round, *sk 2 sts, shell in sl st, sk 2 sts, sl st in next st; repeat from * around, final sl st counts as join. (10 shells)
Round 11: sl st over to center of shell from prev round, ch 1, sc in same st, sc in next st, hdc in next 3 sts *sc in next 3 sts, hdc in next 3 sts; repeat from * around, sc in final st of round. (60)
Round 12: ch 1, hdc in each st around, join with sl st to first hdc. (60)
Round 13: ch 1, working in 3rd loop, sc in each st around, join with sl st to first sc. (60)
Rounds 14-15: ch 1, sc in same st as join, and each st around, join with sl st to first sc. (60)
From the end of round 15, move straight into making the first earflap:
First earflap:
Row 1: ch 1, sc in next 10 sts, ch 1, turn. (10)
Rows 2-3: sc in each st across, ch 1, turn. (10)
Row 4: sc2tog, sc in next 6 sts, sc2tog, ch 1, turn. (8)
Row 5: sc in each st across, ch 1, turn. (8)
Row 6: sc2tog, sc in next 4 sts, sc2tog, ch 1, turn. (6)
Row 7: sc2tog, hdc in next 2 sts, sc2tog. (4)
Fasten off, and weave in ends.
Second earflap:
Count over 20 stitches from other earflap, attach yarn,
Row 1: ch 1, sc in next 10 sts, ch 1, turn. (10)
Rows 2-3: sc in each st across, ch 1, turn. (10)
Row 4: sc2tog, sc in next 6 sts, sc2tog, ch 1, turn. (8)
Row 5: sc in each st across, ch 1, turn. (8)
Row 6: sc2tog, sc in next 4 sts, sc2tog, ch 1, turn. (6)
Row 7: sc2tog, hdc in next 2 sts, sc2tog. (4)
sc evenly around the edge of the earflaps, and hat.
Fasten off, and weave in ends.
Sizes 9-12 months (use 3.75mm F hook), and Toddler (use 4mm G hook):
Round 1: 12 dc in magic circle, join with sl st to first dc. (12)
Round 2: ch 1, FPdc around first dc, dc in next st *FPdc around same dc, dc in next st; repeat from * around, you should have one FPdc around each dc with one dc in between, join with sl st to first FPdc. (24)
Round 3: ch 1, FPdc around first FPdc from prev round, dc in next 2 sts, *FPdc around FPdc from prev round, dc in next 2 sts; repeat from * around, join with sl st to first FPdc. (36)
Round 4: ch 1, FPdc around first FPdc from prev round, dc in next 3 sts, *FPdc around FPdc from prev round, dc in next 3 sts; repeat from * around, join with sl st to first FPdc. (48)
Round 5: ch 1, FPdc around first FPdc from prev round, dc in next 4 sts, *FPdc around FPdc from prev round, dc in next 4 sts; repeat from * around, join with sl st to first FPdc. (60)
Round 6: ch 1, FPdc around first FPdc from prev round, dc in next 5 sts, FPdc around FPdc from prev round, dc in next 4 sts *FPdc around FPdc from prev round, dc in next 5 sts, FPdc around FPdc from prev round, dc in next 4 sts; repeat from * around, join with sl st to first FPdc. (66)
*Note: If you skip the first stitch after the FPdc, and work your stitches for round 7 starting in that second stitch, it helps to minimize any “holes” that are left from not increasing in the last round.
Round 7: ch 1, FPdc around first FPdc from prev round, dc in next 5 sts, FPdc around FPdc from previous round, dc in next 4 sts *FPdc around FPdc from prev round, dc in next 5 sts, FPdc around FPdc from previous round, dc in next 4 sts; repeat from * around, join with sl st to first FPdc. (66)
Round 8: ch 1, hdc in each st around, join with sl st to first hdc. (66)
Round 9: ch 1, working in the 3rd loop of hdc, hdc in each st around, join with sl st to first hdc. (66)
Round 10: *sk 2 sts, shell in next st, sk 2 sts, sl st in next st; repeat from * around, final sl st counts as join. (11 shells)
Round 11: sl st to center of shell from prev round, *sk 2 sts, shell in sl st from prev round, sk 2 sts, sl st to top of shell from prev round; repeat from * around, final sl st counts as join. (11 shells)
Round 12: sl st to center of shell from prev round, *sk 2 sts, shell in sl st from prev round, sk 2 sts, sl st to top of shell from prev round; repeat from * around, final sl st counts as join. (11 shells)
Round 13: sl st over to center of shell from prev round, ch 1, sc in same st, sc in next st, hdc in next 3 sts *sc in next 3 sts, hdc in next 3 sts; repeat from * around, sc in final st of round. (66)
Round 14: ch 1 hdc in each st around, join with sl st to first hdc. (66)
Round 15: ch 1, working in 3rd loop, sc in each st around, join with sl st to first sc. (66)
Rounds 16-17: ch 1, sc in same st as join, and each st around, join with sl st to first sc. (66)
From the end of round 17, move straight into making the first earflap
First earflap:
Row 1: ch 1, sc in next 10 sts, ch 1 turn. (10)
Rows 2-4: sc in each st across, ch 1 turn. (10)
Row 5: sc2tog, sc in next 6 sts, sc2tog, ch 1 turn. (8)
Row 6: sc in each st. across, ch 1 turn. (8)
Row 7: sc2tog, sc in next 4 sts, sc2tog, ch 1 turn. (6)
Row 8: sc in each st across, ch 1 turn. (6)
Row 9: sc2tog, hdc in next 2 sts, sc2tog. (4)
Fasten off, and weave in ends.
Second earflap:
Count over 22 sts from first earflap, attach yarn,
Row 1: ch 1, sc in next 10 sts, ch 1 turn. (10)
Rows 2-4: sc in each st across, ch 1 turn. (10)
Row 5: sc2tog, sc in next 6 sts, sc2tog, ch 1 turn. (8)
Row 6: sc in each st. across, ch 1 turn. (8)
Row 7: sc2tog, sc in next 4 sts, sc2tog, ch 1 turn. (6)
Row 8: sc in each st across, ch 1 turn. (6)
Row 9: sc2tog, hdc in next 2 sts, sc2tog. (4)
sc evenly around the edge of the earflaps, and hat.
Crochet a Child Size Ski Hat (use 4mm G hook):
Round 1: 12 dc in magic circle, join with sl st to first dc. (12)
Round 2: ch 1, FPdc around first dc, dc in next st *FPdc around same dc, dc in next st; repeat from * around, you should have one FPdc around each dc with one dc in between, join with sl st to first FPdc. (24)
Round 3: ch 1, FPdc around first FPdc from prev round, dc in next 2 sts, *FPdc around FPdc from prev round, dc in next 2 sts; repeat from * around, join with sl st to first FPdc. (36)
Round 4: ch 1, FPdc around first FPdc from prev round, dc in next 3 sts, *FPdc around FPdc from prev round, dc in next 3 sts; repeat from * around, join with sl st to first FPdc. (48)
Round 5: ch 1, FPdc around first FPdc from pre round, dc in next 4 sts, *FPdc around FPdc from prev round, dc in next 4 sts; repeat from * around, join with sl st to first FPdc. (60)
Rounds 6-8: ch 1, FPdc around first FPdc from pre round, dc in next 5 sts, *FPdc around FPdc from prev round, dc in next 5 sts; repeat from * around, join with sl st to first FPdc. (72)
Round 9: ch 1, hdc in each st around, join with sl st to first hdc. (72)
Round 10: ch 1, working in the 3rd loop of hdc, hdc in each st around, join with sl st to first hdc. (72)
Round 11: *sk 2 sts, shell in next st, sk 2 sts, sl st in next st; repeat from * around, final sl st counts as join. (12 shells)
Round 12: sl st to center of shell from prev round, *sk 2 sts, shell in sl st from prev round, sk 2 sts, sl st to top of shell from prev round; repeat from * around, final sl st counts as join. (12 shells)
Round 13: sl st to center of shell from prev round, *sk 2 sts, shell in sl st from prev round, sk 2 sts, sl st to top of shell from prev round; repeat from * around, final sl st counts as join. (12 shells)
Round 14: sl st to center of shell from prev round,*sk 2 sts, shell in sl st from prev round, sk 2 sts, sl st to top of shell from prev round; repeat from * around, final sl st counts as join. (12 shells)
Round 15: sl st over to center of shell from prev round, ch 1, sc in same st, sc in next st, hdc in next 3 sts *sc in next 3 sts, hdc in next 3 sts; repeat from * around, sc in final st of round. (72)
Round 16: ch 1, hdc in each st around, join with sl st to first hdc. (72)
Round 17: ch 1, working in 3rd loop, sc in each st around, join with sl st to first sc. (72)
Rounds 18-20: ch 1, sc in same st as join, and each st around, join with sl st to first sc. (72)
From the end of round 20, move straight into making the first earflap
First earflap:
Row 1: ch 1, sc in next 11 sts, ch 1, turn. (11)
Rows 2-4: sc in each st across, ch 1, turn. (11)
Row 5: sc2tog, sc in next 7 sts, sc2tog, ch 1, turn. (9)
Row 6: sc in each st across, ch 1, turn. (9)
Row 7: sc2tog, sc in next 5 sts, sc2tog ch 1, turn. (7)
Row 8: sc in each st across, ch 1, turn. (7)
Row 9: sc2tog, dc in next 3 sts, sc2tog, ch 1, turn. (5)
Fasten off, and weave in ends.
Second earflap:
Count 24 sts over from first earflap and attach yarn.
Row 1: ch 1, sc in next 11 sts, ch 1, turn. (11)
Rows 2-4: sc in each st across, ch 1, turn. (11)
Row 5: sc2tog, sc in next 7 sts, sc2tog, ch 1, turn. (9)
Row 6: sc in each st across, ch 1, turn. (9)
Row 7: sc2tog, sc in next 5 sts, sc2tog ch 1, turn. (7)
Row 8: sc in each st across, ch 1, turn. (7)
Row 9: sc2tog, dc in next 3 sts, sc2tog, ch 1, turn. (5)
sc evenly around the edge of the earflaps, and hat.
Fasten off, and weave in ends.
Crochet an Adult Size Ski Hat (use 4mm G hook):
Round 1: 12 dc in magic circle, join with sl st to first dc. (12)
Round 2: ch 1, FPdc around first dc, dc in next st *FPdc around same dc, dc in next st; repeat from * around, you should have one FPdc around each dc with one dc in between, join with sl st to first FPdc. (24)
Round 3: ch 1, FPdc around first FPdc from prev round, dc in next 2 sts, *FPdc around FPdc from prev round, dc in next 2 sts; repeat from * around, join with sl st to first FPdc. (36)
Round 4: ch 1, FPdc around first FPdc from pre round, dc in next 3 sts, *FPdc around FPdc from prev round, dc in next 3 sts; repeat from * around, join with sl st to first FPdc. (48)
Round 5: ch 1, FPdc around first FPdc from prev round, dc in next 4 sts, *FPdc around FPdc from prev round, dc in next 4 sts; repeat from * around, join with sl st to first FPdc. (60)
Round 6: ch 1, FPdc around first FPdc from pre round, dc in next 5 sts, *FPdc around FPdc from prev round, dc in next 5 sts; repeat from * around, join with sl st to first FPdc. (72)
*Note: If you skip the first stitch after the FPdc, and work your stitches for rounds 7, and 9, starting in that second stitch, while skipping the last stitch in round 8, it helps to minimize any “holes” that are left from not increasing in these rounds.
Rounds 7-9: ch 1, FPdc around first FPdc from prev round, dc in next 6 sts, FPdc around FPdc from prev round, dc in next 5 sts * FPdc around next FPdc from prev round, dc in next 6 sts, FPdc around FPdc from prev round, dc in next 5 sts; repeat from * around, join with sl st to first FPdc. (78)
Round 10: ch 1, hdc in each st around, join with sl st to first hdc. (78)
Round 11: ch 1, working in the 3rd loop of hdc, hdc in each st around, join with sl st to first hdc. (78)
Round 12: *sk 2 sts, shell in next st, sk 2 sts, sl st in next st; repeat from * around, final sl st counts as join. (13 shells)
Round 13: sl st to center of shell from prev round, *sk 2 sts, shell in sl st from prev round, sk 2 sts, sl st to top of shell from prev round; repeat from * around, final sl st counts as join. (13 shells)
Round 14: sl st to center of shell from prev round, *sk 2 sts, shell in sl st from prev round, sk 2 sts, sl st to top of shell from prev round; repeat from * around, final sl st counts as join. (13 shells)
Round 15: sl st to center of shell from prev round, *sk 2 sts, shell in sl st from prev round, sk 2 sts, sl st to top of shell from prev round; repeat from * around, final sl st counts as join. (13 shells)
Round 16: sl st over to center of shell from prev round, ch 1, sc in same st, sc in next st, hdc in next 3 sts *sc in next 3 sts, hdc in next 3 sts; repeat from * around, sc in final st of round. (78)
Round 17: ch 1, hdc in each st around, join with sl st to first hdc. (78)
Round 18: ch 1, working in 3rd loop, sc in each st around, join with sl st to first sc. (78)
Rounds 19-21: ch 1, sc in same st as join, and each st around, join with sl st to first sc. (78)
From the end of round 21, move straight into making the first earflap
First earflap:
Row 1: ch 1, sc in next 12 sts, ch 1, turn. (12)
Rows 2-4: sc in each st across, ch 1, turn. (12)
Row 5: sc2tog, sc in next 8 sts, sc2tog, ch 1, turn. (10)
Row 6: sc in each st across, ch 1, turn. (10)
Row 7: sc2tog, sc in next 6 sts, sc2tog, ch1, turn. (8)
Row 8: sc in each st across, turn. (8)
Row 9: sc2tog, sc in next 4 sts, sc2tog, ch 1, turn. (6)
Row 10: sc in each st across, ch 1, turn. (6)
Row 11: sc2tog, dc in next 2 sts, sc2tog. (4)
Fasten off, and weave in ends.
Second earflap:
Count 27 sts over from first earflap, and attach yarn.
Row 1: ch 1, sc in next 12 sts, ch 1, turn. (12)
Rows 2-4: sc in each st across, ch 1, turn. (12)
Row 5: sc2tog, sc in next 8 sts, sc2tog, ch 1, turn. (10)
Row 6: sc in each st across, ch 1, turn. (10)
Row 7: sc2tog, sc in next 6 sts, sc2tog, ch1, turn. (8)
Row 8: sc in each st across, turn. (8)
Row 9: sc2tog, sc in next 4 sts, sc2tog, ch 1, turn. (6)
Row 10: sc in each st across, ch 1, turn. (6)
Row 11: sc2tog, dc in next 2 sts, sc2tog. (4)
sc evenly around the edge of the earflaps, and hat.
Fasten off, and weave in ends.
Finishing for all hats:
Make a pom-pom, and then attach securely to the top of the hat. If you want to make a faux fur pom-pom try following this quick tutorial.
Note: My circle was 4” across for baby/toddler sizes, and 5″ across for child and adult sizes.
Ties/Braids:
Attach yarn to bottom of earflap, stitch a chain as long as you want the ties to be, and sc in 2nd chain from hook, and in each st across. Attach securely to bottom of earflap. The hat pictured has ties that are 50 chains long, and measure just a tiny bit over 12″ long,
or
JOIN ME ON SOCIAL MEDIA
I would love to see a picture when you’re done, so please feel free to come by my Facebook group and show off your project! Be sure to tag @kirstenhollowaydesigns when you share pictures of your finished hat on Instagram, and use #lavieenroseearflaphat!
You can also follow me on Facebook, Pinterest, Instagram, and Ravelry for more beautiful crochet patterns.
Pattern Terms and Conditions:
You are welcome to share the link to this pattern, using one image of your choice, on your site, but please do not share the written patterns themselves, or use additional images. You do not have permission to use my images by themselves to create pinnable graphics for Pinterest, however they may be included in a roundup pin if there are 4 or more other patterns. If you sell finished items online, please do not use my pictures for your listings. I’m positive that your work is of high enough quality for you to sell the finished piece. Have confidence in your abilities! <3 Thank you!
This pattern was made to be used by individuals, and small business crocheters alike. Selling your finished pieces in boutiques, at farmer’s markets, craft shows, and other local events is encouraged! The only thing I require is that this pattern not be used commercially to produce hundreds of thousands of copies.
If you enjoyed this pattern or found it useful, why not share a link to this post with your friends?


Thank you for sharing this wonderful pattern. I have made it for my 2 year old granddaughter and it looks perfect! Due to the yarn I used and my tension I used the child size pattern.
I love this pattern! I made this hat for my daughter before she was born and every time she outgrows it I make her a new one! She will be 2.5 this winter and I just finished her 5th hat.
I love this pattern!!! I have made so many of these hats which I give to our family resource center. they make up sooooooo fast! Have to say this is one of my favorite patterns. THANK YOU!
Hey, I’m in the process of making this in the toddler size, using correct hook and yarn type as far as I know. But it’s turned out way smaller than it should be and isn’t going to fit my daughter..? What could I be doing wrong?
Hi Caitlyn,
I’m sorry it’s turning out smaller than you expected. Usually when this happens and you’re using the recommended yarn (#4 worsted weight Red Heart Super Saver, Red Heart Comfort or Red Heart With Love are all fine), it’s a matter of gauge and you will need to go up a hook size or two. If you are using Caron Simply Soft, or almost any of Lion Brand’s #4 worsted weight yarns you will definitely need to go up in hook size, and possibly even make the next hat size up. If the hat is coming up too short you may be tugging on the yarn after you draw up your loops, making your stitches not as tall as they need to be. I hope this helps you out!
Thanks! Also, when doing the shell rounds, the “slip stitch to the centre of the previous she’ll” seems a long way to stretch a single slip stitch… Should the loop be quite loose?
You’ll be working multiple slip stitches in that section. I typically work 1 sl st in the top of each st until I arrive at the designated stitch. 😊
Okay thanks!
The child size hat has worked out the perfect size for my toddler, so either my yarn and hook are too thin or my stitches are too tight. Either way, this time it fits her!
Hi Kirsten
I love this pattern just one question if you were making a hat for a 12year and a teenager would you do a adult or a child hat
I’d probably crochet the adult size hats for both. 😊
Just made the 3-6 month size of this in about 1 and half hours. Love it! It’s so pretty and will definitely not be my last one ☺️ Thanks for a lovely hat pattern ❤️
You’re welcome! I’m so glad you enjoyed it, Emma! 😊
Hello! I love the pattern!
I am making the adult size. Finishing round 6 I have the 72 stitches, but not sure how round 7-9 go up to 78?
Round 7 and 9 I did like it said to do the FPDC and then the 1st DC in the second stitch and then for row 8 skip the last stitch. Still not sure where you picked up the extra 6 stitches? Please help!
Thank you
-Paige
In round 7 each time you have section that says to dc in next 6 sts you should end up with an increase because you will have a dc and a FP stitch worked in the same stitch. This will give you a final stitch count of 78 If you continue this pattern for rounds 8 and 9 then your stitch counts should remain at 78. 😊
I feel at a loss .
I’m working on the toddler size. The first row of shells. I have redone this row like 5 times and I don’t understand what I’m not doinf right. I’m getting more than 11 shells and I have counted I have the 66 stitches
Each shell should take up a total of 6 stitches: 66/11 = 6. Are you skipping 2 stitches between each shell before placing your slip stitch? I have a picture tutorial in a CAL I did for this hat a while back. Maybe it will provide more help too. 😊 https://kirstenhollowaydesigns.com/crochet-a-longs/la-vie-en-rose-cal
Love this pattern so far!
I’m making an adult sized hat and I can’t understand round 12? Been stuck on it for quite awhile so I thought commenting would help.
You will be making the shell stitch texture towards the middle of the hat body. Up near the top of the pattern there should be info for what a Shell is (5 dc in 1 stitch). Take the round 1 comma at a time and hopefully it will make more sense. 😊
Toddler rnd 3: It says fpdc around 1st fpdc, then dc in 2 sts. Fpdc around next fpdc but the next stitch is a dc. Do I skip that dc; & if so do not end up with 36 stitches.
Hi Cindy,
If the written instructions are confusing you, try taking a look at the pictures that show what most of the rounds look like near the bottom of the CAL post: https://kirstenhollowaydesigns.com/crochet-a-longs/la-vie-en-rose-cal/la-vie-en-rose-cal-part-1 I hope that helps! 🙂
Hey Kirsten,
I’m using this pattern for the first time and I’m making a 6-9 month old hat. I’m stuck on round 11, after doing 3 SC, 3 hdc, it does not go back to 60. It’s at 57. Not too sure what I’m doing wrong. I’m following every step
Hi Jenna,
Are you working in the slip stitches too? That might be where you are coming up short. I also have a Crochet-a-long style tutorial for this hat that might be helpful: https://kirstenhollowaydesigns.com/crochet-a-longs/la-vie-en-rose-cal
Yes I am, I’ll check it out. Would be helpful. Thank you so much!
You’re welcome!
Hi love this hat,and all my measurements are correct, but the hat is very small for 3 to 6 months
Hi Claire,
If you met gauge and your finished measurements are the same as what I have listed in the notes, then try going up to the next size. These hats should fit the average baby’s head in this age range, however there are some babies with very large heads that will always need the next size or two up. I had kids like that. 😅 I hope that helps!
Hello!
I finished making the hat and its super cute, but way too small for my toddler. Should I just try the adult size or try the kids one?
I do love the hat!! It was fun to make too
Hi Carolina,
The reason this can happen is because your tension is tighter than mine or you may be using a different yarn. These hats should be pretty roomy when finished so try going up a hook size or two (plenty of people have had to use a 6mm hook to meet my gauge) and see if you can meet gauge that way. If not then you can try making one of the larger sizes to compensate. 😊
Do you have a matching scarf pattern?
I sure do! It’s written sized for adults. Here it is: http://www.kirstenhollowaydesigns.com/2017/11/la-vie-en-rose-free-ladies-crochet-scarf-pattern.html 😊
Thank you! Just finished the hat so now for the scarf!
You’re welcome!
Hi there! I am confused about how to end row 12 in the child hat section. Am I ending the 12th shell stitch set on the center of the 1st shell set of that row? I have 72 stitches but if i do that, i will really only have 70 stitches I can stitch into
You’ll end it right where you began the first one in the round. 🙂 You stitch count should not go down if you do that.
Hello, I love this pattern! I made one for my 9 month old daughter and started making one for my sister in law. I followed the adult pattern, but it’s way too small. To size up what do you suggest doing?
Thank you so much for making this pattern public ♥️
Hi Alisha,
Did you use the recommended #4 worsted weight yarn, and did you meet gauge for the pattern? This should fit adults with 21″-23″ head circumference just fine. If your head is larger then definitely try going up a hook size or two. I hope that helps! 😊
Thank you for your reply! I did use #4 yarn, but didn’t check the gauge. Beginners mistake! I will try again and if it doesn’t meet the gauge I’ll go up a size in the hook, would 4.25 work?
Thank you again!
You’re welcome! You can try that or a 4.5mm if the 4.25mm is still too small. 😊
I made this! How do I share a photo with you? I think it turned out lovely
Hi Erin,
I believe there is a link to my Facebook group at the bottom of the post. You are welcome to share pictures there. 🙂 https://www.facebook.com/groups/KirstenHollowayDesigns/
Hi there!
I’m going to be trying out this pattern soon but I wasn’t sure about the yarn, the one my sister picked out is a 5 bulky, so would that make the size turn out bigger? Or do I just adjust the needle size until the gauge turns out right? Thanks so much for this pattern I can’t wait to get started!
Your hat will turn out much larger if you use a #5 yarn. You might try following one of the baby sizes and go up to a 5.5mm hook and see if it fits a toddler or young child. I have not done this so you would probably need to play with it a bit. Meeting gauge will probably not work since the stitches should be much larger than with a worsted weight yarn.
I am making the child size and on the first row of shells I am getting more than 12 shells, almost double the count . I have the correct stitches in the previous row and I am following the instructions correctly. I dont know how to fix it.
Hi Tracey,
Each shell should take up 6 stitches. If you have 72 stitches in the previous round you should only get 12 shells (72/6=12). I hope that helps! If you still are stuck feel free to join my Facebook group and ask questions there. https://www.facebook.com/groups/KirstenHollowayDesigns/
😊
I want to print pages 11 to 20 and can’t . What am I doing wrong?
The patterns on this site on not optimized for print. You can purchase an ad-free, PDF that is specifically designed for printing from Ravelry for a small fee: https://www.ravelry.com/patterns/library/la-vie-en-rose-earflap-hat
I’d love to make this, I’m just checking to see if there is video tutorial for this hat, I’m still learning to crochet and not quite understand with the writings
Hi Susie,
I don’t have a video, but you may find my post on learning to read written crochet patterns useful: https://kirstenhollowaydesigns.com/2018/04/how-to-read-crochet-patterns-terms-for-beginners.html
You can also join my Facebook group and ask questions there if you get stuck: https://www.facebook.com/groups/KirstenHollowayDesigns/
I hope that helps! Learning to read written patterns opens up a whole new and exciting world of crochet! 😁
Well this has got me beat. Can’t fully understand 3rd loop! Know how to do it but it seems odd at the join. Also there seems to be rows missing as the hat is tiny – is this chunky or Aran?. I used double knitting and a size 4 hook. Don’t like to be beat but can’t understand the number of rows?
Hi Mary,
DK is too small a yarn. The pattern calls for a #4 worsted weight which is closer to aran weight. You may also try going up a hook size if your hat is coming out too small. To avoid problems with the 3rd loop, try placing a stitch marker in the first stitch of the round and see if that helps things turn out better. 🙂
Love this hat style. I have made two for some little girls in my life. Very easy and cute.
I’m so glad to hear that, Danielle! ????
Hi. This is such a nice hat. Made 2 if them but they turned out much smaller then I thought. Not sure why. Changed the size of needle I was using and did not help. Any suggestions?
If you’re having issues getting the gauge correct, keep going up in hook sizes until you can match it. You may need to go up 2 or 3 hook sizes if you have tight tension.
Thank you so much for the pattern, it will look darling on my Granddaughter!!!!!!!
I’m sure it will, Pat! You’re welcome. 🙂
This is undoubtedly the most precious little hat I’ve ever made and I’ve been crocheting over 50 years! You are so talented and such a sweetheart for sharing these gorgeous patterns for free. There is only one thing that would make it better – a pair of booties!! Sorry! I shouldn’t be greedy!! Thank you so much!!
I’m so glad you like the hat, Patsy! 🙂
This is such a beautiful pattern!! Thank you so much for sharing this!
You’re very welcome, Jami!
Hi thanks for Sharing this little cute earflap hat , I just made one in two colors ????????????❤️
Awesome! You’re welcome!
I love this pattern. I wanted to make it a little more slouchy, so the top drapes back a bit. Do you have any suggestions as to where I could extend the pattern rows to lengthen the size of the hat without too much difficulty? It’s for a teen who loves slouchy hats! Thanks in advance for any help you can offer me!
Hi Mary-Anne, you could try adding a few extra rounds to the hat right after you finish increasing, before moving on to the hdc ridge. Keep the pattern going with the post stitches around post stitches as before, just don’t increase. 🙂
Are you going to post any videos with instructions on YouTube? I found your page, but no videos! Just wondered…I learn so much better watching than I do reading! I love you blog and patterns!
I don’t have detailed videos at this point, however I did a crochet-a-long for this hat pattern and shared some additional pictures of the steps: https://kirstenhollowaydesigns.com/crochet-a-longs/la-vie-en-rose-cal
You can find some great video tutorials on how to read patterns on YouTube, or I have a written one here: https://kirstenhollowaydesigns.com/2018/04/how-to-read-crochet-patterns-terms-for-beginners.html
🙂
I don’t know what I am doing wrong but my finished products keep coming out really small. The adult barely fit my head. I also tried the toddler size and I could not get it to stretch into my 13 mo old sons head. I used the 4mm hook and my hat looks good just too small to fit.
Your gauge is tighter than mine, so you’ll just need to go up a hook size or two. 🙂
I can’t seem to find the DC of the previous row when doing row 4 and 5 of the toddler size ? I get where to put the FPDC just when doing the increases where I put that extra stitch?
The dc you’re looking for should be the stitch immediately following the FPdc. Sometimes FP stitches cover up the first stitch after them. Your final dc of that section will be in the same stitch (FPdc from prev round) you make your next FPdc around. This is how the hat increases. 🙂
I’m so glad I found this pattern, it’s exactly what I needed! Thank you for sharing it!!
I used to do some knitting, but I have dyspraxia and autistic burnout so I got really tired of handling two or more needles. I just taught myself crochet last month and this is my very first crochet hat!!
I’m making it for a charity in my hometown that does crisis intervention for kids affected by abuse, neglect and/or poverty. We’re holiday shopping for a 6 year old girl who is at risk of being removed from her home by CPS and needs winter clothing. That’s why I’m so glad I found this pattern– it’s SO cute and tasteful and it’s just my skill level for my first hat. I’m excited to be able to include something handmade!
I’ve just started on the shells and it’s been a lot of fun to work on so far!! I hope it’s the right size. I came in a little bit under gauge on round 2 but now it seems like it might almost be big enough to fit me. Who knows. I should have time to make a second hat if need be 🙂
thanks again!!
I’m so glad you’re enjoying this project, Caitlin! If you go to the Ravelry listing you should see the hat modeled by a variety of people, many of which say their hat came out the right size. Keep playing with it if needed. I’m sure the hat will be very appreciated by the little girl and those taking care of her. https://www.ravelry.com/patterns/library/la-vie-en-rose-earflap-hat/people
Love this hat pattern and I plan to make for my great niece for Christmas. I did the first two rows correctly but for some reason I am having a problem understanding row 3. Could you lengthen your video to include row 3?
Back to the hat. Might have to put it away for the night and start again with fresh eyes.
Hi Sarah, I only have that little clip, but round 3 is very similar to round 2 in that you’ll work post stitches around post stitches. The other stitches will be worked in the top of the regular dc, and in the top of the next post stitch (so you’ll have a post stitch with a post stitch worked around it and a dc in the top). This increases the circle so it lays flat. 🙂 I hope that explanation helps!
First, thank you for sharing this pattern!
Second, for size months 9-12 in instruction Row 6-8 total 72 stitches. In row 6 I get to 72 stithes, but if I do row 7 and 8 with the same instructions it will grow beyond 72. What am I not getting?
Hi Eleisa!
Keep the same stitch count through rounds 7 and 8 that you did in round 6. You don’t want to increase any more. 🙂
Got it! Thanks for your speedy reply. On row 10 and can’t wait to see the finished hat!!
Wonderful! You’re welcome!
Love your pattern! I’ve made 3 so far for gifts.
Thank you, Bonnie! That’s awesome to hear!
Absolutely beautiful hat and scarf. I appreciate your creating and sharing the patterns for the hat and for the scarf. You are very talented.
You’re welcome, Nora!
Hi! Love the hat. I’m trying to make the adult version and I’m at round 7. I’m understanding by the 9th round I should have 78 stitches. However, getting there is confusing. My brain is weird. It looks like the increases in each round 7-9 the way it’s written is going to be more than 78 stitches at the end of round 9. Am I supposed to be increasing 2 stitches per round?
You should not be increasing beyond 78 stitches. You’ll have either 4 or 5 stitches between post stitches. If you do 4 stitches, and see there is one more stitch left, just skip to the next post stitch. Same for the 5 stitch sections. As long as you count you should be good. 🙂
I love the pattern! It’s very detailed and love that you provide different sizes.
Thank you. Gloria! It’s my pleasure!
How did you make the strings on the hat?
The instructions for the ties are near the bottom of the post. 🙂 There are a couple of options included.
Would this work for boys if you did boy colors. Or do you think the pattern if too feminine for boys ages 3 and 5
Hi Connie, you could probably get away with making it for a boy. I’ve seen plenty of other people do that. 🙂 Have fun!
I am confused by round 15 of the adult size hat. It seems to be just another round of shells, but the way it is written, you can’t possibly get 13 shells.
Also, as an FYI for others, I am making it in Red Heart Super Saver and had to go up two hook sizes (to an I or 5.5mm hook) and crochet loosely to get it even close to an adult size hat.
So far, I am really enjoying this pattern and have learned a lot about crocheting from it. Thanks!
Hi Holly! The stitch count for the adult hat should be 78 by the time you get to the shells. Each shell should take up 6 stitches, so 78 divided by 6 should give you 13 shells. I hope that helps things make a little more sense!
If you crochet tightly you will need to adjust your hook size. I’m glad you found what worked for you! 🙂 Good luck on the rest of the project!
I did get 78 stitches and I did start working the rounds of shells, but the pattern got confusing when I reached Round 15 for an adult sized hat. It reads (copied and pasted from above):
“Round 15: sl st to center of shell from previous round, skip 2 stitches, 5 dc in sl st from previous round, skip 2 stitches sl st to top of shell from previous round *skip 2 stitches, dc in sl st from previous round, skip 2 stitches sl st to top of shell from previous round* Join with sl st to first dc (13 shells)”
The way it reads, only one shell (5 dc) is made and the rest of the round consists of skipping stitches, slip stitches and a just one dc in the sl st. Nowhere between the *’s does it say anything about making 5 dc shells.
Thanks for your further clarification!
Ahh ok, I see the 5 was accidently left out. It’s been fixed! 🙂
I would like to make this with bulky yarn. Is there any change to the pattern if you increase the size of the yarn and the gauge of the hook?
Hi Andrea, it all depends on what size you are wanting to make. For instance, if you follow the instructions for the toddler hat and use a 5.5 or 6mm hook, you may get an adult sized hat. I’ve not played with it though, so I am uncertain on exact specifications. Feel free to experiment!
Thank you for this beautiful design!
I was so excited, I finished it in only 3 hours :D!
Worked out perfectly!
Can’t wait to make more!!
You’re welcome, Valerie! I’m glad it came together quickly for you!
Thank you so much for this free pattern !!
I have made the hat for my 1 year old daughter (it tooks only 2 hours) it is gorgeous !
You’re welcome, Diane! I’m glad you were pleased with the outcome! 🙂
Thank you so much for your pattern!
You’re welcome, Svea!
Hi I’m stock in number 10. You said in the 3 loop. I found the 3 loop but if I do on every 3 loop it doesn’t come 72 stiches. My comes like 96 stiches. I need help please.
Hi Olga, I’m not sure why your stitch count would be off by so much, but perhaps you will have better luck following the pattern over on the crochet-a-long page. There are lots of pictures to help explain the steps. 🙂 Scroll down to the bottom of the page for the links. https://kirstenhollowaydesigns.com/crochet-a-longs/la-vie-en-rose-cal
I don’t understand row 3 it says go then D.C. N then FP I’m confused
Hi Beni, you will do a front post double crochet around the first front post double crochet from the previous round, then dc in the next stitch, then that you will work a double crochet in the next stitch, after that the pattern should repeat so you are working a front post double crochet around the front post double crochet from the previous round, then a regular double crochet in the next 2 stitches. Check out this link for a picture tutorial of this pattern. You will need to scroll down the page a little ways to get to the pictures: https://kirstenhollowaydesigns.com/crochet-a-longs/la-vie-en-rose-cal/la-vie-en-rose-cal-part-1
I hope that helps! 🙂
Thank you so much for your pattern, I love making hats for my children and grandchildren. It’s fun to try different stitches! I know this one will be worn with love.
You’re welcome, Joyce! 🙂
Hi! I would love to do the shell stitch area in a different color from rest of hat…should I change yarn after the FPdc rows? Then back on the sc in 3rd row? Thanks!
Some people have changed it starting at the shells themselves, and others have done it right after the first round of hdc (that makes the rib around the outside of the hat). If you look at the Ravelry projects page, you should see several variations, and you can choose to do it the way that is most appealing to you. 🙂
https://www.ravelry.com/patterns/library/la-vie-en-rose-earflap-hat/people
Yes, after the rib was my thought! Thank you- such a great free pattern?
You’re very welcome! ?
Made this hat in size 6-9 months for my 5 month old granddaugher. Hat is adorable. The big problem was that it didn’t fit her. I know I crochet tightly so I am going to make the child’s size for her. I even used a larger hook, but I love the design.
Yes, if you crochet tightly you can either try going up a couple of hook sizes or make a larger pattern size. 🙂 Good luck!
Bonsoir
Ou peut ton trouvé
Les explications en Français
Merci
Hello Rebeh,
The instructions are only available in English, however this chart from Ooombawka Designs might help you with translating it. https://oombawkadesigncrochet.com/2014/05/basic-crochet-terms-translated.html
I absolutely love this hat any chance you could film it being made? Would love something visual to follow x
I have a CAL for this pattern that includes some additional pictures explaining how to make the hat: https://kirstenhollowaydesigns.com/crochet-a-longs/la-vie-en-rose-cal
Hopefully that will help you out a bit!
Thank you so much that will really help x
I tried making this in a soft superwash wool but it’s more thinner than worsted weight… the child size is working up quite small even using a 5mm hook size.. any tips to correct? Should I just go up another hook size? I don’t want it too big and I really love this soft wool!
If the wool is thinner you could try making the adult size hat, and it might come out child size. 🙂
I pulled it all out and started again using a hook size up and a bit looser tension. Turned out beautifully! Yay!
Wonderful! I’m glad you got it to work! 😀
Thank you SO much for this wonderful free pattern. It was very easy to follow and I love how it turned out. Mine was a little smaller than I expected, but I do tend to crochet tightly. I posted pictures if you’d like to see them:
https://lisascrochet.blogspot.com/2017/09/la-vie-en-rose-hat.html
You’re welcome, Lisa! Thank you for sharing your picture. it’s always fun to see others’ projects. Good luck on your next hat! My tension is very loose so a lot of people have had to go up a hook size or two for this hat. 🙂
I absolutely love this pattern! Am making it for my Mum at the moment. A delight to work with. Thank you!
You’re very welcome! I’m glad you’re having fun with it! 😀
Thus will be my hat pattern fir the season! Absolutely perfect for boy or girl. Thank you so much for sharing.
You’re welcome! I’m glad you’re enjoying it!
How do you do the majic circle?
Hi Joyce, it’s much like making a slip knot, but you will not pull it tight immediately so you can work stitches into it. Here is a video that I found helpful when first starting out: https://youtu.be/sLUaywX0-WE
Good luck!
Hi if you use a worsted weight 4 yarn do you still use a 3.75 hook??
Yes, that is correct. 😉
Love this pattern! Thanks so much for sharing. I made the 6-9 month size pattern for my daughter and it was very easy to follow. I can’t believe how quick it was to make. Will definitely be saving this pattern to make more beanies for presents for friends and family. Thank you!
Wonderful! I’m glad you enjoyed making it! 🙂
Thank you so much for sharing! The pattern was super easy to follow and I have made one in each size using different yarns and colours and they are beautiful. I love your patterns!!! Can hardly wait for cooler weather so I can wear mine.
You’re welcome! I’m so glad you’ve had fun making this pattern! 😀
Hi could you tell me if the pattern is in English or USA stitches. Thank you
It is written in American terms. 🙂
I love this hat but currently having some trouble with the shell stitches, it my first time doing them. I’ve finished the first round and then the pattern says to st into the centre of th previous she’ll but it doesn’t look right. I’m not sure what I’m doing wrong.. Help please?
This link from the crochet-a-long I did for this hat has some additional picture instructions that explain how the shells should work: https://kirstenhollowaydesigns.com/crochet-a-longs/la-vie-en-rose-cal/la-vie-en-rose-cal-part-2
I hope that helps!
Thanks that was just what I needed!
Fantastic! I’m glad it helped!
hello, bonjour
ou puis je trouver les explications en français ?
merci
I do not have a French translation of this pattern. It is only available in English at this time. I’m sorry.
Saw this adorable hat on facebook and I HAD to look up your other patterns. I CANNOT believe you make these treasures FREE. What a gift!! I love several of your patterns. They are special. I look forward to making them.
Thank you for the kind words! It is my pleasure to offer these patterns for free! It warms my heart knowing you are enjoying them. 🙂
Hi from Toy town (Winchendon,Ma) Wow,what a beautiful hat! Im just a beginner in making sc and dc afghans but id love to see a video on this hat.i seem to be able to learn alot this way but i have a neighbor that can help me with this hat. You are so gifted. BEST WISHES,THAKYOU,
Linda
Thank you for the sweet words, Linda! I’m glad you have a friend to help you with this pattern.
Putting videos together is something I’m working on, and I hope to get several completed over the summer (including this pattern). 🙂
Hey this is a beautiful creation of yours!! Thanks for sharing it with all of us!
I am a crochet beginner and I have a doubt, I don’t understand why we start each new row with ch1 instead of ch3.. I am having trouble inserting my hook for the first post stitches with only 1 chain, never done post stitched and having trouble with them. I started doing it with three chains on each round but now I don’t know if I am making the fpdc in the fpdc of the previous round… I am having trouble seeing the fpdc she have made in previous round.. any advice would help. Hat is sooo beautiful! Really want to make it for my baby
You’re welcome!
The reason I start with a ch 1 instead of a ch 3 is because the ch 1 makes the seam less visible. Typically, in other patterns, a ch 3 counts as a the first stitch of a round, whereas the ch 1 does not. I make my chains pretty loosely so if you don’t have enough room to work with, you can try chaining 2 instead to see if that is better. Your FPdc will be the first stitch of the round, not the chain 1 (or in your case, if you need to, the ch 2). If you work every FPdc around a FPdc, you should start to see lines coming out from the center.
If you are having trouble with post stitches, I’d recommend going to YouTube and doing a search for how to crochet post stitches. This is not a beginner level pattern, so looking up how to do the post stitches, shell stitches, and how to work in the 3rd loop of a hdc, will help this pattern make more sense, I think. 🙂
That helps a lot!! Thank you! I did start youtubing the stitches I don’t know and I am practicing all the stitches before I start the hat. Hat wasn’t coming out right and I undid it. Now I know what the post stitches are supposed to look like. Thank you again for sharing this beautiful creation with us!
You’re welcome! I’m glad it helped! 🙂
I finally finished!! Ended up Making an adult version for my friend.. going to be her birthday present ^_^ Have posted on ravelry ? Making another one for my baby ? Thankyou again for the pattern!
Awesome! I’m glad you’re having fun with the pattern! I’ll head over to Ravelry and look for your project. 🙂
Hi! Your round 7 and 13 is a “back post half double crochet (BPHDC).” Took a minute to figure that out by looking at the photo because I wasn’t sure what the words meant. Thanks for the beautiful pattern!
Working in the 3rd loop of a hdc gives a similar look as working a BPhdc, but it is a different stitch. I’m glad you’re enjoying the pattern!
Just completed this hat but it looks like from your pictures you have a final row after you add the ear flaps. Is it a sc in 3rd loop?
It’s just a simple sc around the edge of the entire hat, earflaps and all. Hope that helps!
I Love your pattern and would like to say a big thank you for sharing it. You really are very kind.
You’re very welcome! 🙂
Thank you for the pattern! I have just finished making the hat for my granddaughter. It will be her birthday present!
You’re welcome! I hope she has a happy birthday!
Just finished this and I Love It!! How do I share a picture with you of mine? 🙂
That's great! You can share it on Ravelry: http://www.ravelry.com/patterns/library/la-vie-en-rose-earflap-hat/people
I look forward to seeing it!
This pattern looks so much more complicated than it is, and I REALLY appreciate that! My only issue is that I've tried this 3x and it still comes out too small. I've gone up a hook size and relaxed my tension, but it's still really small. Is anyone else having this issue?
I've not heard of others having sizing issues with this so far, but if one hook size isn't working, you might try going up a second hook size. I crochet really loosely. Hope that helps!
Make sure your yarn is the right thickness. I had problems because here in the UK Double Knit was to fine and Aran to thick. I eventually found a thick DK and it has worked out great using a size 4mm hook.
This pattern was written in American terms, and uses worsted weight for sizing, so yes, if you live in other parts of the world you may need to experiment. I’m glad you found a yarn/hook combination that worked! 🙂
Thank you for the beautiful pattern!
You're welcome! 🙂
Thank you so much for this lovely pattern….however I am a little confused about the beginning of round 13. I slipped stitched to the middle of the shell but what join are you referring to when stated I have to place a sc?
You're welcome! The "join" reference shouldn't have been there. Just sl st up to the top of the shell, and ch 1, sc in that same stitch (at the top of the shell). I'm sorry about the confusion–the pattern has been fixed!
Thank you so very much…sorry for the late response…I'm making one for my little girl ☺
You're welcome! I'm sure she'll look cute in it!
thank you so much for such a gorgeous pattern just got the ties and pompom to do then first one is completed i am loving it
You're welcome! I'm glad you're having fun with it!
This is really beautiful. I've just made up two in baby blue for new twin boys in the family. It looks as though it'll be complicated, but even making the ties and pompoms it was less than two hours to make the 0-3 m version. Thank you for sharing this.
You're so welcome! Thank you for tagging me on Instagram so I could enjoy the cuteness too!
Thank you so much for sharing your pattern. I have been looking for something like this. It's perfect!
You're very welcome! Have fun making it!
Thank you, Kirsten! I've enjoyed getting lost for a little while in here. You are beautiful and wonderful and creative and AWESOME!
You're very welcome! I'm glad you've enjoyed your stay so much! It's a joy to design for others.:D
Thanks for your pattern I made a version without ear flaps for my daughter today and she loves it
That's great! You're welcome! 🙂
I'm a little confused on what to do with round 16 of the adult sized hat. Do you mind clarifying what the pattern says?
This is where you are evening out your rounds. The tops of the shell get sc's and the lower parts get hdc's. You will slip stitch over to the top of the shell from round 15 to start this repeating pattern. I hope that helps!
Can you make a pattern for size newborn or 0-3 months? Thanks!
I would like to add 0-3 months eventually. A hack that might work in the meantime is to use #3 light weight/DK yarn, and work the 3-6 month pattern in that with a 4mm hook. 🙂
This is a gorgeous hat just what I've been looking for to make as a Christmas gift for my 2 year old niece. Thank you Kirsten for this beautiful pattern. Happy Holidays!
You're welcome! Merry Christmas, and happy crocheting!
Thank you so much Kirsten!
You're welcome! I hope that helps. 🙂
Not sure if my last comment went through. But I'm stuck on Rounds 6-8 on the Child Hat. If I follow the normal progression of the fpdc, dc in top of dc from previous round and dc in next 4 stitches on Round 6, then Round 7 will be 5 stitches and Round 8 will be 6 stitches. Do I miss/drop a stitch somewhere? Thank you x
I just got notification of your comment! You should be skipping a stitch at the beginning of those repeats, or at the end so that your stitch count is the same on all rounds. Basically you did a 12 stitch increase from round 5 to round 6, but you want to stop there, so even if there is a stitch left in that section between FPDC's, just skip it, that way your stitch count stays at 72.
Hi! Starting this pattern now. One question – shouldn't you start row 2 with a dc/chain 2 in first dc of round 1? Otherwise you come up with just 23 dc/fpdc at the end?
Round 2 is supposed to start with a fpdc around the first dc from the previous round, and should end with a dc in the join. In round 2, with 12 dc in the beginning round, you should have 1 fpdc around each stitch (from round 1) immediately followed by a dc in the top of the next stitch. I hope that helps!
This was stumping me, too. Knowing to dc in the join helps a lot! Thank you! Beautiful hat!! Thank you for sharing.
Hi I am making the child size hat but its not really looking right. The third row of shells – is it right that the shell goes in the top of the shell below?
The third round of shells should be worked between the shells from round 2. When begin round 3, you'll want to slip stitch over into the top of the shell from round 2, and then work 5 dc into the sl st between the shells. Hope that helps!
Beautiful pattern, I'm making it with bernat satin sparkle in coral color. I'm currently stuck on row 15 toddler size. Sc in third loop around . Not sure what to do there, could you clarify what I need to do? Thanks
Suzan
Moogly has a wonderful video that explains it very well. I'll post the link here, and up in the main pattern since several people have been having a hard time figuring that out out. 🙂
https://www.youtube.com/watch?v=d2nyqJZBfvA&feature=youtu.be
When we do the dc in the third loop, do we stitch into the back loop like in the video above? Or in the front loop?
You'll stitch in the back 3rd loop. 🙂
A beautiful hat!! Thank you so much for sharing the pattern!!
You're very welcome! 🙂
This is a gorgeous hat!! Thank you for your wonderful post!
I am sooo pinning this right now!
You're welcome! Thank you for the pin!
I am making it with 3 colors. Hope it works well for year old granddaughter.
I'm sure it will be lovely! 🙂
thank you, this is something that I've never tried.
You're welcome! Good luck with your project!
Thanks so much for the pattern. I have no model so could you tell me what the measurements should be when finished? My hat looks like it may be too big.
In the "additional notes" section I have included size when finished. Approximately 7" wide and 5 1/2 tall (not including earflaps). 🙂 If it's not coming up the right size, try going down a hook size. Using a thicker worsted weight yarn, such as Red Heart With Love, will give you a larger hat too.
Thanks, i didn't see that. Yes mine came out 8" wide by 6" tall. Used a size G hook and RH super saver medium #4 WW yarn. Going to try with smaller F hook and see if that changes. Thanks
You're welcome! 🙂 I'll work up another one in this size soon to check my measurements again. My tension is usually pretty loose, and I generally have to write my patterns to use a hook half a mm smaller than most. This was using an older Red Heart yarn that may have stretched out, and gotten thinner. Thank you for letting me know what your measurements were!
Thank You so much for the posted pattern
You're welcome! 🙂
Thank you much.I really love this and will start making them for my grandkids,or at least try
You're welcome! Good luck with your projects!
Do you have any suggestions on how to make it bigger? We have big headed babies in our family. Lol
Try going up a hook size, and possibly using a thicker yarn, such as Red Heart With Love. 🙂 Good luck!
Thank you for sharing, I cannot wait to get into my stash tonight and whip one of these up just to see what I can create, I have oodles of scraps and just can't wait to play!
You're welcome! I'd love to see a picture of the finished hat if you decide to share it!
Thank you for sharing this beautiful pattern looking forward to trying it for my granddaughter
You're welcome! Happy stitching!
i wish you could do a video on it alot of people would love it thank you
Video is something I've been wanting to look into for a while. Let me do some research, and see what is required to get started. 🙂
I am also wishing for a video! I’ve never been able to understand the written pattern. I’m a visual learner!
Sincerely,
Leslie in Maine
There’s no video yet, but it is in the works! What parts are you having trouble understanding?
I am having a rough time understanding row 10 in the child version. If you are only doing a stitch in the 3rd stitch how do you wind up with the same number of stiches from previous row?
You’ll be working in the 3rd loop of the hdc, not every 3rd stitch. If you look at the back of a hdc stitch you should see a little bump. That is the 3rd loop. The first two loops being the sideways V at the top. I hope that helps!
Hi there, did you end up completing the video? Id love to try this this hat but it’s a bit complex for me and a visual always helps! Thank you. Beautiful work😊
Hi Jennie,
I have not been able to make a complete video yet, but I do have a CAL for this hat which featured a lot of images at the bottom of the page. You can find it here: https://kirstenhollowaydesigns.com/crochet-a-longs/la-vie-en-rose-cal
I hope that helps!
I also would love a video. I’m getting hung up on about the 2nd and 3rd row and my stitch count isn’t coming out right. I’m trying to make the child size hat.
I made a quick video to explain round 2 for the recent CAL I did for this hat. You can find it on my Facebook page: http://www.facebook.com/kirstenhollowaydesigns
It should be there under videos. If not, just scroll down the page a little ways. I hope it helps!
Awesome! I’ll check it out. Thanks so much for getting back to me so quickly! I appreciate it.
You’re welcome! I hope it helps!
thank you for sharing your work is beautiful
You're welcome! I hope you enjoy making this!
Thank you Dear for sharing such beautiful design!
You're most welcome!
What is a front post double crochet?
You will work a dc around the post of the stitch, instead of in the sideways v’s at the top as you normally do. There are many good YouTube videos that show how to work the stitch. 🙂
Thanks for the pattern. I will be making some hats for homeless children in my area. A local group of volunteers knit, crochet and sew hats, mittens, and scarves that are donated to people in need.
You’re welcome! Thank you for making cozy hats and accessories to help other children stay warm!
Hello Kirsten;
I’m about to start the hat,but am stumped by the term ” magic circle”. What is this?
tHANKS
DIANE
Hi Diane, a magic circle is an alternative method for starting projects in the round. The other method being working your first round of stitches into a chain.
Edit: I’ve recently put together a picture tutorial for this technique which you can find here: https://kirstenhollowaydesigns.com/2021/06/how-to-crochet-the-magic-ring-easy-picture-tutorial.html
I hope that helps!
I love this pattern but I am struggling a bit at the end of the shell stitch rows to know where to join.
Hi Lexi,
The sl st at the end of each round of shells counts as the join. Just continue on to the next round. 😊 A stitch marker that you can put in the first st of the round to keep your place may be helpful.