
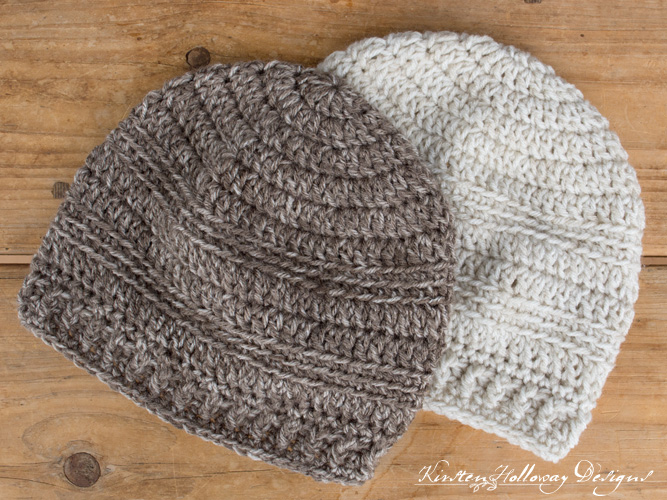
This easy crochet beanie pattern uses simple double crochet, and single crochet stitches to make the body of the hat and add subtle texture. The free instructions come in two sizes to fit either women, or men. Find the free crochet pattern instructions below, or purchase a print-optimized, ad-free PDF by clicking here.
Click here to dd this pattern to your Ravelry queue!

How to crochet a basic beanie hat
This simple beanie only requires knowledge of some basic stitches to complete, so it’s a great option for those who have worked a pattern or two, and want something a little more detailed than just a one or two stitch hat. You will need to know what the front and back loops of a stitch are, and know how to work around the stitch (instead of in the top, as usual). Both are easy techniques to master, and you’ll get plenty of practice on this pattern!
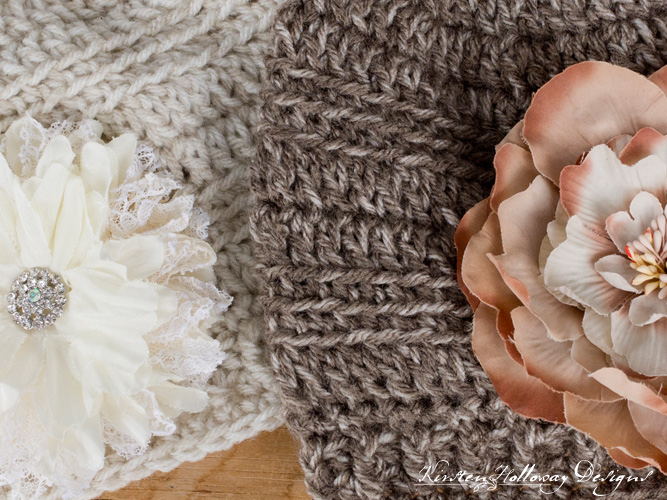
I used Vanna’s Choice yarn in Pearl Mist and Taupe Mist for this project, and love how the slight variation in tones brings this hat to the next level. It looks like both of these colors have been discontinued, but you may be able to find it online on Etsy or Ebay. Hobby Lobby now carries a color in their “I Love This Yarn” line that looks and feels very similar.
For those who would like to crochet a flower instead of buy, and attach an accessory, I’ve included instructions for a nice big flower near the bottom of this post. You can also leave the flower off altogether, for a unisex look. Large hat size instructions have been added lower in the post.
Disclaimer: This post contains affiliate links. When you purchase something using these links a small amount of the sales price goes to me to help keep this site, and the patterns on it free. You do not pay any extra for the item you purchase.
Difficulty:
Easy
Materials Needed:
5.5mm (I) hook, or hook needed to obtain gauge
1 skein (approximately 145 yds) Vanna’s Choice yarn in “Taupe Mist”, or “Pearl Mist”, or I Love This Yarn in “Walnut Stonewash”
Yarn needle
Scissors
(Optional) Large Flower accessory – Ivory Daisy Fabric Flower by Recollections, or a flower hair clip you already have. I picked the beige flower clip up at Claire’s a few years ago.
Sewing needle (for flower accessory)
Sewing thread (for flower accessory)
Stitches Used:
sc = single crochet
hdc = half double crochet
dc = double crochet
sl st = slip stitch
FPhdc = front post half double crochet, insert your hook from the front to the back, and work the stitch around the post of the stitch from previous round
BPhdc = back post half double crochet, insert your hook from the back to the front, and work the stitch around the post of the stitch from previous round
Additional Terms
BLO = Back Loop Only
st/sts = stitch/stitches
sp/sps = space/spaces
Gauge:
13 dc stitches to 4″
Measurements:
Finished Teens/Ladies hat should measure 8” high by 9 ½” wide. It should have a good amount of stretch. If you find your hat running small, go up a hook size or two.
Additional Notes:
-ch-1 at beginning of round does not count as a stitch
-To prevent the seam from running diagonally, after you finish the increases, start each round in the same stitch as join.
-Gauge is important, please make sure you can meet it before you begin. Go up a hook size or two if needed.
Easy Double Crochet Hat Pattern for Beginners (US Terms):
Click here to purchase an ad-free, print-optimized PDF of this pattern on LoveCrafts
Ladies Double Crochet Hat Pattern:
Round 1: 12 dc in magic ring, join with sl st to first dc. (12)
Round 2: ch 1, 2 dc in each st around, join with sl st to first dc. (24)
Round 3: ch 1, 2 dc in first st, dc in next st *2 dc in next st, dc in next st; repeat from * around, join with sl st to first dc. (36)
Round 4: ch 1, 2 dc in first st, dc in next 2 sts *2 dc in next st, dc in next 2 sts; repeat from * around, join with sl st to first dc. (48)
Round 5: ch 1, 2 dc in first st, dc in next 3 sts *2 dc in next st, dc in next 3 sts; repeat from * around, join with sl st to first dc. (60)
Round 6: ch 1, dc in each st around, join with sl st to first dc. (60)
Rounds 7-8: ch 1, working in BLO, sc in each st around, join with sl st to first sc. (60)
Round 9: ch 1, working in BLO, dc in each st around, join with sl st to first dc. (60)
Round 10: ch 1, dc in each st around, join with sl st to first dc. (60)
Rounds 11-12: ch 1, working in BLO, sc in each st around, join with sl st to first sc. (60)
Round 13: ch 1, working in BLO, dc in each st around, join with sl st to first dc. (60)
Round 14: ch 1, sc in each st around, join with sl st to first sc. (60)
Round 15-16: ch 1, FPhdc around first st, BPhdc around next st *FPhdc around next st, BPhdc around next st; repeat from * around, join with sl st to first FPhdc. (60)
Round 17: ch 1, sc in each st around, join with sl st to first sc. (60)
Cut yarn, and weave in ends. See bottom of page for crochet flower instructions.
Men’s Easy Double Crochet Hat Pattern (US Terms):
Note: This should fit most men. If you find the hat is too short, add another round of dc stitches before starting round 16.
Round 1: 12 dc in magic ring, join with sl st to first dc. (12)
Round 2: ch 1, 2 dc in each st around, join with sl st to first dc. (24)
Round 3: ch 1, 2 dc in first st, dc in next s *2 dc in next st, dc in next st; repeat from * around, join with sl st to first dc. (36)
Round 4: ch 1, 2 dc in the first st, dc in next 2 sts *2 dc in next st, dc in next 2 sts; repeat from * around, join with sl st to first dc. (48)
Round 5: ch 1, 2 dc in first st, dc in next 3 sts *2 dc in next st, dc in next 3 sts; repeat from * around, join with sl st to first dc. (60)
Round 6: ch 1, 2 dc in first st, dc in next 4 sts *2 dc in next st, dc in next 4 sts; repeat from * around, join with sl st to first dc. (72)
Round 7: ch 1, dc in each st around, join with sl st to first dc. (72)
Rounds 8-9: ch 1, working in BLO, sc in each st around, join with sl st to first sc. (72)
Round 10: ch 1, working in BLO, dc in each st around, join with sl st to first dc. (72)
Rounds 11-12: ch 1, dc in each st around, join with sl st to first dc. (72)
Rounds 13-14: ch 1, working in BLO, sc in each st around, join with sl st to first sc. (72)
Round 15: ch 1, working in BLO, dc in each st around, join with sl st to first dc. (72)
Round 16: ch 1, sc in each st around, join with sl st to first sc. (72)
Round 17: ch 1, FPhdc around first st, BPhdc around next st *FPhdc around next st, BPhdc around next st; repeat from * around, join with sl st to first FPhdc. (72)
Round 18: ch 1, FPhdc around first FPhdc from previous round, hdc in the next st *FPhdc around next FPhdc, hdc in the next st; repeat from * around, join with sl st to first FPhdc. (72)
Round 19: ch 1, sc in each st around, join with sl st to first sc. (72)
Cut yarn, and weave in ends.
With needle and thread, sew flower accessory to hat, or follow the instructions below to create a large crochet flower instead.
This flower is worked in layers to give it it’s textured and slightly more realistic look. You will turn it over and work some rounds at the back before turning it over to the front and continuing with the petals.
Easy Layered Crochet Flower Pattern (US Terms):
Note: You can use the same 5.5mm (I) hook as you used to crochet the hat or you can switch to a smaller 5mm (H) hook.
Round 1: 6 sc in magic circle, join with sl st to first sc. (6)
Round 2: ch 1, 2 sc in each st around, join with sl st to first sc. (12)
Round 3: (sc, hdc, dc, hdc, sc) in first st, sl st in the next, *(sc, hdc, dc, hdc, sc) in next st, sl st in next st; repeat from * around. (6 petals)
Turn your flower over and work this next step across the back side. Don’t forget to turn it back over so the front side is facing you after you end the round.
Round 4: sl st into back center of first petal from round 3, ch 3 *sl st into back center of next petal, ch 3; repeat from * around, join with sl st to first ch (6, ch-3 sps)
Round 5: with right side of flower facing, *working into ch-3 sp, (hdc, 5 dc, hdc, sl st); repeat from * around, join with sl st to first ch-3 sp. (6 petals)
Time to turn the flower over and work this next round at the back side again. Don’t forget to turn it back over so the front side is facing you after you end the round.
Round 6: sl st into back center of first petal from round 5, ch 4 *sl st into back center of next petal, ch 4; repeat from * around, join with sl st to first ch. (6, ch-4 sps)
Round 7: with right side of flower facing, *working into ch-4 sp, (hdc, 3 dc, 2 tc, 3 dc, hdc, sl st); repeat from * around, join with sl st to first ch-4 sp. (6 petals)
Cut yarn, leaving a 18″ tail for sewing flower securely to hat.
If you’d like, sew a button in the center for a more embellished look.
Want more gorgeous crochet patterns, and a little encouragement for your day? Sign up for my newsletter here! That way you’ll never miss out on special events, or freebies I’m offering.
JOIN ME ON SOCIAL MEDIA
I would love to see a picture when you’re done, so please feel free to come by my Facebook group and show off your project! Be sure to tag @kirstenhollowaydesigns when you share pictures of your finished hat on Instagram.
You can also follow me on Facebook, Pinterest, Instagram, and Ravelry for more beautiful crochet patterns.
PATTERN TERMS AND CONDITIONS:
You are welcome to share the link to this pattern, using one image of your choice, on your site, but please do not share the written patterns themselves, this includes my Ravelry downloads or translations of these patterns, or use additional images. You do not have permission to use my images by themselves to create pinnable graphics for Pinterest, however they may be included in a roundup pin if there are 4 or more other patterns. If you sell finished items online, please do not use my pictures for your listings. I’m positive that your work is of high enough quality for you to sell the finished piece. Have confidence in your abilities! <3 Thank you!
This pattern was made to be used by individuals, and small business crocheters alike. Selling your finished pieces in boutiques, at farmer’s markets, craft shows, and other local events is encouraged! The only thing I require is that this pattern not be used commercially to produce hundreds of thousands of copies.
If you enjoyed this pattern or found it useful, why not share a link to this post with your friends?


