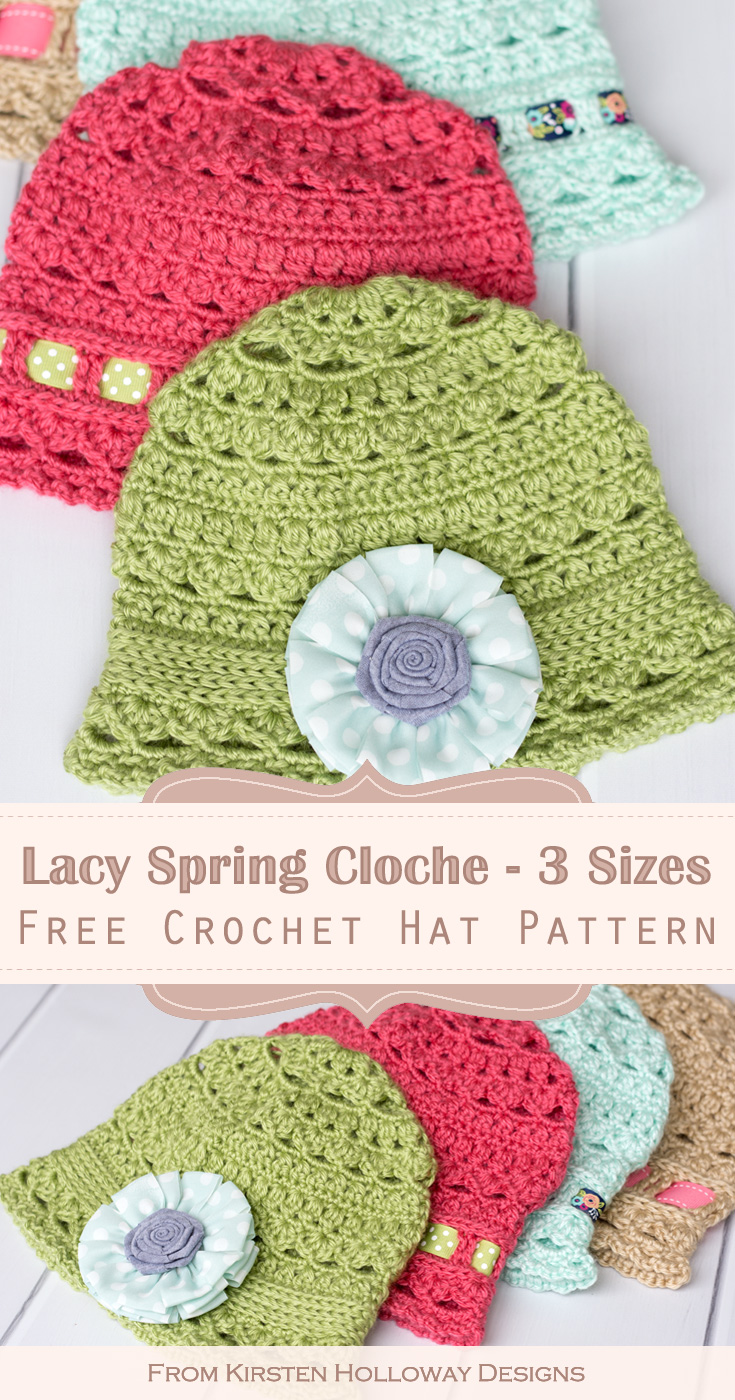
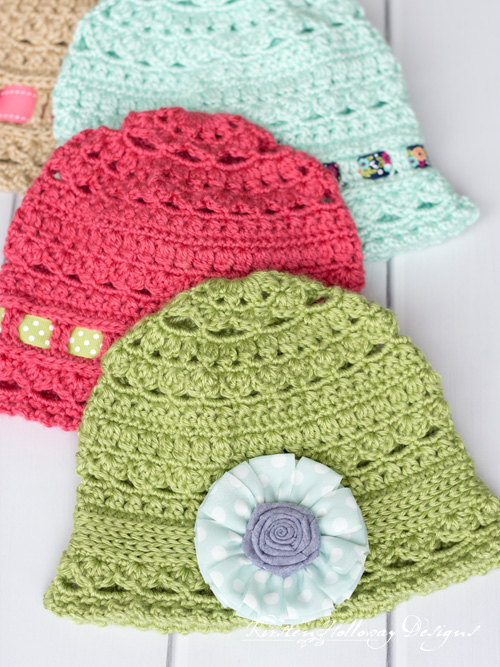
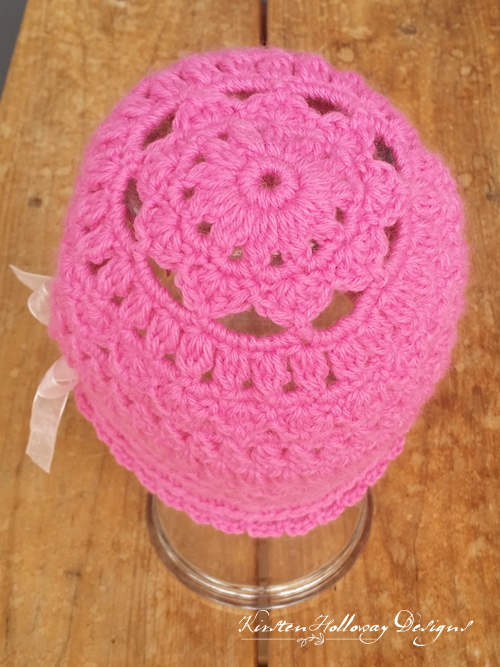
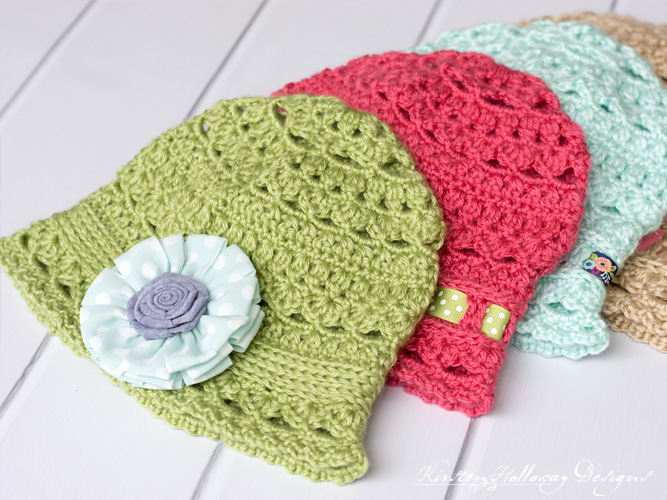
The Eden cloche uses a light and airy stitch pattern that makes this a perfect spring hat project! Because of its lacy design, it can be modified up or down in size to fit toddlers, women and children using different crochet hooks. The variety of vibrant colors in the Caron Simply Soft line help to bring out the cheerful, “boutique” look of this hat. Find the free crochet pattern instructions below, or purchase a print-optimized, ad-free PDF by clicking here.
Click here to add this pattern to your Ravelry queue!
This sweet crochet cloche hat pattern makes a perfect fashion accessory for walks in the park, digging in the garden, or picking a spring bouquet. It’s a beautiful combination of texture and lacy stitches–both warm and pretty.
I have always enjoyed the variety of colors Caron Simply Soft comes in, and right now when cheer is especially needed, this yarn does not disappoint! It is a lighter weight #4 worsted weight yarn so it is softer than most worsted weight yarns and has a beautiful sheen. If you want a slightly lighter weight yarn for your cloche hat with even more drape, the Bernat Baby Softee line is a good substitute–just watch your gauge.

Disclaimer: This post contains affiliate links. When you purchase something using these links a small amount of the sales price goes to me to help keep this site, and the patterns on it free. You do not pay any extra for the item you purchase.
Difficulty:
Easy
Materials Needed:
4mm (G) hook for toddler, or hook needed to obtain gauge
5mm (H) hook for child size, or hook needed to obtain gauge
6mm (J) hook for adult size, or hook needed to obtain gauge
150-200 yards of #4 worsted weight Caron Simply Soft in Pistachio, Soft Green, or Bone. You can also try # 3 light weight Bernat Baby Softee in Soft Red but you may need to go up a hook size or two to meet gauge.
scissors
yarn needle or ribbon needle
1 yard 5/8″ ribbon
Fray check or clear nail polish for ribbon ends
(Optional) Hair clip accessory. Use what you have on hand, or try these for something different!
Stitches Used:
ch = chain
sl st = slip stitch
sc = single crochet
hdc = half double crochet
dc = double crochet
tr = treble crochet (adult size only)
sc2tog = single crochet 2 together
Additional Terms:
3 dc cluster: dc3tog in the same stitch
Cross Stitch: sk st, dc in next st, cross back in front and dc in skipped stitch.
3rd loop of hdc: Look at the back of the hdc stitch, and find the loop. Work all stitches for the round in that 3rd loop
st/sts = stitch/stitches
sp/spa = space/spaces
sk = skip
Gauge:
Toddler measures approximately 3″ across after round 5
Child measures approximately 3 1/2″ across after round 5
Adult measures approximately 4″ across after round 5
Measurements:
Toddler: 7″ tall by 8″ wide
Child: 8″ tall, by 9″ wide
Adult: 9” tall by 10” wide
Additional Notes:
-Regarding the child size: The smaller the child the more slouchy this hat may be on them. Just pull the ribbon tighter, scoot the hat back on your child’s head, and let the top part of the hat slouch down. There are so many cute ways to wear it!
-If you do not wish to thread a ribbon through the bottom I have included instructions further down in the pattern to make a solid band using hdc in the 3rd loop. Don’t forget you’ll still need to do the decreases, in the 3rd loop–just make sure they are hdc instead of sc.
Eden Cloche Hat Crochet Pattern (US terms):
Click here to purchase an ad-free, print-optimized PDF of this pattern on LoveCrafts
Adult size cloche hat pattern:
Using 6mm (J) hook,
Round 1: ch 4, join with sl st to first ch forming a circle.
Round 2: ch 1, 12 sc in circle, join with sl st to first sc. (12)
Round 3: ch 1, 3dc cluster in first st, ch 2 *3dc cluster in next st, ch 2; repeat from * around, join with sl st to top of first 3dc cluster. (12 3dc clusters, 12 ch-2 sps)
Round 4: ch 1, *3 sc in ch-2 sp; repeat from * around, join with sl st to first sc. (36 sc)
Round 5: *sk st, 4 dc in next st, sk st, sl st in next st; repeat from * around, final sl st counts as join. (9 shells)
Round 6: sl st in next 2 sts to top of first shell, ch 5, *sl st between second and third dc of 4 dc shell (center), ch 5; repeat from * around, join with sl st to top of first shell. (9 ch-5 sps)
Round 7: ch 1, *6 sc in ch-5 sp; repeat from * around, join with sl st to first sc. (54 sc)
Round 8: ch 1, 3dc cluster in first st, ch 2, sk st, *3dc cluster in next st, ch 2, sk st; repeat from * around, join with sl st to first 3dc cluster. (27 3dc clusters, 27 ch-2 sps)
Round 9: ch 1, *3 sc in ch-2 sp; repeat from * around, omitting 3rd sc in final ch-2 sp of round, join with sl st to first sc. (80 sc)
Round 10: *sk st, 4 dc in next st, sk st, sl st in next st; repeat from * around, final sl st counts as join. (20 shells)
Round 11: sl st in next 2 sts to top of first shell, ch 4, *sl st between second and third dc of 4 dc shell (center), ch 4; repeat from * around, join with sl st to top of first shell. (20 ch-4 sps)
Round 12: ch 1, *4 sc in ch-4 sp; repeat from * around, join with sl st to first sc. (80 sc)
Round 13: ch 1, *Cross Stitch across next 2 sts; repeat from * around, join with sl st to first dc. (80 dc)
Round 14: ch 1, sc in each st around, join with sl st to first sc. (80)
Round 15: ch 1, 3dc cluster in first st, ch 1, sk st, *3dc cluster in next st, ch 1, sk st; repeat from * around, join with sl st to first 3dc cluster. (40 3dc clusters, 40 ch-1 sps)
Round 16: ch 1, 2 sc in each ch-1 sp, join with sl st to first sc. (80 sc)
Rep rounds 10-13 one more time, then continue with rest of pattern. If you do not wish to thread a ribbon through the band you may make a solid band by substituting hdc in the 3rd loop for rounds 22 and 23:
Round 21: ch 1, hdc in each st around, join with sl st to first hdc. (80)
Round 22: ch 1, working in 3rd loop of hdc, ch 1, *sc2tog, sc in next 6 sts; repeat from * around, join with sl st to first sc2tog. (70)
Round 23: ch 2, tr in each st around, join with sl st to first tr. (70 tr)
Round 24: ch 1, hdc in each st around, join with sl st to first hdc. (70 hdc)
Round 25: ch 1, working in 3rd loop of hdc, 2 sc in first st, sc in next 6 sts, *2 sc in next st, sc in next 6 sts; repeat from * around, join with sl st to first sc. (80)
Round 26: *sk st, 4 dc in next st, sk st, sl st in next st; repeat from * around, final sl st counts as join. (20 shells)
Round 27: sl st in next 2 sts to top of first shell, ch 4, *sl st between second and third dc of 4 dc shell (center), ch 4; repeat from * around, join with sl st to top of first shell. (20 ch-4 sps)
Round 28: ch 1, *5 sc in ch-4 sp; repeat from * around, join with sl st to first sc. (100 sc)
Round 29: ch 2, sk st, sl st in the next *ch 2, sk st, sl st in next st; repeat from * around, final sl st counts as join. (50 ch-2 sps)
Round 30: working in ch-2 sp, (3 sc, sl st), *working in next ch-2 sp (3 sc, sl st); repeat from * around, final sl st counts as join. (50 shells)
Fasten off, and weave in ends.
Cut 1 yd of ribbon, weave through tr sts in round 23. Tie in a bow and trim ends to desired length.
Toddler and Child Size Cloche Hat Crochet Pattern (US Terms):
Using 5mm (H) hook (Child) or, 4mm (G) hook (Toddler),
Round 1: ch 4, join with sl st to first ch forming a circle.
Round 2: ch 1, 12 sc in circle, join with sl st to first sc. (12)
Round 3: ch 1, 3dc cluster in first st, ch 2 *3dc cluster in next st, ch 2; repeat from * around, join with sl st to top of first 3dc cluster. (12 3dc clusters, 12 ch-2 sps)
Round 4: ch 1, *3 sc in ch-2 sp; repeat from * around, join with sl st to first sc. (36 sc)
Round 5: *sk st, 4 dc in next st, sk st, sl st in next st; repeat from * around, final sl st counts as join. (9 shells)
Round 6: sl st in next 2 sts to top of first shell, ch 5, *sl st between second and third dc of 4 dc shell (center), ch 5; repeat from * around, join with sl st to top of first shell. (9 ch-5 sps)
Round 7: ch 1, *6 sc in ch-5 sp; repeat from * around, join with sl st to first sc. (54 sc)
Round 8: ch 1, 3dc cluster in first st, ch 2, sk st, *3dc cluster in next st, ch 2, sk st; repeat from * around, join with sl st to first 3dc cluster. (27 3dc clusters, 27 ch-2 sps)
Round 9: ch 1, *3 sc in ch-2 sp; repeat from * around, omitting 3rd sc in final ch-2 sp of round, join with sl st to first sc. (80 sc)
Round 10: *sk st, 4 dc in next st, sk st, sl st in next st; repeat from * around, final sl st counts as join. (20 shells)
Round 11: sl st in next 2 sts to top of first shell, ch 3, *sl st between second and third dc of 4 dc shell (center), ch 3; repeat from * around, join with sl st to top of first shell. (20 ch-3 sps)
Round 12: ch 1, *4 sc in ch-3 sp; repeat from * around, join with sl st to first sc. (80 sc)
Round 13: ch 1, *Cross st across next 2 sts; repeat from * around, join with sl st to first dc. (80 dc)
Round 14: ch 1, sc in each st around, join with sl st to first sc. (80 sc)
Round 15: ch 1, 3dc cluster in first st, ch 1, sk st, *3dc cluster in next st, ch 1, sk st; repeat from * around, join with sl st to first 3dc cluster. (40 3dc clusters, 40 ch-1 sps)
Round 16: ch 1, 2 sc in each ch-1 sp, join with sl st to first sc. (80 sc)
Rep rounds 10-13 one more time, then continue with rest of pattern. If you do not wish to thread a ribbon through the band you may make a solid band by substituting hdc in the 3rd loop for rounds 22 and 23:
Round 21: ch 1, hdc in each st around, join with sl st to first hdc. (80 hdc)
Round 22: ch 1, working in 3rd loop of hdc, ch 1, *sc2tog, sc in next 6 sts; repeat from * around, join with sl st to first sc2tog. (70)
Round 23: ch 1, dc in each st around, join with sl st to first dc. (70 dc)
Round 24: ch 1, hdc in each st around, join with sl st to first hdc. (70 hdc)
Round 25: ch 1, working in 3rd loop of hdc, 2 sc in first st, sc in next 6 sts, *2 sc in next st, sc in next 6 sts; repeat from * around, join with sl st to first sc. (80)
Round 26: *sk st, 4 dc in next st, sk st, sl st in next st; repeat from * around, final sl st counts as join. (20 shells)
Round 27: sl st in next 2 sts to top of first shell, ch 4, *sl st between second and third dc of 4 dc shell (center), ch 4; repeat from * around, join with sl st to top of first shell. (20 ch-4 sps)
Round 28: ch 1, *5 sc in ch-4 sp; repeat from * around, join with sl st to first sc. (100 sc)
Round 29: ch 2, sk st, sl st in the next *ch 2, sk st, sl st in next st; repeat from * around, final sl st counts as join. (50 ch-2 sps)
Round 30: working in ch-2 sp, (3 sc, sl st), *working in next ch-2 sp (3 sc, sl st); repeat from * around, final sl st counts as join. (50 shells)
Fasten off, and weave in ends.
Cut 1 yd of ribbon, weave through tr sts in round 23. Tie in a bow and trim ends to desired length. Note: Most children this age have a head circumference of 20″-22″. Coat the ends with fray check or clear nail polish to prevent fraying.
Want more gorgeous crochet patterns, and a little encouragement for your day? Sign up for my newsletter here!
JOIN ME ON SOCIAL MEDIA
I would love to see a picture when you’re done, so please feel free to come by my Facebook group and show off your project! Be sure to tag @kirstenhollowaydesigns when you share pictures of your finished hat on Instagram.
You can also follow me on Facebook, Pinterest, Instagram, and Ravelry for more beautiful crochet patterns.
PATTERN TERMS AND CONDITIONS:
You are welcome to share the link to this pattern, using one image of your choice, on your site, but please do not share the written patterns themselves, this includes my Ravelry downloads or translations of these patterns, or use additional images. You do not have permission to use my images by themselves to create pinnable graphics for Pinterest, however they may be included in a roundup pin if there are 4 or more other patterns. If you sell finished items online, please do not use my pictures for your listings. I’m positive that your work is of high enough quality for you to sell the finished piece. Have confidence in your abilities! <3 Thank you!
This pattern was made to be used by individuals, and small business crocheters alike. Selling your finished pieces in boutiques, at farmer’s markets, craft shows, and other local events is encouraged! The only thing I require is that this pattern not be used commercially to produce hundreds of thousands of copies.
If you enjoyed this pattern or found it useful, why not share a link to this post with your friends?