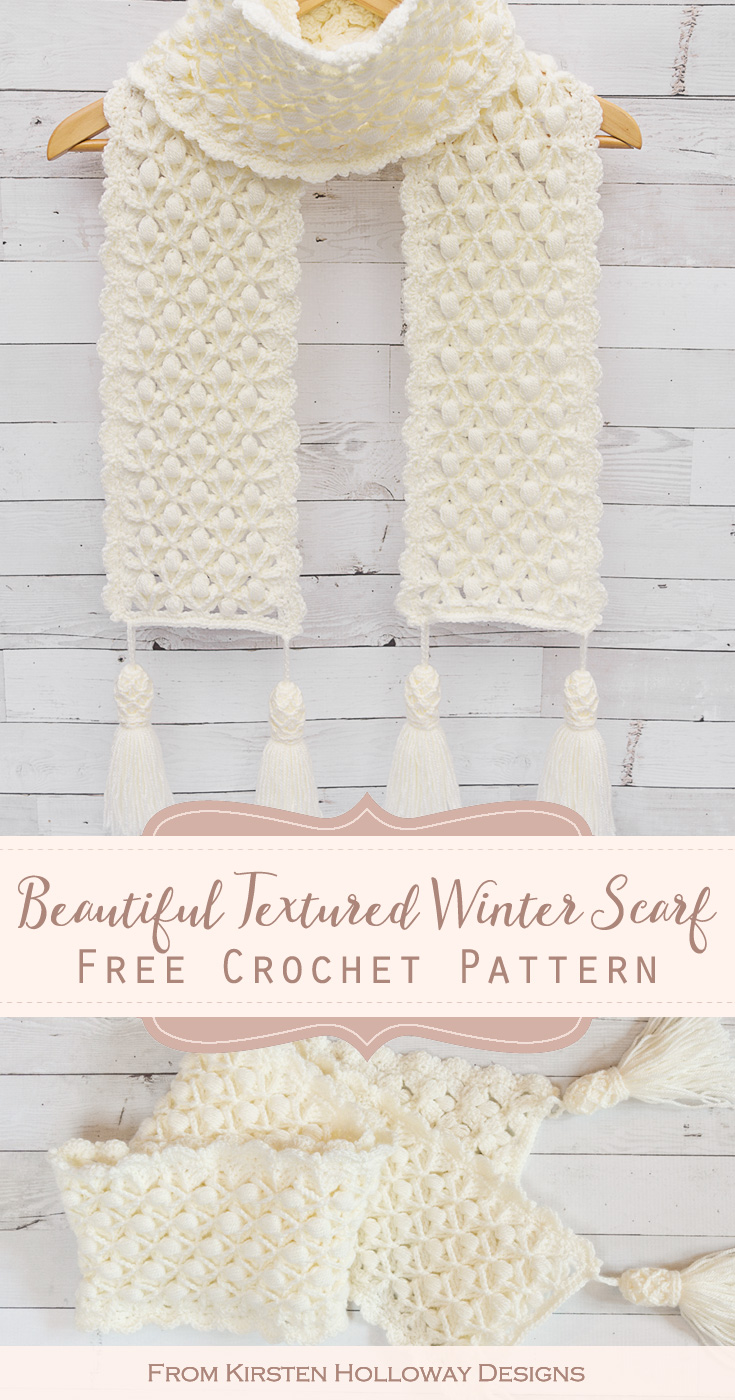
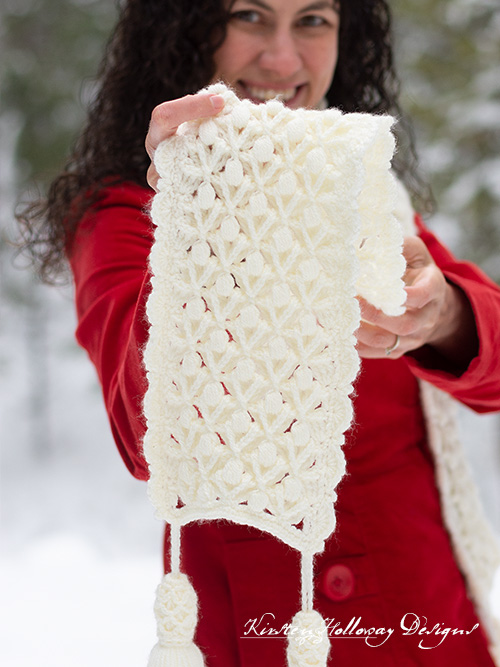
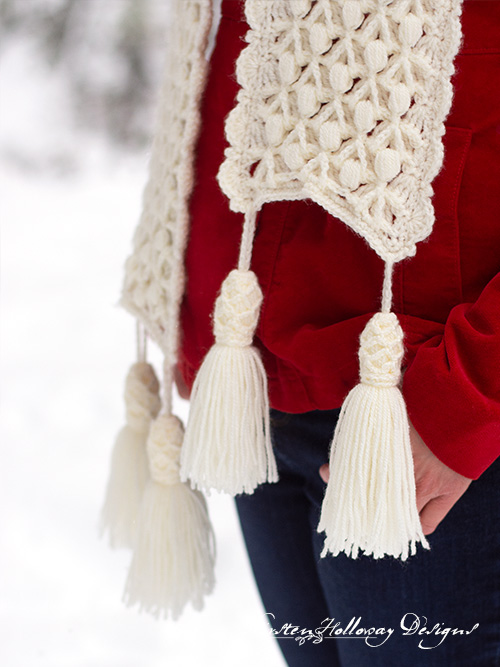
Texture reigns supreme in this exquisite crochet winter scarf pattern! Puff stitches add the majority of the bulk and texture with delicate chains adding geometric interest to the scarf. Delicate scallops, picots, and tassels finish out this designer piece–it was born for a night out on the town! Find the free crochet pattern instructions below, or purchase a print-optimized, ad-free PDF by clicking here.
Click here to add this to your Ravelry queue!
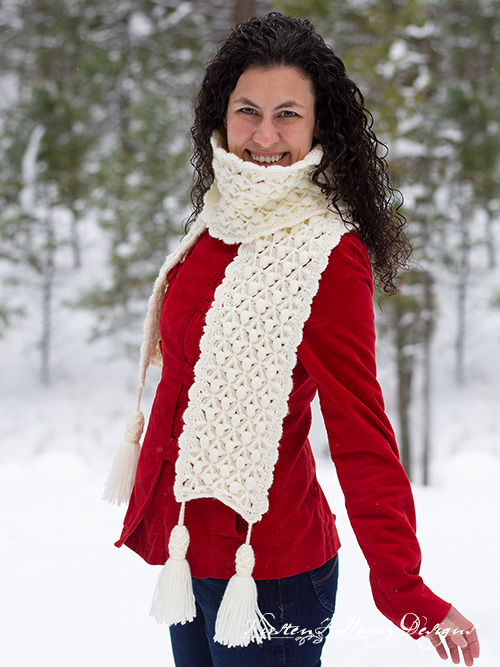
Whether you’re caroling, Christmas present shopping, or enjoying dinner with friends, this unique crochet scarf is sure to catch the eyes of all who see it! It’s also perfect for dancing in the snow if you are so inclined.
This year for the Holiday Stashdown 2018, Paintbox Yarns generously provided the designers who are participating in this event with yarn to create something cozy and memorable. Since light colors exude elegance, I chose their Simply DK in “Champagne White”. You may not think of using #3 light weight yarn when you think of crocheting winter scarves, but this crochet scarf pattern has a chunky texture and that will keep out the cold, leaving you warm and comfortable.
Disclaimer: This post contains affiliate links. When you purchase something using these links a small amount of the sales price goes to me to help keep this site, and the patterns on it free. You do not pay any extra for the item you purchase.
Difficulty:
Intermediate
Materials Needed:
3.25mm (D) hook
3 balls (900 yards) Paintbox Yarns Simply DK in Champagne White, or color of your choice. This is a #3 lightweight yarn. This pattern will not have good drape if worked in anything heavier. You will only be using 650-700 yards for this scarf.
Yarn needle
Scissors
Measuring stick
Stitches Used:
ch = chain
sc = single crochet
FPsc = front post single crochet
dc = double crochet
tr = treble crochet
Special stitches:
6 hdc puff: yo, pull up a loop 6 times in same st, yo, pull through 12 loops, yo, pull through final 2 loops
Fan: (3 tr, ch 2, 3 tr) in same stitch
Shell: 6 dc in same st
Measurements:
6 1/2” wide by 5’ long, excluding tassels
Gauge:
Gauge is not particularly important. Your rows should be as close to 5 1/2” wide as possible. Each pattern repeat adds about 2” of length to your scarf.
Additional Notes:
-Because this winter scarf pattern is so textured, keeping a tighter tension over all while crocheting this will help the design stay more flat which means it will catch on fewer things. It’s especially important when making the chains for the Vs, and the ch-6 at end of row 2/beginning of row 3 so they don’t get floppy.
-This winter scarf is a piece for special occasions, and not the scarf to wear if you will be hauling wood for the fire, romping with pets, or playing with little ones who want to drive their toy cars or plastic horses along your personage (as a mom of boys this was definitely a significant stage in my life!). No matter how nice and neat you make your stitches, they WILL get snagged by tiny toys/squishy baby fingers, and pet paws.
-This winter scarf was made shorter that most of my scarves on purpose to help keep then ends from dragging along surfaces and getting pulled or snagged. You may make this scarf another foot longer if you wish, but you may find it catching on things if you’re not careful.
-The body of the pattern is based on a stitch pattern by MyPicot
This video will help you figure out the stitch pattern for the main body of the scarf if you are stuck. It covers the first half of the repeat. The second half is very similar.
“Snowberries” Winter Scarf Pattern Instructions (US Terms):
Click here to purchase an ad-free, print-optimized PDF of this pattern on LoveCrafts
Ch 28,
Row 1: dc in 4th ch from hook, sk 3 sts, (3 tr, ch 2, 3 tr) in next st (fan created), sk 3 sts, *6 hdc puff in next, sk 3 sts, (3 tr, ch 2, 3 tr) in next st, sk 3 sts; repeat from * across. Work 2 dc in final ch, ch 1, turn. (3 fans, 2 puffs, 3 dc)
Row 2: sc in first dc, ch 1, *FPsc around each of next 3 tr sts, (you will now create a “V” behind your work) ch 5, bend work forward so you are looking at the back of the piece, sc in ch at bottom of fan (there should be a gap where those 6 tr sts were worked in the previous row), ch 5, FPsc around top of next 3 tr sts, ch 2; repeat from * across, end row by only chaining 1, sk dc st, sc in top of ch-3 from previous row, ch 6 (counts as first tr, + ch sp,).
Row 3: 3 tr in first sc, 6 hdc puff in ch-2 sp at center of fan from row 1, *(3 tr, ch 2, 3 tr) in ch-2 sp from previous row (above puff), 6 hdc puff in ch-2 sp at center of fan from row 1; repeat from * across ending with (3 tr, ch 1, tr) in final sc of row, ch 1, turn.
Row 4: sc in first tr, ch 1, *FPsc around each of next 3 tr sts, ch 2, FPsc around next 3 tr sts, ch 5, bend work forward so you are looking at the back of the piece, FPsc around top of puff from row 3 near bottom of fan, ch 5; repeat from * across. Ending with, FPsc around top of next 3 tr sts, ch 2, FPsc around next 3 tr, ch 1, sc in top of 5th ch from previous row, ch 3 (counts as first dc of next row), turn.
Row 5: dc in first sc, (3 tr, ch 2, 3 tr) in ch-2 sp from previous row (above puff), 6 hdc puff in ch-2 sp at center of fan from row 4, *(3 tr, ch 2, 3 tr) in ch-2 sp from previous row (above puff), 6 hdc puff in ch-2 sp at center of fan from row 4; repeat from * across, last repeat omits the puff and ends with 2 dc in final sc, ch 1, turn.
Row 6: sc in top of first dc, ch 1, *FPsc around next 3 tr sts, ch 5, bend work forward so you are looking at the back of the piece, FPsc around top of puff from row 3, ch 5, FPsc around top of next 3 tr sts, ch 2; repeat from * across, end row by only chaining 1, sk dc st, sc in top of ch-3 from previous row, ch 6 (counts as first tr, + ch sp).
Repeat rows 3-6 until your scarf measures 60″ long.
Scarf Edging:
Round 1: ch 1, turn, sc evenly across end putting a sc in each FPsc and 2 sc in each ch-2 sp. sc in both the beginning and ending sc sts as well, at corner work (sc, ch 1, sc).
Continue working sc evenly down long side of scarf. You should work these in multiples of 6+1, or 301 sc along each long side if you made your scarf about 60″ long. This works out roughly to 1 sc in each sc row, 2 sc in ch-3, 3 sc in ch-6 (this is why keeping your chain tension tight is important in the body of the scarf). At corner work (sc, ch 1, sc), continue working evenly along other end, at corner work (sc, ch 1, sc), and work evenly down other long side working the same number of stitches as you did on your first long side, join with sl st to first sc.
Round 2: ch 1, sc along end, turn and work this sequence down long side: ch 3, sl st in same st, *sk 2 sts, shell in next st, sk 2 sts, (sl st, ch 3, sl st) in next; repeat from * along side, sc across end, repeat from * down other long side, join with sl st to first sc. (If you used a stitch count of 301 in round 1, you should have 50 shells and 51 picots per side edge.)
Fasten off weave in ends.
How to make a pretty tassel:
Tassel cap (make 4):
Measures 2” tall x 1 1/4” wide
Note: All chains in this section should be worked with tight tension.
Ch 5, join with sl st to first ch
Round 1: ch 1, 10 sc in ch-5 sp, Join with sl st to first sc. (10)
Round 2: *ch 5, sk st, sl st in next st; repeat from * around. Final sl st counts as join (5 ch-5 sp)
Rounds 3-5: sl st up ch 2 sts, *ch 5, sl st in next ch-5 sp; repeat from * around, final sl st will be worked in 2nd sl st at beginning of round. (5 ch-5 sp)
Round 6: sl st up 2 ch sts, ch 1, 1 sc in ch-5 sp, *2 sc in next ch-5 sp* repeat * to * 3 times, sc in final ch-5 so where you placed your first sc of round, join with sl st to first sc. (10 sc)
Round 7: ch 1, sc in each sc stitch around, join with sl st to first sc. (10 sc)
Round 8: Loosely sl st around bottom of tassel between rounds 6 and 7.
Fasten off leaving 12” tail for sewing cap to tassel.
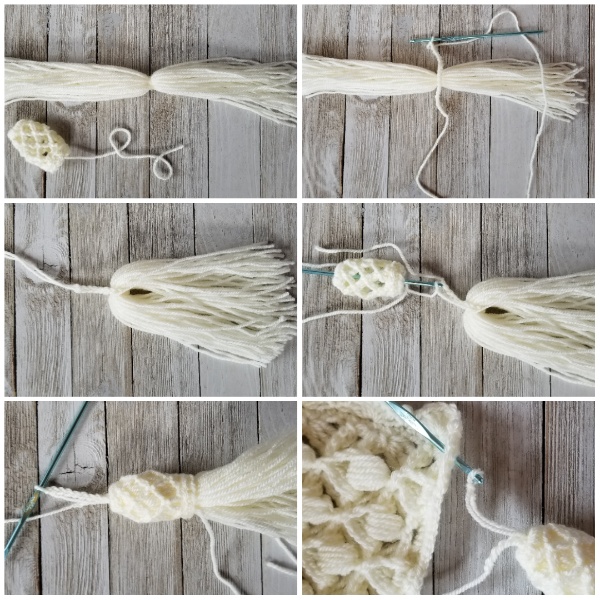
Big fluffy tassels (make 4–2 for each end):
Cut 50 12” lengths of yarn, tie another 12” length of yarn around the middle of the bundle.
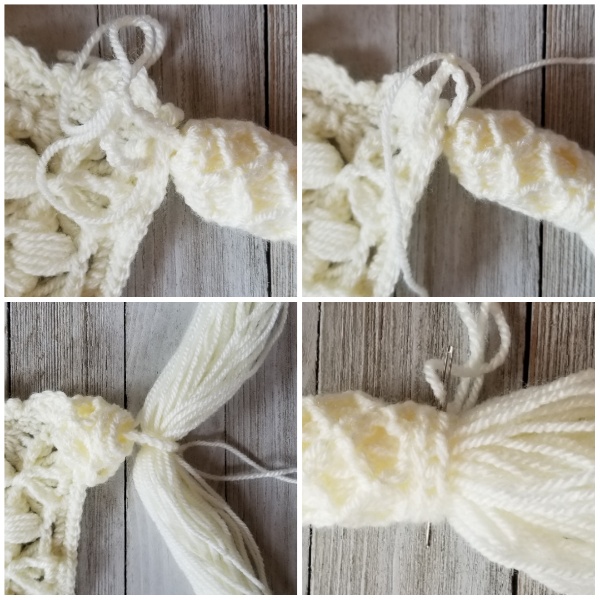
Ch 20, do not fasten off, place ch around same center tie just made and pull both ends through top of tassel cap (you may need to remove the hook from your working loop, insert hook down through top of cap, reinsert into working loop and start of chain and pull both ends through tassel cap), and then through end of scarf. Join ends of chain with sl st.
Cut yarn, and tie ends together securely.
Push cap up off tassel and move the knotted ends to the underside of the tassel.
Gently pull cap back down over tassel and then sew it in place with 12” tail from round 8.
Repeat for next 3 tassels.
Trim ends of tassels neatly
Here are some images that illustrate the steps above:
How to make big fluffy tassels – picture tutorial

Want more gorgeous crochet patterns, and a little encouragement for your day? Sign up for my newsletter here! That way you’ll never miss out on special events, or freebies I’m offering.
JOIN ME ON SOCIAL MEDIA
I would love to see a picture when you’re done, so please feel free to come by my Facebook group and show off your project! Be sure to tag @kirstenhollowaydesigns when you share pictures of your finished scarf on Instagram so I can see what you made too!
You can also follow me on Facebook, Pinterest, Instagram, and Ravelry for more beautiful crochet patterns.
PATTERN TERMS AND CONDITIONS:
You are welcome to share the link to this pattern, using one image of your choice, on your site, but please do not share the written patterns themselves, this includes my Ravelry downloads or translations of these patterns, or use additional images. You do not have permission to use my images by themselves to create pinnable graphics for Pinterest, however they may be included in a roundup pin if there are 4 or more other patterns. If you sell finished items online, please do not use my pictures for your listings. I’m positive that your work is of high enough quality for you to sell the finished piece. Have confidence in your abilities! <3 Thank you!
This pattern was made to be used by individuals, and small business crocheters alike. Selling your finished pieces in boutiques, at farmer’s markets, craft shows, and other local events is encouraged! The only thing I require is that this pattern not be used commercially to produce hundreds of thousands of copies.
If you enjoyed this pattern or found it useful, why not share a link to this post with your friends?


Hi ,the pattern is soooo super i loved it.but after trying 3times i got it .it’s very easy like what you said to read the pattern properly.
I’m so glad you love your new scarf! 🙂
Hi. Any chance there’s a hat pattern to match?
I’ve got a matching hood in the works that I hope to release next month. 😊
Do you happen to have a diagram of the first 6 rows or maybe do a video of the first 6 rows from the very start? I’ve now tried 3 separate times to do this pattern and I keep messing up somewhere to where my one side is off and curving in.
If you read the pattern notes I’ve included a link to where I got the stitch pattern from originally. You can download a graph from that page. 🙂
How can I print this pattern
You can purchase an ad-free, print optimized version of this on Ravelry. 🙂
Hi Kirsten,
Love the scarf design!
I have a question about row 2. Perhaps the difficulty stems from my not being a native English speaker. Should I do one single crochet per treble crochet (so six sc per fan) or make one single crochet going behind all the treble crochet stitches (so two sc per fan)?
Thanks you and kind regards,
Mila
Mila,
You will work a front post single crochet around all 6 treble stitches. It is broken up in the middle, after the first 3 stitches, by creating that “V” shape with the chains, then you’ll continue working the FPsc around second group of 3 stitches for a grand total of 6. 🙂
I hope that helps!
Hi Kirsten,
Yes, that’s really helpful, thanks you! I love your patterns, keep up the good work. 🙂
You”re welcome! I’m glad you’re enjoying the patterns!
I’d really like to make a wider version of this scarf. Can you please tell me what the multiple + would be for the starting chain? Can’t wait to make this!
Hi Wendy,
It is worked in multiples of 8+4. Good luck! 🙂
Thank you so much!
You’re welcome!
Hi Kirsten
I love this pattern and am trying to make it but the first two rows look really messy and untidy, is this something with the way that I am doing the starting chain?
Thanks Vicki
Hi Vicki,
The first couple of rows may look a little messy at first, but should straighten up after you do a couple more rows–they should not stay messy. You may want to practice this stitch pattern in a small swatch for a few rows before starting the scarf. I think it took me about 10-15 rows before I felt I had a decent handle on the pattern. Good luck!
This is stunning do you have it with uk stitch’s please
Hi Gill,
Thank you! I don’t have it in UK terms, but it should be fairly simple to convert.
sc = dc in UK terms
hdc = half treble in UK terms
dc = tr in UK terms
tr = dbl tr in UK terms
And the puff stitches should be explained in the special stitches section.
If that’s not enough help, do a Google search for a US to UK terms conversion chart. 🙂
How do you share?.
You can copy the link from the browser and paste it into the social media site or email you want to share to. 🙂
Is there any way I can get the video for the first 6 rows maybe…cos I did it but it seem not right especially at the V part. Im mastura from malaysia. I love this patern very much..
There should be a short video showing you how to work this stitch pattern just below the Additional Notes section. 🙂
I am near the end of the body part of this amazing scarf and realize I have my puff stitches with only 3 yarnovers instead of 6, so altho my puffs are smaller and it shows more on the backside, I am going to finish and be happy. It is still beautiful…..I think.
I’m glad you’re happy with it, Penny! That’s the most important thing!
I love how you used this stitch! The scarf looks amazing, well done! I too have pinned and shared!
Thank you so much, Candy! 🙂
What a beautiful scarf and I just happen to have this particular paintbox yarn in my stash. Unfortunately I don’t have a 3.25mm hook, so would you recommend I go down to a 3mm or would a 3.5mm be better?
I am looking forward to making this x
Depending on how tight or loose your tension is, going up might be best. I actually made mine with a 3mm hook because my tension is usually very relaxed and many people have trouble matching it when I list the exact hook I used. You’re welcome to play around with it and see how it looks after a few rows with both hooks. The gauge isn’t extremely important since it’s worked from one end to the other, so whichever one looks best to your eye should be fine. ???? Good luck!
Absolutely stunning! Hoping I can find some extra time to squeeze this beauty in. Pinned, and shared.
Thank you so much, Alexandra! ????