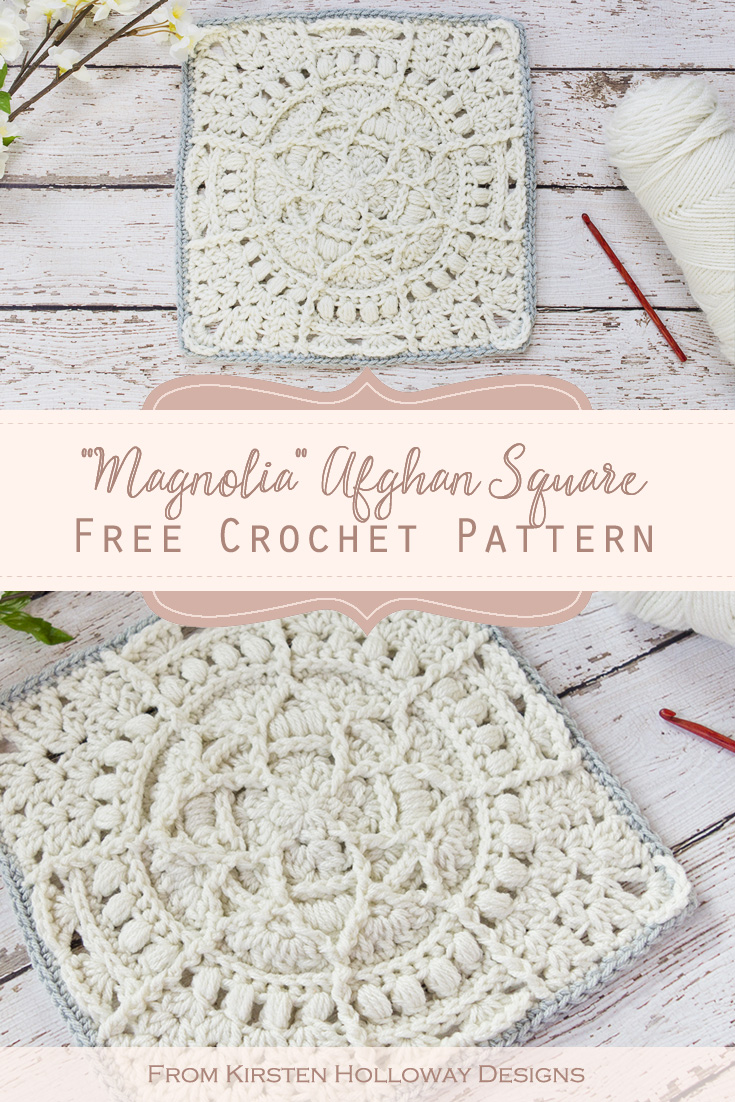
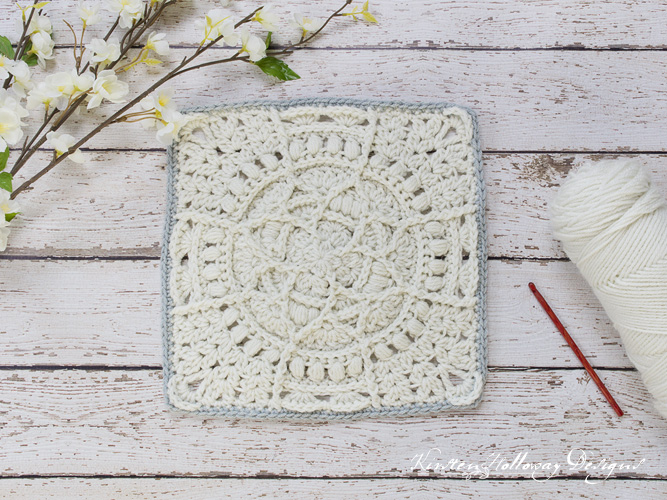
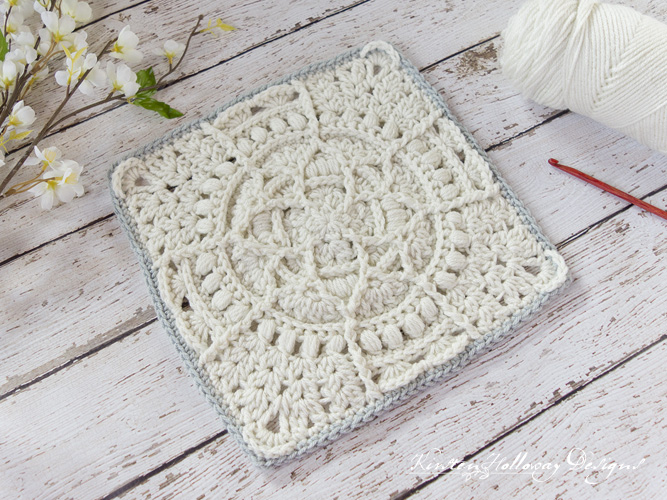
It’s easy to crochet a beautiful, lace “granny” square afghan with this flower-inspired crochet pattern! Post stitches create the outline of a Magnolia blossom in the center of the square, while clusters and puffs create a lacy border. Find the free crochet pattern instructions below, or purchase a print-optimized, ad-free PDF by clicking here.
Granny squares can be used to crochet your own unique blanket, and they are quick and easy projects that you can take anywhere in your project bag. The Magnolia square will give you a warm, but lacy looking afghan when you sew it together, and with a lace boarder it will have a vintage/heirloom feel. Afghan squares can be joined in many ways, but if you are wanting that romantic, vintage look I’d like to suggest this beautiful Celtic Lace Join, or the Scallop Join.
Click here to add this pattern to your Ravelry queue!
This crochet granny square pattern was created for the 2018 afghan CAL over on Moogly.
Disclaimer: This post contains affiliate links. When you purchase something using these links a small amount of the sales price goes to me to help keep this site, and the patterns on it free. You do not pay any extra for the item you purchase.
Difficulty:
Intermediate
Materials Needed:
6mm (J) hook, or hook needed to obtain gauge
150 yards # 4 worsted weight, Red Heart With Love in “Eggshell”, and 25 yards Red Heart With Love in “Light Grey”
Yarn needle
Scissors
Stitches Used:
ch/chs = chain/chains
sl st = slip stitch
sc = single crochet
dc = double crochet
tr = treble crochet
BPsc = back post single crochet
BPhdc = back post half double crochet
FPsc = front post single crochet
FPhdc = front post half double crochet
FPdc = front post double crochet
2dc cluster = dc2tog in same stitch
2tr cluster = tr2tog in same stitch
3dc cluster = dc3tog in same stitch
dc2tog = double crochet 2 together
Additional Terms:
Puff st: yo, pull up a loop 4 times in same st, yo, pull through 8 loops, yo, pull through final 2 loops
st/sts = stitch/stitches
sp/sps = space/spaces
prev = previous
Gauge:
6” across after round 5
Measurements:
12” x 12” when blocked
Additional Notes:
-ch 1 at beginning of round does not count as stitch. All other ch-1’s count as stitches.
-Use the FP stitches as a guide to help you keep things lined up.
-This square has some cupping issues. Blocking is required to get this square to lay well and show off the lace details.
-In rounds 3 and 5 “(FPdc, 3dc cluster, FPdc) in FPdc” means you’re working around the post AND into the top of the st for the cluster.
-If you would like to use this square to create a “granny square” afghan, it’s first helpful to know how large you want the finished afghan to be. If incorporating it into an blanket as part of a CAL the math may already be done for you. If using this block design by itself, here are some rough estimates to help you figure out how many squares you’ll need to make for your project. Since these are 12″ squares you can translate the formulas as follows: For a throw: 5×5= 25. Make 25 squares total. Arrange them in 5 rows vertically and 5 rows horizontally.
Afghan square layouts and totals, rough estimates:
Baby blanket: 3×3 = 9 total squares
Toddler blanket: 4×5 = 20 total squares
Throw: 5×5 = 25 total squares
Twin 6×8 = 48 total squares
Queen: 8×8 = 64 total squares
King, 9×9 = 81 total squares
Magnolia Lace “Granny” Square Crochet Pattern (US Terms):
Click here to purchase an ad-free, print-optimized PDF of this pattern on LoveCrafts
With color A,
Round 1: in magic ring, ch 1, [dc, ch 1, 3dc cluster, ch 1] 4 times, join with sl st to first dc (8)
Round 2: ch 1, *FPdc around dc, ch 1, (3dc cluster, ch 1, 3dc cluster, ch 1) in top of 3dc cluster from prev round; repeat from * around, join with sl st to first FPdc. (24)
Round 3: ch 1, *(FPdc, 3dc cluster, Fpdc) in FPdc from previous rnd, sk 2 sts, 5 dc in ch-1 sp, sk 2 sts; repeat from * around, join with sl st to first FPdc. (32)
Round 4: ch 1, *FPdc around FPdc from prev round, 3 dc in each of next 2 sts, FPdc around FPdc from prev round, BPhdc around next 5 sts; repeat from * around, join with sl st to first FPdc. (52)
Round 5: ch 1, *(FPdc, 3dc cluster, Fpdc) in FPdc from prev round, BPhdc around next 6 dc sts, (FPdc, 3dc cluster, FPdc) in FPdc from prev round, sk st, puff st in next 3 sts, sk st; repeat from * around, join with sl st to first FPdc. (60)
In round 6 you will be skipping the puff stitches and BPhdc sts you made in round 5.
Round 6: ch 1, *FPdc around FPdc from prev round, (2dc cluster, ch 1, 2dccluster) in next st, ch 1, (2dc cluster, ch 1, 2dc cluster) in next st, FPdc around FPdc from prev round, ch 1; repeat from * around. (8 shells)
Round 7: ch 1, *sc between FPdc and first 2dc cluster, 2 sc in next 3 ch-1 sps, sc between final 2dc cluster and FPdc, FPdc2tog around next 2 FPdc sts; repeat from * around, join with sl st to first sc. (72)
Round 8: ch 1, *FPhdc around FPdc2tog, sc in next 8 sts; repeat from * around, join with sl st to first FPhdc. (72)
Round 9: ch 1,* FPdc around FPhdc from prev round, BPhdc around next 8 sc; repeat from * around, join with sl st to first FPdc. (72)
Keep your chains nice and loose in this next round to minimize cupping.
Round 10: ch 1, *FPdc around FPdc from prev round, [ch 1, sk st, puff st] 4 times, ch 1; repeat from * around, join with sl st to first FPdc. (80)
Your piece will probably cup a bit after this round, but we’ll start the process of straightening it out in the next round.
Round 11: ch 1, *FPdc around FPdc from prev round, sc in next 9 sts, FPdc around FPdc from prev round, sk st, [(2dc cluster, ch 1, 2dc cluster), sk st] 4 times; repeat from * around, join with sl st to first FPdc. (92)
Round 12: ch 1, *FPdc around FPdc from prev, BPsc around next 9 sc, FPdc around FPdc from prev round, sk st, [(2dc cluster, ch 1, 2dc cluster) in next ch-1 sp] 4 times, sk st; repeat from * around, join with sl st to first FPdc. (92)
Round 13: ch 1, *FPdc around FPdc from prev round, sk 2 sts, 5 dc in next st, sk 3 sts, 5 dc in next st, sk 2 sts, FPdc around FPdc from prev round, sk st, (2dc cluster, ch 1,2dc cluster) in ch-1 sp, sk st (2dc cluster, ch 1, 2tr cluster) in ch-1 sp, sk st, working between 2nd and 3rd cluster groups (tr, ch 1, tr), sk st, (2tr cluster, ch 1, 2dc cluster) in ch-1 sp, sk st, (2dc cluster, ch 1, 2dc cluster) in ch-1 sp; repeat from * around, join with sl st to first FPdc. (108)
Round 14: ch 1, *FPhdc around FPdc, BPsc around next 5 dc, sc between shells, BPsc around next 5 dc, FPhdc around FPdc, sc between FPdc and 2dc cluster, sk st, 2 sc in ch-1 sp, sk st, sc between 1st and 2nd cluster groups, sk st, 2 sc in ch-1 sp, sk st, sc between 2tr cluster and tr, sk st, 5 dc in ch-1 sp, sk st, sc between tr and 2tr cluster, sk st, 2 sc in ch-1 sp, sk st, sc between 3rd and 4th cluster groups, sk st, 2 sc in ch-1 sp, sk st, sc between 2dc cluster and FPdc; repeat from * around, join with sl st to first FPdc. (128)
Join color B (this color change is optional),
Drop color A and fasten off.
Round 15: ch 1, sc in next 20 sts, BPsc around next 2dc sts, *(BPsc, ch 1, BPsc) around next dc, BPsc around next 2 dc sts, sc in next 27 sts; repeat from * around, omitting last 20 sts on final repeat, join with sl st to first sc. (136, 34 sts to a side including ch-1 in corner)
Fasten off, and weave in ends
Block to finish.
Want more gorgeous crochet patterns, and a little encouragement for your day? Sign up for my newsletter here! That way you’ll never miss out on special events, or freebies I’m offering.
JOIN ME ON SOCIAL MEDIA
I would love to see a picture when you’re done, so please feel free to come by my Facebook group and show off your square! Be sure to tag @kirstenhollowaydesigns when you share pictures of your finished shawl on Instagram, and use #magnolialacegrannysquare!
You can also follow me on Facebook, Pinterest, Instagram, and Ravelry for more beautiful crochet patterns.
PATTERN TERMS AND CONDITIONS:
You are welcome to share the link to this pattern, using one image of your choice, on your site, but please do not share the written patterns themselves, this includes my Ravelry downloads or translations of these patterns, or use additional images. You do not have permission to use my images by themselves to create pinnable graphics for Pinterest, however they may be included in a roundup pin if there are 4 or more other patterns. If you sell finished items online, please do not use my pictures for your listings. I’m positive that your work is of high enough quality for you to sell the finished piece. Have confidence in your abilities! <3 Thank you!
This pattern was made to be used by individuals, and small business crocheters alike. Selling your finished pieces in boutiques, at farmer’s markets, craft shows, and other local events is encouraged! The only thing I require is that this pattern not be used commercially to produce hundreds of thousands of copies.
If you enjoyed this pattern or found it useful, why not share a link to this post with your friends?


HI, i’m completely enjoying this pattern i’m currently making a bed cover for my daughter with the squares. my Question is which method would you recommend for attaching the individual squares ?
You can join with whatever method you prefer. Google “how to join granny squares” and you’ll probably get several options. I’ve personally done the slip stitch join on squares and preferred it because it’s nice and flat. 🙂
I am just starting this and am reading thru it to understand the stitches. Can you explain the ending. In round 15 it ends with “omitting the last 20 stitches” yet it joins to the 1st sc. What am I missing?
Susan,
You’ll follow the repeat as written around the square, but you’ll leave off the last 20 stitches of the final repeat (because there won’t be any more stitches in that round to crochet into). I hope that helps!
Love this pattern but seem to have confused myself… Does the 3dc cluster finish when you pull through the 4 loops on the hook or when you chain 1 to secure the top on the stitch? Think I might be doubling up my chain stitches!
Thanks, Becky
Hi Becky,
The cluster stitch ends when you pull your working yarn through all 4 loops. 🙂
Beautiful!! Do you happen to have a video by chance? I don’t read patterns!
I don’t have a video, but you may find my post on learning to read written patterns helpful: https://kirstenhollowaydesigns.com/2018/04/how-to-read-crochet-patterns-terms-for-beginners.html
You can also join my Facebook group and ask questions there if you get stuck: https://www.facebook.com/groups/KirstenHollowayDesigns/
Beautiful pattern!! I’ve made so many now I know it by heart and still love it ???? making a king size blanket for myself. Thanks for the lovely pattern! And also for number of squares needed for blanket size
You’re welcome! I’m glad to hear you are enjoying this square so much!
Hi there Kirsten! I was a bit confused how round 1 says (8) but round 2 says (24). I’m counting 16 st in round one with 4 (dc, ch1, 3dc cluster, ch1) repeated 4 times? Maybe I’m doing this wrong haha
Hi Kjersten,
I believe in that round I did not include the chains as stitches in the end of row count. It sounds like you are working it correctly though. 🙂
Thank you again Kristin. Your patterns are all so gorgeous and creative.
Laura
Aww, thank you! I’m so glad you’re enjoying them!
This is a gorgeous square and I jumped right in, but I have a question, in round 6 it says to do the fppc and then the next 2 stitches and then another fppc then to do that around… what about the stitches between the fppc? Just dc in them? The ending stitch count says just 8 shells but I cant see that we would just skip the 6 sc and 3 puff stitches from the previous rounds? Thank you in advance for clarifying for me 🙂
You will skip those stitches entirely. 🙂 Good luck on the rest of the square!
Hi!
I am a complete crochet beginner (and French to boot) but I am up to my sixth square to make the beautiful blanket you made with others for Lorene. I saw it by chance and I thought I had to try and make it, and that I would learn as I went.
I made a LOT of mistakes, but I’m getting better and I now have 6 absolutely beautiful squares done. This one I just finished (I know it’s not on the pattern but I thought it was lovely and I’d like to include it). It’s not very flat but I’m quite happy with the result. Now I’m off to make my seventh square…
Thank you : your pattern is really clear and the instructions really helpful. I love your website and I’m having a lot of fun.
Love,
Veronique
I’m glad you have been enjoying the designs, Veronique! You will definitely learn a lot from crocheting these squares! ????
Such a gorgeous design! I’m just starting to branch out in my crocheting abilities so the written pattern can seem a bit daunting. Would love to see a step by step video I could follow along with since I’m more of a visual learner. But again absolutely gorgeous, great job! Will definitely be subscribing to your blog!
Hi Corina,
Thank you! I don’t have a video, but I do have a progression shot showing rounds 2-7 finished over in the Moogly CAL Facebook group: https://www.facebook.com/groups/moogly2015cal/permalink/2021575257881851/
I hope that helps a bit! 🙂
Thank you so much!
You’re welcome!
I would love to make this pattern. It is easier for me if I can watch a tutorial. Do you have a tutorial for this granny square? If yes, where can I find it?
Thank you
Hi Kate,
I’m sorry, I do not. However, if you are on Facebook you can search for the Moogly CAL group and apply to join. I have shared some additional images of the completed rounds there that may be helpful. ????
WOW! What a beautiful square!! Pinned.
Thank you so much, Alexandra!
This looks gorgeous…but so hard! I would love to see a photo of a finished Afghan.
Thank you, Elle! I may eventually make one, and design a border to match, but it will probably be a while. 🙂