Today I’m taking time to answer a couple of questions I get asked regularly: “What will happen if I substitute another yarn for the one in the pattern?” and “Why did my crochet project turn out too small/too big?” We all have different color preferences, and style needs, so it’s not surprising that these questions comes up frequently. Despite them being 2 separate questions, they are often related. And they both boil down to gauge.
Let me explain,

Most of us know that hook size and tension affect gauge while crocheting, but did you know the yarn is another factor?
I can’t tell you how many times I see people in various online groups complain that they have crocheted a hat with one type of yarn, but that it turned out too small or too large even though the yarn they substituted said it was the same weight as what the pattern called for. Simply put, the problem has everything to do with gauge. In this post I want to focus on a potentially lesser known factor of gauge, specifically I’ll be talking about yarns that are labeled #4 Worsted weight, however when held side by side they vary drastically in width. Being aware of the differences and how they affect you will change the way you choose yarn for your crochet projects.
How is gauge measured?
If you have followed a crochet pattern or two you will have noticed a gauge listed in the pattern instructions. Gauge is measured as the number of stitches in a certain space, typically 4″ wide by 4″ tall. The gauge information will also tell you what kind of stitches you are to make to achieve that count. Using a larger or smaller hook will obviously affect your gauge, but the thing that most people don’t talk about is how your yarn affects this number too. Just because a yarn says it is a #4 on the label does not mean it is the same thickness as another #4 yarn–even if it is produced by the same company!
Why do yarns that are labeled the same weight have different thicknesses?
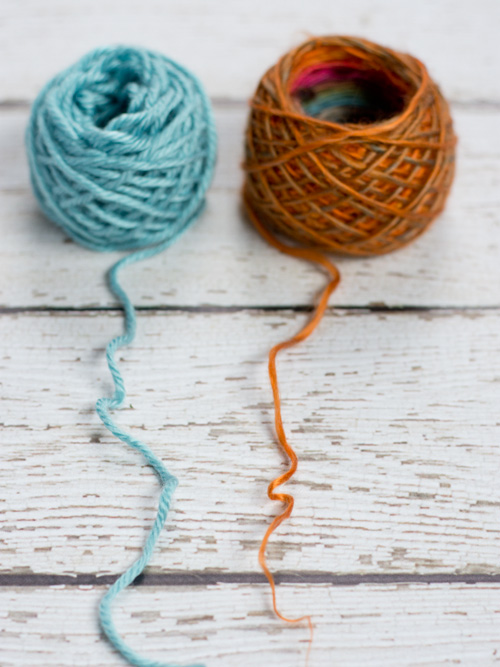
For this post I am going to compare Red Heart Soft, and Red Heart Unforgettable. They are both labeled as a #4 worsted weight yarn which means they should both be the same thickness, right? Not always.
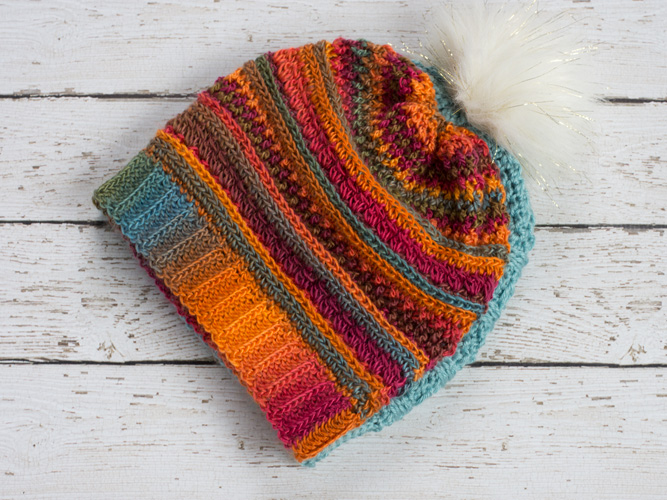
Yarn companies have different reasons for labeling different thicknesses of yarn as the same weight. It could be that a particular yarn is intended to be more “lacy” when worked up, or should be used to create a tighter, warmer fabric. Being aware of how these yarns work will help you choose the right one for the look you are trying to achieve. Here is where my Serendipity Slouch hat pattern comes in<–Click this link if you want to make one of your own.
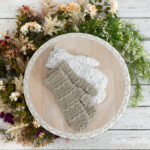
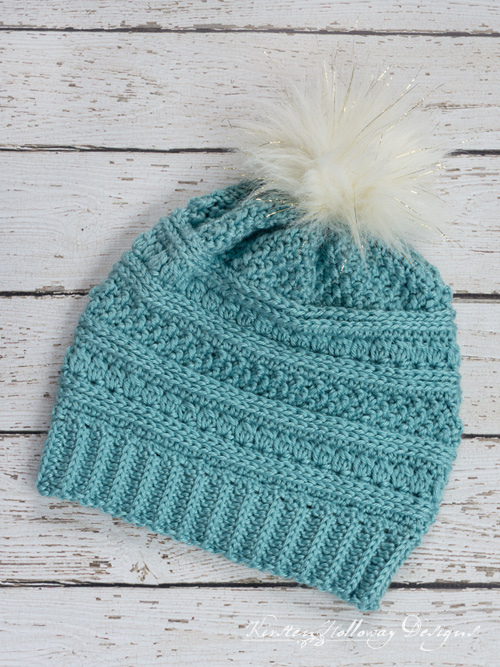
When worked up in Red Heart “Soft” this hat has a thick, warm, squishy feel–when you squeeze the hat in your hand it has some “substance” to it. The thickness of the yarn shows off the texture well. Ideally, it should keep you warm in winter temperatures (I live in the northern part of the the US, so we get our fair share of freezing weather). If you look at the back of the label on your skein of Red Heart Soft you should see a square that looks like this:
Basically, it tells you how many of a particular stitch (12 single crochet in the example above), and how many rows (15 in the example above) you should expect to get in a 4×4″ gauge swatch using the manufacturers recommendations.
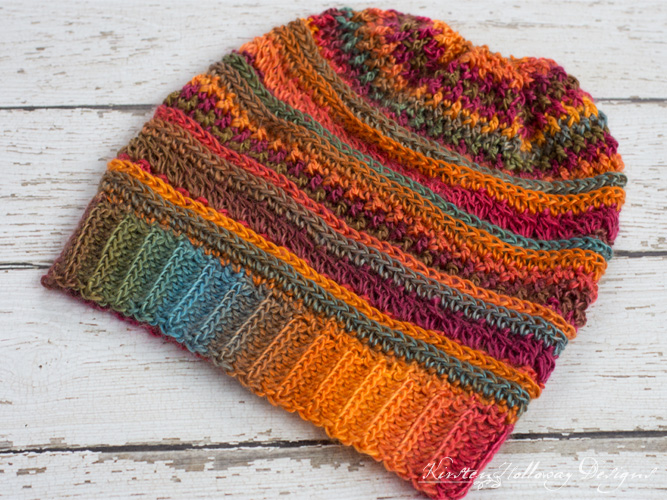
On the other hand, when working the same hat pattern in Red Heart “Unforgettable” it feels very light and silky, and probably would not keep you warm in winter. It would work great for spring or fall, however. It might even be light enough to wear to summer festivals. The stitches are not as raised in this version of the hat, and it’s the color that brings attention to the different textures, not so much the size of the stitches themselves.
Look at the difference between this gauge swatch from Red Heart “Unforgettable”, and the one above:
 Red Heart says you should be getting 15 single crochet stitches and 18 rows in a 4×4″ gauge swatch. Did you also notice the hook size they recommend is larger too? Your hat will be significantly smaller if you don’t take these things into consideration!
So, what will happen if I substitute another yarn for the one listed in the pattern?
The short answer based on the information above is that your finished project may not be the size the designer meant it to be.
If it’s a garment it may not fit correctly, or if it is a household item, like a hot pad or placemat, it may work perfectly for a child’s tea set instead of the plates in your kitchen. Conversely, items that are supposed to be dainty and delicate will lose a lot of beautiful details, and be much larger if made with a thicker yarn. One important thing to keep in mind is that thicker yarn enhances texture, thinner yarn hides it. Along those same lines, solid colored yarn complements texture, whereas short-striping variegated often yarn hides it.
Both of the hats I featured above were worked with the same hook sizes, and same stitch counts. My gauge is slightly narrower on the hat made with Red Heart “Unforgettable”, but where this difference really shows up is in the height. I added an extra round near the end of the hat to get it closer to the length I wanted, but it is still almost an inch shorter than the hat made with Red Heart “Soft”. This is due to the width of the strand of yarn. The thickness of the yarn means I don’t move my hook up as high when making the stitches, which, after a few rounds, is pretty evident.
Remember, both of these yarns were labeled the same weight (#4 worsted), but when it came down to actually using them, even though I used the same hook sizes for both they produced very different results. The best way to tell if a yarn you are using is going to work well as a substitute is to use the following list:
- Does my gauge with this yarn match the designer’s numbers?
- Does this yarn match the look or style am I trying to achieve with this piece?
- Am I ok with this item looking significantly different from what the preview picture shows?
If you answer “no” to any of the above questions then you may want to reconsider before you spend time on a project you may or may not end up loving or being able to use.
Here is something else to try when you want to substitute one type of yarn for another:
Many times it is possible to substitute a different yarn for the one in the pattern (though when in doubt, use the one the designer has recommended as it will usually give you the best results). If that is not an option, try this method instead:
Take a pencil or ruler and wrap your yarn around it. Measure the number of wraps you have in one inch.
A #4 worsted weight yarn should have 9-12 wraps per inch, a #3 light weight should have 11-15 wraps per inch and a #5 chunky weight should have 6-9 wraps per inch.
You can read more about the Wraps Per Inch method described by the Craft Yarn Council at this link.
Notice how there is still some variation between how many wraps per inch you will get. This is where you will use the designers gauge instructions to fine-tune your stitches.
I hope you feel more confident about choosing the correct yarn for your projects after reading this, and that you have a better understanding how different yarns affect your gauge.
Have more questions about how yarn affects your gauge? I invite you to come visit my virtual crochet studio over on Facebook. We have a whole community of knowledgeable, friendly ladies who would love to help!
Disclaimer:
This post contains affiliate links. When you purchase something using these links a small amount of the sales price goes to me to help keep this site, and the patterns on it free. You do not pay any extra for the item you purchase. How cool is that?!