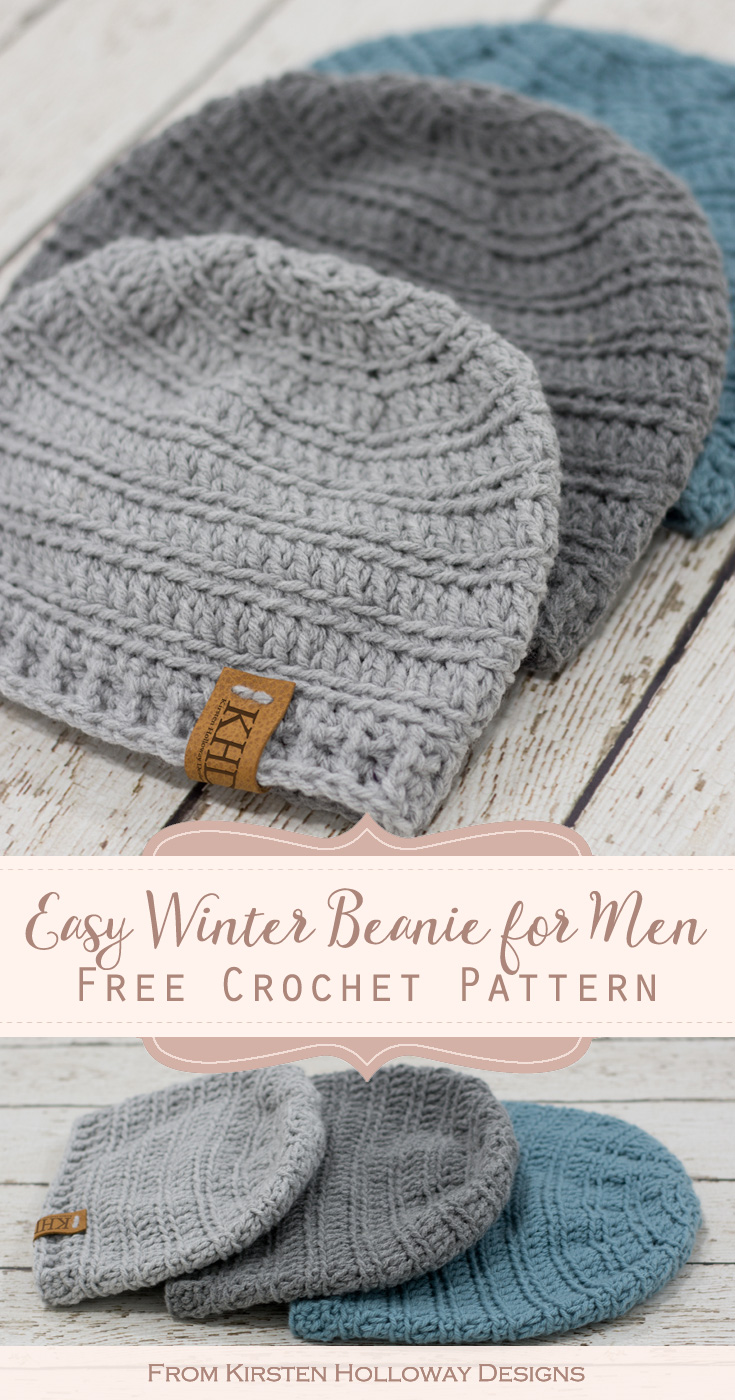
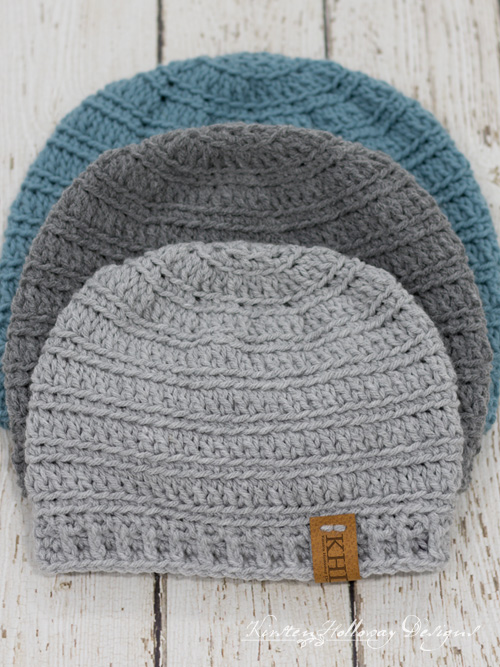
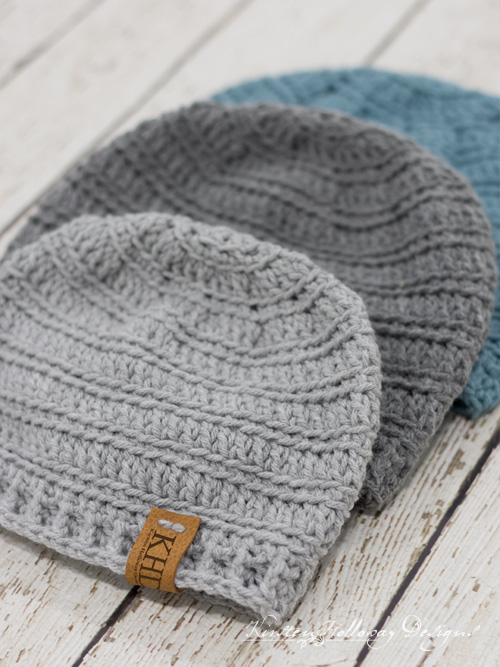
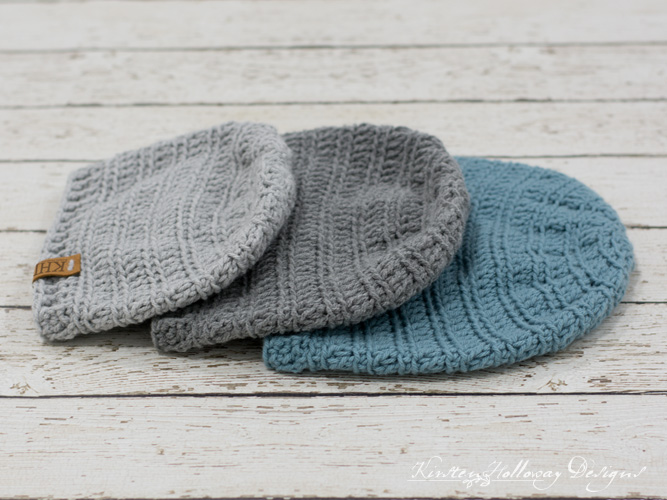
The “Unlimited” crochet hat pattern is a quick, easy project that comes in 4 sizes and doesn’t take much time to complete. That makes it a perfect last-minute gift idea for the men and boys in your life. It also means this would be a good charity project to donate to shelters, or hospitals. I have included several finishing options both in the individual hat patterns, and at the bottom of the post to provide you with almost unlimited customization possibilities! Find the free crochet pattern instructions below, or purchase a print-optimized, ad-free PDF by clicking here.
Click here to add this pattern to your Ravelry queue!
When I took a poll this spring on the kinds of crochet patterns you wanted to make, 2/3 of you said you wanted simple, no-fuss patterns that could be crocheted quickly. You also showed a preference for patterns that would work for both men or women. This hat nicely ticks both of those boxes. The body of the hat uses 2 basic stitches that all beginners should be comfortable making, and the band uses the single crochet stitch in a couple of different ways that are still easy to master. Double crochet stitches mean this hat grows in length fairly quickly. If you’re just starting out this will probably take you a couple of evenings to crochet. If you are a bit faster and more experienced you’ll probably be able to finish this pattern in about 2-2 1/2 hours.
Caron One Pound is thick, warm and durable, and comes in so many good colors for men and boys! It has been one of my go-to yarns for making hats for the homeless and needy because of how sturdy, yet nice it is. Neutrals always give such a refined, and classy look to pieces and the Caron One Pound line has several that are perfect for a crochet project like this! Another positive to using this yarn is that items made with it are easy to care for and don’t require much “special handling”.
And who says beginner-friendly hats have to be dull? I’ve included several options for finishing this hat so you can customize it for that special person you’re crocheting it for. This includes instructions for adding earflaps, crocheting a button tab, or bear ears for kids and babies, and a video tutorial for making a faux fur pom-pom. There are almost unlimited possibilities with this crochet pattern! I hope you’ll come into my Facebook group and share what you have made with this quick and easy hat pattern, whether you’re a beginner or not!
Disclaimer: This post may contain affiliate links. When you purchase something using these links a small amount of the sales price goes to me to help keep this site, and the patterns on it free. You do not pay any extra for the item you purchase.
Difficulty:
Beginner/Easy
Materials Needed:
Approximately 75-125 yards #4 worsted weight Caron One Pound yarn. I used Soft Grey Mix, Medium Grey Mix, and Azure. <–Click here to pick up some of your own
5.5mm (I) hook, or hook needed to obtain gauge (hat body)
5mm (H) hook (if you decide to add the optional earflaps)
(Optional) 4 (G) mm hook (if making the other add-ons)
Yarn needle
Scissors
(Optional) Measuring Tape
If making a pom-pom:
1/4 yd Fashion Faux Fox Fur Fabric -Silver
Golf-ball size piece of polyester stuffing
Heavy-duty button thread
Sharp sewing needle
Stitches Used:
sl st = slip stitch
sc = single crochet
dc = double crochet
FPsc = front post single crochet (Only used if making ribbed band)
BPsc = back post single crochet (Only used if making ribbed band)
sc2tog = single crochet 2 together (Only used if making earflaps)
Additional Terms:
BLO = Back Loop Only. Work all stitches for that round in the back loop only.
Gauge:
Your piece should measure a little over 5 1/2″ after round 5 (Small/Med, and Child) and about 6 1/2″ across after round 6 (Large/X-Large).
13 sc in 4″
Measurements:
Child: 9 ½” wide by 7 ½” tall
Small/Med: 10 ½” wide by 8 ½” tall
Large/X-Large: 11 ½” wide, by 9 ½” tall
Additional Notes:
-This pattern is written in US terms.
-ch-1 at beginning of the round does not count as a stitch.
-all rounds are joined with a slip stitch unless otherwise stated.
-Caron One Pound is a thicker yarn than Caron Simply Soft, or Red Heat Super Saver, meaning your hat could turn out smaller if you use one of them. Please keep this in mind when you make your hat using a different yarn that the one I called for.
–This easy hat pattern has additional finishing instructions! Scroll to the bottom of the post to see additional ways of customizing this hat to fit a variety of style preferences.
-color changes can be made every other round for some variety, if you wish.
-When choosing to make this hat with earflaps: Do the first round of edging in the same color as your ear flaps, then, if you wish, add a contrasting color in the second round. This will give you a more professional look in the end.
Unlimited Beanie Easy Crochet Beanie Pattern (US Terms):
Click here to purchase an ad-free, print-optimized PDF of this pattern on LoveCrafts
Crochet A Large/X-Large Adult Hat for Men:
Round 1: ch 1, 12 dc in magic circle, join with sl st to first dc. (12)
Round 2: ch 1, working in BLO, 2 sc in first st, *2 sc in next st; repeat from * around, join with sl st to first sc. (24)
Round 3: ch 1, working in BLO, 2 dc in first st, dc in next st, *2 dc in next st, dc in next st; repeat from * around, join with sl to first dc. (36)
Round 4: ch 1, working in BLO, 2 sc in first st, sc in next 2 sts, *2 sc in next st, st in next 2 sts; repeat from * around, join with sl st to first sc. (48)
Round 5: ch 1, working in BLO, 2 dc in first st, dc in next 3 sts, *2 dc in next st, dc n next 3 sts; repeat from * around, join with sl st to first dc. (60)
Round 6: ch 1, working in BLO, 2 sc in first st, sc in next 4 sts, *2 sc in next st, sc in next 4 sts; repeat from * around, join with sl st to first sc. (72)
Your piece should measure about 6 1/2″ across at this point. Grab your measuring tape and make sure you’re meeting gauge
Round 7: ch 1, working in BLO, dc in each st around, join with sl st to first dc. (72)
Round 8: ch 1, working in BLO, sc in each st around, join with sl st to first sc. (72)
Round 9-17: rep rounds 7-8
Your piece should measure 8” long at this point. If you want a shorter hat leave off the last 2 rounds.
You now get to decide if you want to add earflaps or a ribbed band to finish this hat. Choose only one!
Hat Band:
Round 1: ch 1, working in BLO, sc in each st around, join with sl to first sc. (72)
Round 2: ch 1, FPsc around first st, BPsc around next st, *FPsc around next st, BPsc around next st; repeat from * around, join with sl st to first FPsc. (72)
Rounds 3-4: FPsc around first st, sc in next st, *FPsc around next st, sc in next st; repeat from * around, join with sl st to first FPsc. (72)
Fasten off and weave in ends.
Earflaps (Optional):
Using a 5mm (H) hook,
Row 1: ch 1, sc in next 11 stitches
Rows 2-4: ch 1 turn, sc in each stitch across (11)
Row 5: ch 1, turn, sc2tog, sc in next 7 stitches, sc2tog (9)
Row 6: ch 1, turn, sc in each stitch across (9)
Row 7: ch 1, turn, sc2tog, sc in next 5 stitches, sc2tog (7)
Row 8: ch 1, turn, sc in each stitch across (7)
Row 7: ch 1, turn, sc2tog, dc in next 3 stitches, sc2tog (5)
Fasten off, and weave in ends.
Count over 24 stitches from the other earflap, attach yarn,
Row 1: ch 1, sc in next 11 stitches
Rows 2-4: ch 1 turn, sc in each stitch across (11)
Row 5: ch 1, turn, sc2tog, sc in next 7 stitches, sc2tog (9)
Row 6: ch 1, turn, sc in each stitch across (9)
Row 7: ch 1, turn, sc2tog, sc in next 5 stitches, sc2tog (7)
Row 8: ch 1, turn, sc in each stitch across (7)
Row 9: ch 1, turn, sc2tog, dc in next 3 stitches, sc2tog (5)
Edging Round 1: sc evenly around the edge of the earflaps, and hat.
You may do the second round of edging, which includes the ties, in a contrasting color if you wish.
Edging Round 2: sc in each st until you get to the bottom of the first, earflap ch 51, sc in second ch from hook, sc in each ch until you arrive back at the hat, then continue working a sc in each st until you get to the bottom of the second earflap, ch 51, sc in second ch from hook, sc in each ch until you arrive back at the hat, then continue working a sc in each st until you get back to where you started the round.
Fasten off, and weave in ends.
Crochet A Small/Med Adult Hat:
Round 1: ch 1, 12 dc in magic circle, join with sl st to first dc. (12)
Round 2: ch 1, working in BLO, 2 sc in first st, *2 sc in next st; repeat from * around, join with sl st to first sc. (24)
Round 3: ch 1, working in BLO, 2 dc in first st, dc in next st, *2 dc in next st, dc in next st; repeat from * around, join with sl to first dc. (36)
Round 4: ch 1, working in BLO, 2 sc in first st, sc in next 2 sts, *2 sc in next st, st in next 2 sts; repeat from * around, join with sl st to first sc. (48)
Round 5: ch 1, working in BLO, 2 dc in first st, dc in next 3 sts, *2 dc in next st, dc n next 3 sts; repeat from * around, join with sl st to first dc. (60)
Your piece should measure a little over 5 1/2″ across at this point. Grab your measuring tape and check!
Round 6: ch 1, working in BLO, 2 sc in first st, sc in next 9 sts, *2 sc in next st, sc in next 9 sts; repeat from * around, join with sl st to first sc. (66)
Round 7: ch 1, working in BLO, dc in each st around, join with sl st to first dc. (66)
Round 8: ch 1, working in BLO, sc in each st around, join with sl st to first sc. (66)
Round 9-16: rep rounds 7-8
Your piece should measure 7” long at this point.
You now get to decide if you want to add earflaps or a ribbed band to finish this hat. Choose only one!
Hat Band:
Round 1: ch 1, working in BLO, sc in each st around, join with sl to first sc. (66)
Round 2: ch 1, FPsc around first st, BPsc around next st, *FPsc around next st, BPsc around next st; repeat from * around, join with sl st to first FPsc. (66)
Rounds 3-4: FPsc around first st, sc in next st, *FPsc around next st, sc in next st; repeat from * around, join with sl st to first FPsc. (66)
Fasten off and weave in ends.
Earflaps:
Using a 5mm (H) hook,
Row 1: ch 1, sc in next 10 stitches, ch 1 turn, (10)
Rows 2-4: sc in each stitch across, ch 1 turn, (10)
Row 5: sc2tog, sc in next 6 stitches, sc2tog, ch 1 turn, (8)
Row 6: sc in each stitch across, ch 1 turn, (8)
Row 7: turn, sc2tog, sc in next 4 stitches, sc2tog, ch 1 turn, (6)
Row 8: turn, sc in each stitch across, ch 1 turn, (6)
Row 9: sc2tog, dc in next 2 stitches, sc2tog (4)
Fasten off, and weave in ends.
Count over 22 stitches from the other earflap, attach yarn,
Row 1: ch 1, sc in next 10 stitches, ch 1 turn, (10)
Rows 2-4: sc in each stitch across, ch 1 turn, (10)
Row 5: sc2tog, sc in next 6 stitches, sc2tog, ch 1 turn, (8)
Row 6: sc in each stitch across, ch 1 turn, ch 1 turn, (8)
Row 7: sc2tog, sc in next 4 stitches, sc2tog, ch 1 turn, (6)
Row 8: sc in each stitch across, ch 1 turn, (6)
Row 9: ch 1, turn, sc2tog, dc in next 2 stitches, sc2tog (4)
Edging Round 1: sc evenly around the edge of the earflaps, and hat.
You may do the second round of edging, which includes the ties, in a contrasting color if you wish.
Edging Round 2: sc in each st until you get to the bottom of the first, earflap ch 51, sc in second ch from hook, sc in each ch until you arrive back at the hat, then continue working a sc in each st until you get to the bottom of the second earflap, ch 51, sc in second ch from hook, sc in each ch until you arrive back at the hat, then continue working a sc in each st until you get back to where you started the round.
Fasten off, and weave in ends.
Crochet A Child’s (Approximately 6-10 yrs) Hat:
Round 1: ch 1, 12 dc in magic circle, join with sl st to first dc. (12)
Round 2: ch 1, working in BLO, 2 sc in first st, *2 sc in next st; repeat from * around, join with sl st to first sc. (24)
Round 3: ch 1, working in BLO, 2 dc in first st, dc in next st, *2 dc in next st, dc in next st; repeat from * around, join with sl to first dc. (36)
Round 4: ch 1, working in BLO, 2 sc in first st, sc in next 2 sts, *2 sc in next st, st in next 2 sts; repeat from * around, join with sl st to first sc. (48)
Round 5: ch 1, working in BLO, 2 dc in first st, dc in next 3 sts, *2 dc in next st, dc n next 3 sts; repeat from * around, join with sl st to first dc. (60)
Your piece should measure a little over 5 1/2″ across at this point. Grab your measuring tape and check!
Round 6: ch 1, working in BLO, sc in each st around, join with sl st to first sc. (60)
Round 7: ch 1, working in BLO, dc in each st around, join with sl st to first dc. (60)
Round 8-14: rep rounds 6-7
Your piece should measure a little over 6” long at this point.
You now get to decide if you want to add earflaps or a ribbed band to finish this hat. Choose only one!
Hat band:
Round 1: ch 1, working in BLO, sc in each st around, join with sl to first sc. (60)
Round 2: ch 1, FPsc around first st, BPsc around next st, *FPsc around next st, BPsc around next st; repeat from * around, join with sl st to first FPsc. (60)
Rounds 3-4: FPsc around first st, sc in next st, *FPsc around next st, sc in next st; repeat from * around, join with sl st to first FPsc. (60)
Earflaps:
Using a 5mm (H) hook,
Row 1: ch 1, sc in next 10 stitches, ch 1, turn
Rows 2-3: sc in each stitch across, ch 1, turn (10)
Row 4: sc2tog, sc in next 6 stitches, sc2tog, ch 1, turn (8)
Row 5: sc in each stitch across, ch 1, turn (8)
Row 6: sc2tog, sc in next 4 stitches, sc2tog, ch 1, turn (6)
Row 7: sc2tog, dc in next 2 stitches, sc2tog (4)
Fasten off, and weave in ends.
Count over 20 stitches from the other earflap, attach yarn,
Row 1: ch 1, sc in next 10 stitches, ch 1, turn (10)
Row 2-3: sc in each stitch across, ch 1, turn (10)
Row 4: turn, sc2tog, sc in next 6 stitches, sc2tog, ch 1, turn (8)
Row 5: sc in each stitch across, ch 1, turn (8)
Row 6: sc2tog, sc in next 4 stitches, sc2tog, ch 1, turn (6)
Row 7: sc2tog, dc in next 2 stitches, sc2tog (4)
Edging Round 1: sc evenly around the edge of the earflaps, and hat.
You may do the second round of edging, which includes the ties, in a contrasting color if you wish.
Edging Round 2: sc in each st until you get to the bottom of the first, earflap ch 51, sc in second ch from hook, sc in each ch until you arrive back at the hat, then continue working a sc in each st until you get to the bottom of the second earflap, ch 51, sc in second ch from hook, sc in each ch until you arrive back at the hat, then continue working a sc in each st until you get back to where you started the round.
Fasten off, and weave in ends.
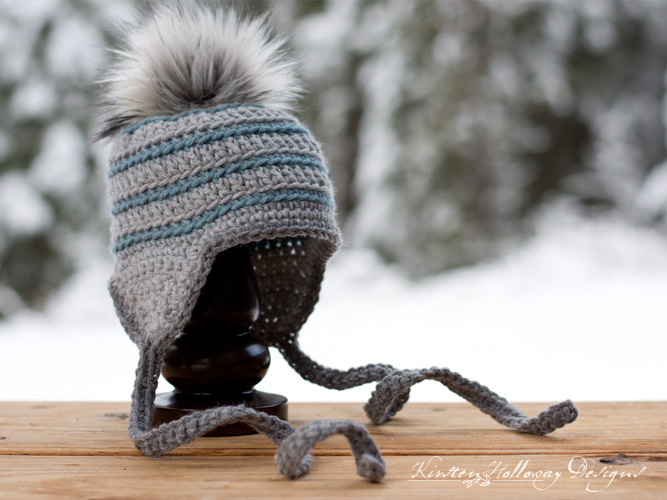
Crochet A 9-12 Months Baby Hat:
This image shows the hat with the optional earflaps, and a pom-pom.
Round 1: ch 1, 12 dc in magic circle, join with sl st to first dc. (12)
Round 2: ch 1, working in BLO, 2 sc in first st, *2 sc in next st; repeat from * around, join with sl st to first sc. (24)
Round 3: ch 1, working in BLO, 2 dc in first st, dc in next st, *2 dc in next st, dc in next st; repeat from * around, join with sl to first dc. (36)
Round 4: ch 1, working in BLO, 2 sc in first st, sc in next 2 sts, *2 sc in next st, st in next 2 sts; repeat from * around, join with sl st to first sc. (48)
Round 5: ch 1, working in BLO, 2 dc in first st, dc in next 3 sts, *2 dc in next st, dc n next 7 sts; repeat from * around, join with sl st to first dc. (54)
Round 6: ch 1, working in BLO, sc in each st around, join with sl st to first sc. (54)
Round 7: ch 1, working in BLO, dc in each st around, join with sl st to first sc. (54)
Rounds 8-10: rep rounds 6 and 7 once, then repeat round 6.
Your hat should measure about 5″ long at this point.
You now get to decide if you want to add earflaps or a ribbed band to finish this hat. Choose only one!
Hat Band:
Round 1: ch 1, working in BLO, sc in each st around, join with sl to first sc. (54)
Round 2: ch 1, FPsc around first st, BPsc around next st, *FPsc around next st, BPsc around next st; repeat from * around, join with sl st to first FPsc. (54)
Rounds 3-4: FPsc around first st, sc in next st, *FPsc around next st, sc in next st; repeat from * around, join with sl st to first FPsc. (54)
Earflaps:
Using a 5mm (H) hook,
Row 1: ch 1, sc in next 9 stitches, ch 1, turn (9)
Row 2-3: sc in each stitch across, ch 1, turn (9)
Row 4: turn, sc2tog, sc in next 5 stitches, sc2tog, ch 1, turn (7)
Row 5: sc in each stitch across, ch 1, turn (7)
Row 6: sc2tog, sc in next 3 stitches, sc2tog, ch 1, turn (5)
Row 7: sc2tog, dc in next stitch, sc2tog (3)
Fasten off, and weave in ends.
Count over 18 stitches from the other earflap, attach yarn,
Row 1: ch 1, sc in next 9 stitches, ch 1, turn (9)
Row 2-3: sc in each stitch across, ch 1, turn (9)
Row 4: turn, sc2tog, sc in next 5 stitches, sc2tog, ch 1, turn (7)
Row 5: sc in each stitch across, ch 1, turn (7)
Row 6: sc2tog, sc in next 3 stitches, sc2tog, ch 1, turn (5)
Row 7: sc2tog, dc in next stitch, sc2tog (3)
Edging Round 1: sc evenly around the edge of the earflaps, and hat.
You may do the second round of edging, which includes the ties, in a contrasting color if you wish.
Edging Round 2: sc in each st until you get to the bottom of the first, earflap ch 51, sc in second ch from hook, sc in each ch until you arrive back at the hat, then continue working a sc in each st until you get to the bottom of the second earflap, ch 51, sc in second ch from hook, sc in each ch until you arrive back at the hat, then continue working a sc in each st until you get back to where you started the round.
Fasten off, and weave in ends.
Additional finishing options for your hat:
Add a pom-pom:
Add a button tab:
Use 4mm (G) hook for all sizes
Requires a 1″ button
Adults and Children:
With 4mm hook,
Ch 6,
Row 1: Sc in second ch from hook, sc in each remaining chain across, ch 1, turn. (5)
Row 2: sc in each st across, ch 1, turn. (5)
Repeat row 2 until tab measures just over 2” long.
To finish, sc evenly around the edge of the tab, fasten off leaving an 18″ tail for sewing the tab to the hat.
Wrap button tab around the brim with half inside, half outside, and sew it onto the hat, then sew on button.
Add bear ears:
Worked in continuous rounds, using 4mm (G) hook,
Children and baby:
Make 2:
6 sc in magic ring
2 sc in each st (12)
sc in each st around (12)
2 sc in first st 1 sc in the next *2 sc in next st, 1 sc in the next; repeat from * around (18)
sc in each st around (18)
sc2tog, sc in next 2 st *sc2tog, sc in next 2 sts* end with sc2tog (13)
sl st into next stitch.
Cut yarn, leaving a 12″ tail for sewing the ears to the hat. Lay hat flat, position ears along the top of the hat where you would like them, sew them to the hat.
Add a Flower:
I know there are some of you ladies making this hat for yourself, so here are a couple of links to patterns that contain flowers! These flowers are not “beginner/easy” level patterns.
This scarf has 3 different flowers to choose from <–Click to go to the patterns
This headband has 2 different flowers: A Rose and a Johnny Jump-up (Violet) <–Click to go to the patterns
Want more gorgeous crochet patterns, and a little encouragement for your day? Sign up for my newsletter here! That way you’ll never miss out on special events, or freebies I’m offering.
JOIN ME ON SOCIAL MEDIA
I would love to see a picture when you’re done, so please feel free to come by my Facebook group and show off your hat! Be sure to tag @kirstenhollowaydesigns when you share pictures of your finished hat on Instagram, and use #UnlimitedBeanie!
You can also follow me on Facebook, Pinterest, Instagram, and Ravelry for more beautiful crochet patterns.
PATTERN TERMS AND CONDITIONS:
You are welcome to share the link to this pattern, using one image of your choice, on your site, but please do not share the written patterns themselves, this includes my Ravelry downloads or translations of these patterns, or use additional images. You do not have permission to use my images by themselves to create pinnable graphics for Pinterest, however they may be included in a roundup pin if there are 4 or more other patterns. If you sell finished items online, please do not use my pictures for your listings. I’m positive that your work is of high enough quality for you to sell the finished piece. Have confidence in your abilities! <3 Thank you!
This pattern was made to be used by individuals, and small business crocheters alike. Selling your finished pieces in boutiques, at farmer’s markets, craft shows, and other local events is encouraged! Please credit/link Kirsten Holloway Designs when selling finished products online. The only thing I require is that this pattern not be used commercially to produce hundreds of thousands of copies.
If you enjoyed this pattern or found it useful, why not share a link to this post with your friends?


