Make a beautiful flower lace poncho with this free crochet pattern. It comes in 4 sizes to fit S/M through 4x/5x. The pattern is highly customizable as far as length and width goes so you can make it uniquely yours. Find the free crochet pattern instructions below, or purchase a print-optimized, ad-free PDF by clicking here.
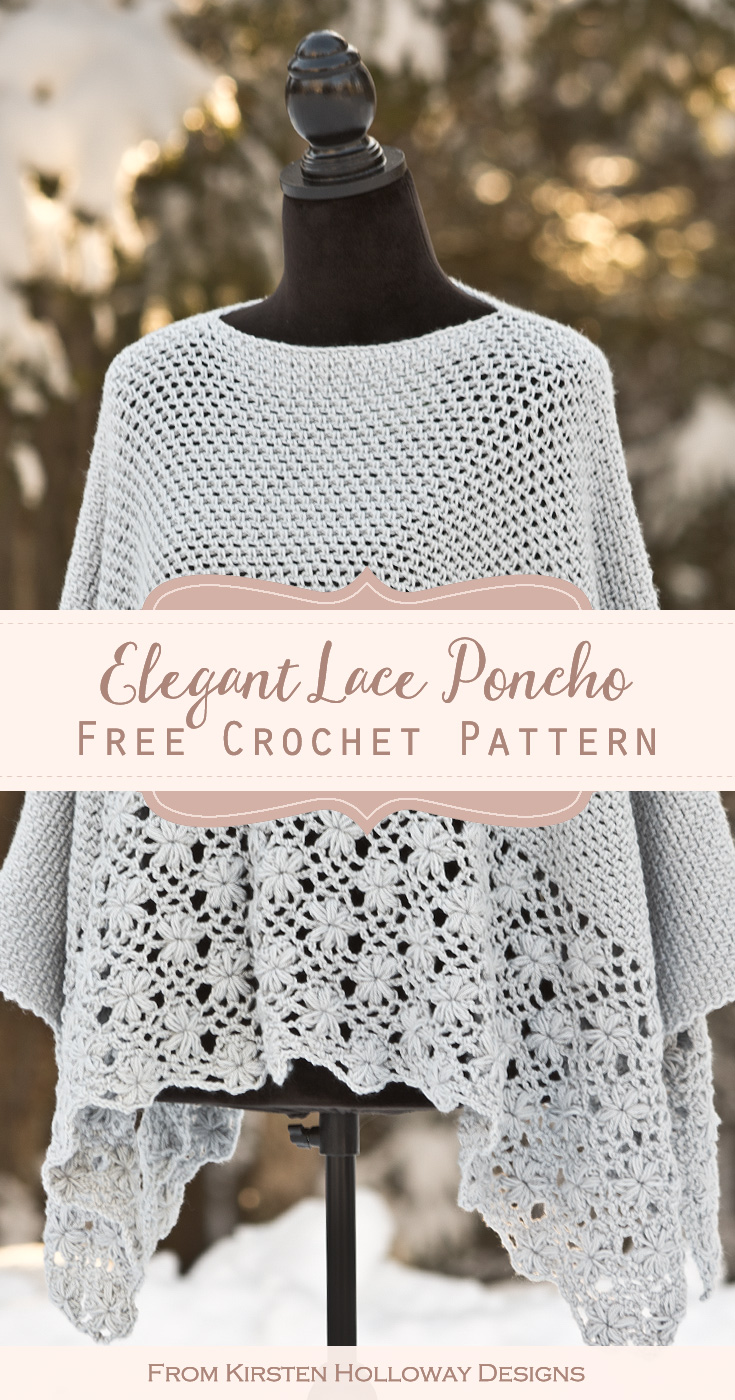
Stylish Crochet Poncho Pattern for Women
Flowy and feminine, this crochet poncho has lovely drape for an effortlessly stylish feel. The bottom part of the Frost Petals poncho mimics the look of those beautiful, flowery ice patterns seen on many surfaces this time of year. It consists of two rectangular sections seamed together at the top, making it one of the simplest garment shapes out there! So if you have never tried to make something to wear, this would be an excellent first garment project.
Click here to add this pattern to your Ravelry queue!
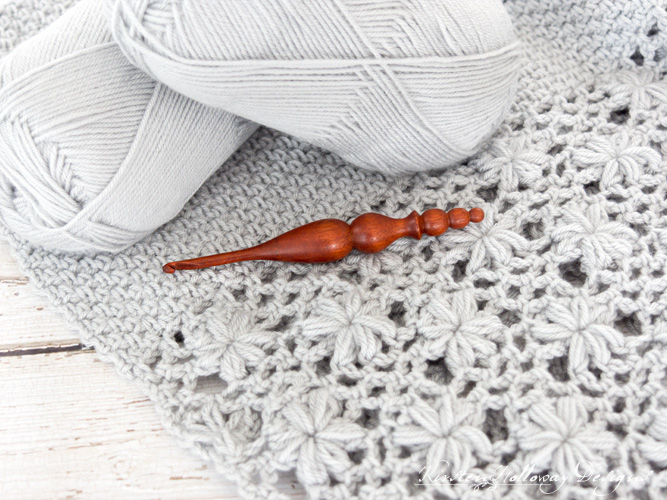
I used an acrylic light weight #3 yarn to create this pattern to give the poncho beautiful drape and flow as you move. A light weight wool or cotton yarn will also work depending on when you plan to wear it. Using a solid color for this crochet project will make the lacy details stand out more, but a long striping variegated or ombre yarn would also be gorgeous!
Beautiful Crochet Lace Details
Speaking of those lacy details, the flower lace section is more complex than the linen stitch at the top of the poncho, but I’ve included a step-by-step picture tutorial at the bottom of the pattern to help you if you get stuck. It is important to maintain relaxed tension to achieve the lacy look in this poncho. If you find you are struggling to make the lace part look light and airy, go up a hook size.

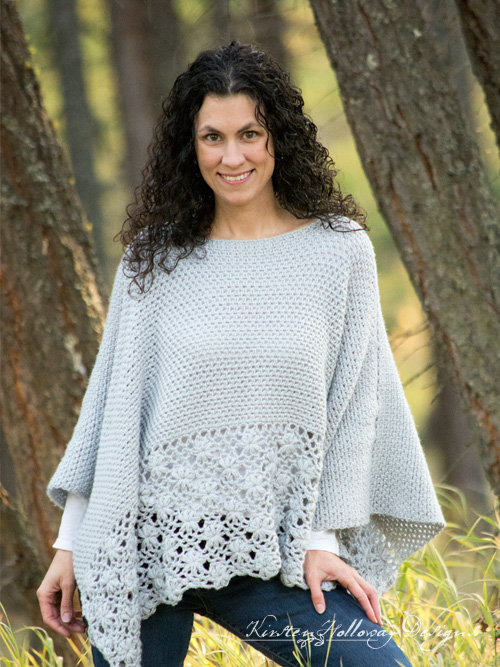
This lace poncho can be worn for any special occasion, and is a stylish addition to your cold-weather wardrobe. It is far from ordinary run-of-the-mill ponchos you may have seen in the past, and I know you are going to love how you look in it!
Disclaimer: This post contains affiliate links. When you purchase something using these links a small amount of the sales price goes to me to help keep this site, and the patterns on it free. You do not pay any extra for the item you purchase.
Materials Needed:
Approximately 1650 (1794, 2549, 3066) yards #3 Premier Everyday Baby yarn in “Fog Grey” for Sm/Med
5.5mm (I) hook, or hook needed to obtain gauge for linen stitch section
5mm (H) hook for flower lace section
Yarn needle
Scissors
Stitches Used:
sl st = slip stitch
ch = chain
sc = single crochet
dc = double crochet
sk = skip
yo = yarn over
st(s) = stitch(es)
sp(s) = space(s)
prev = previous
Special Stitches:
Puff stitch: [yo, draw up a loop] 3 times, you will have 7 loops on your hook, yo, pull through all 7 loops.
3pufftog: [yo, draw up a loop] 3 times across each of the next 3 sc sts, you will have 19 loops on your hook, yo, pull through all 19 loops.
Gauge:
5.5mm hook, using the linen stitch: 19 rows gives 4” of height. There will be 17 sts in 4” across. Since this is a garment, meeting gauge is very important!
Finished Sizes:
Pattern is written for size S/M with sizes L/XL, 2X/3X, 4X/5X in parentheses ( ).
Finished Width: Approximately 46 (50, 54, 58) inches
Finished Depth: Approximately 19 (19, 25, 28) inches
Additional Notes:
–This pattern has also been translated into French. Please scroll to the bottom of the English-lauguage instructions to find it. Ce modèle a été traduit en français. Veuillez faire défiler vers le bas des instructions en anglais pour le trouver.
-Ch-1 at beginning of row does count as a stitch when working linen stitch section.
-Ch-1 at beginning of row does not count as a stitch when working lace section.
-Other turning chains are described in lace section.
-The poncho is made in two rectangular panels which are about half linen stitch and half flower lace. Panels are seamed at the top of the linen section to create the neck opening.
-I intended to have the linen stitch section cover the depth of your bust, followed by the flower lace stopping at your hips. You are free to add or remove rows of either section if you prefer more or less coverage for that area. For example, women with larger busts might need more rows of linen stitch. Women with longer waists might need more flower lace, and short-waisted women might not needed as much lace length.
-This pattern is adjustable! It is written with extended widths by adding enough stitches for one more flower in the lace for each size. I want you to feel like this is your poncho, so have fun with it!
-If you are stuck and can’t figure out the flower lace I have included a step-by-step picture tutorial at the bottom of this pattern.
Frost Petals Poncho Crochet Pattern (US Terms):
OR
Pick up the printable version of this pattern on Etsy instead
Make two panels following these instructions:
Linen Stitch Section:
Using 5.5mm hook,
Ch 196 (210, 226, 240)
Row 1: Sc in second ch from hook, *ch 1, sk st, sc in next st; repeat from * across, ch 1, turn. <196 (210, 226, 240) sts>
Row 2: *Sk sc, sc in ch-1 sp, ch 1; repeat from * across, placing final sc in turning ch of prev row, ch 1, turn.
Rows 3-44 (44, 60, 60): Rep row 2
Once last row is complete continue with the lace section below. At this point, the depth of the linen stitch rows should cover the bust area. If you need more rows, continue in pattern as needed.
Flower Lace Section:
If you get stuck on the lace section you can find a picture tutorial of this stitch at the bottom of the scarf pattern over on this page.
Row 1: sc in first st, *ch 3, sk 2 sts, sc in next st; repeat from * across working final sc in turning ch-1, ch 5 (counts as first dc+ch 2 of next row), turn. <65 (70, 75, 80) ch-3 sps, 66 (71, 76, 81) sc>
Row 2: sc in first ch-3 sp, *ch 3, sc in next ch-3 sp; repeat from * across, when you finish working in final ch-3 sp ch 2, dc in final sc of row, ch 1, turn. <65 (70, 75, 80) sc, 64 (69, 74, 79) ch-3 sps, 2 ch-2 sps and 2 dc>
Row 3: sc in first st, ch 3, sk first ch-sp, sc in next ch-3 sp, ch 3, *[yo, draw up a loop] 3 times across each of the next 3 sc sts, you will have 19 loops on your hook, yo, pull through all 19 loops—this will be referred to as a 3pufftog st from now on, using tight tension ch 1 to close, ch 3, working in the ch-1 you used to close your 3pufftog st [yo, pull up a loop] 2 times, yo, pull through all 5 loops on your hook, ch 1, this will make a 4 petaled flower**, [sc in next ch-3 sp, ch 3] 3 times; repeat from * across, end final repeat at ** and work sc in next ch-3 sp, ch 3, sc in 3rd ch of turning ch, ch 5, turn. <13 (14, 15, 16) 4-petaled flowers>
Row 4: Sc in ch-3 sp, *ch 3, puff in center of 4 petal flower made in prev row, [ch 3, puff in same st] 2 times, this will make a 3-petaled flower, ch 3, sk ch-3 sp immediately following 4 petal flower in prev row, sc in next ch-3 sp**, ch 3, sc in next ch-3 sp; repeat from * across, when you complete the final 3-petaled flower stop at **, ch 2, dc in beg sc (or ch if working row 4-9 repeats) from prev row, ch 1, turn. <13 (14, 15, 16) completed flowers with 3 ch-3 sps between each, (one ch-3 sp, sc, ch-2 sp, dc) at each end>
Row 5: Row 5: Sc in top of dc, ch 3, sk ch-2 sp, sc in ch-3 sp, *ch 3, sc in next ch-3 sp; repeat from * across, working last sc in 3rd ch of turning ch, ch 3, turn. <65 (70, 75, 80) ch-3 sps, 66 (71, 76, 81) sc>
Row 6: [Yo, draw up a loop] 2 times in first sc, [yo, draw up a loop] 3 times in next sc, you will have 11 loops on your hook, yo, pull through all 11 loops, using tight tension ch 1 to close, ch 3, working in the ch-1 you used to close your puff sts [yo, pull up a loop] 2 times, yo, pull through all 5 loops on your hook, ch 1, this will make a 3 petaled flower, [sc in next ch-3 sp, ch 3] 3 times, *3pufftog across next 3 sc sts, using tight tension, ch 1 to close, ch 3, working in the ch-1 you used to close your 3pufftog st [yo, pull up a loop] 2 times, yo, pull through all 5 loops on your hook, ch 1, [sc in next ch-3 sp, ch 3] 3 times; repeat from * across, when you have 2 sc sts left in your row [yo, draw up a loop] 3 times in second to last sc, [yo, draw up a loop] 2 times in final sc, yo and draw through all loops, using tight tension ch 1 to close, ch 1, dc in final sc, ch 3, turn. <half flower on each end, 12 (13, 14, 15) 4-petaled flowers with 3 ch-3 sps between each>
Row 7: [Yo, draw up a loop] 2 times in ch-1 used to close the puff sts, yo, pull through all 5 loops on your hook, ch 3, [yo, draw up a loop] 3 times in same st as before, yo, pull through all 7 loops on your hook, ch 3, sk ch-3 sp, [sc in next ch-3 sp, ch 3] 2 times, *puff in center of 4 petal flower made in prev row, [ch 3, puff in same st] 2 times, ch 3, sk ch-3 sp, [sc in next ch-3 sp, ch 3] 2 times; repeat from * across, when you come to final flower work the following sequence in the ch-1 sp: [Yo, draw up a loop] 2 times, yo, pull through all 5 loops on your hook, ch 1, dc in top of ch-3, ch 1, turn. <half flower on each end, 12 (13, 14, 15) completed flowers with 3 ch-3 sps between each, dc + ch-1 on each end>
Row 8: Sc in first st, ch 3, sc in ch-3 sp, *ch 3, sc in next ch-3 sp; repeat from * across, place final sc in top of ch-3 from prev row, ch 5, turn. <65 (70, 75, 80) ch-3 sps, 66 (71, 76, 81) sc>
Row 9: Sk first ch-3 sp, sc in next ch-3 sp, ch 3, *3pufftog across next 3 sc sts, using tight tension ch 1 to close, ch 3, working in the ch-1 you used to close your 3pufftog st [yo, pull up a loop] 2 times, yo, pull through all 5 loops on your hook, ch 1**, [sc in next ch-3 sp, ch 3] 3 times; repeat from * across, end final repeat at ** then sc in final ch-3 sp, ch 3, sc in final sc of row, ch 5, turn. <13 (14, 15, 16) 4-petaled flowers>
Repeat rows 4-9 until poncho is as long as you want it (I recommend ending it about an inch or two below belly button level). Then rep row 4 one more time.
Fasten off and weave in ends.
Keep scrolling down for the finishing instructions
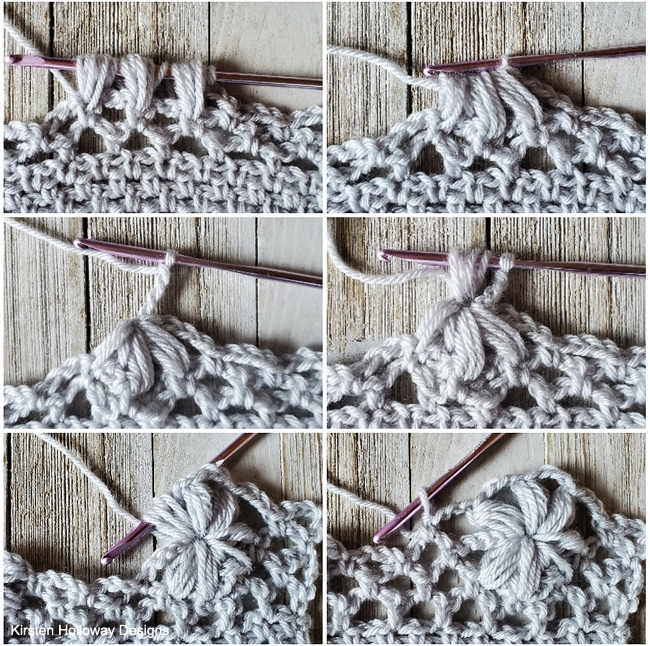
How to crochet the flower lace stitches
If you are having trouble with mastering the flower lace, here is a step-by step picture tutorial that may help you visualize it better. The top and middle panels show how to make the first row of the flower and the bottom two panels show how to make the second row of the flower.:
Lay the panels on top of each other with linen section at the top and flower lace at the bottom. Shoulders will be seamed across the top of the linen stitch side from the outer edge toward the neck opening.
Sew the two panels securely together with a whip stitch, leaving a hole large enough for your head to go through. For S/M size, I stitched about 80 stitches together on each side which left an opening about 9.5” for my head (this poncho has plenty of stretch so you don’t want a huge opening). For larger sizes you might seam 88, 96, 104 sts to keep the head opening the same. To make this your own, perhaps leave the end of your seaming yarn loose to try on after working both shoulders and see if the opening is how you like it. If you prefer, you may use sc to join the panels on the underside of the garment instead.
Fasten off and weave in ends.
I would love to see a picture when you’re done, so please feel free to come by my Facebook group and show off your poncho! Be sure to tag @kirstenhollowaydesigns when you share pictures of your finished poncho on Instagram, and use #FrostPetalsPoncho!
You can also follow me on Facebook, Pinterest, Instagram, and Ravelry for more crochet patterns.
Pattern Terms and Conditions:
You are welcome to share the link to this pattern, using one image of your choice, on your site, but please do not share the written patterns themselves, or use additional images. You do not have permission to use my images by themselves to create pinnable graphics for Pinterest, however they may be included in a roundup pin if there are 4 or more other patterns.
This pattern was made to be used by individuals, and small business crocheters alike. Selling your finished pieces in boutiques, at farmer’s markets, craft shows, and other local events is encouraged! Please credit/link Kirsten Holloway Designs when selling finished products online. The only thing I require is that this pattern not be used commercially to produce hundreds of thousands of copies. Also, if you sell finished items online, please do not use my pictures for your listings. I’m positive that your work is of high enough quality for you to sell the finished piece. Have confidence in your abilities! <3 Thank you!
Sharing a link to this post with your friends is also always appreciated!
Poncho au crochet (French Translation)
French translation graciously provided by MeryCrochet.
Vous aurez besoin de :
- Baby Sport Solids & Marls (Fil de taille moyenne,crochet recommandé n4)
- Pour S/M : 1 pelote et demi
- Pour L/XL : presque 2 pelotes
- Pour 2X/3X : 3 pelotes
- Pour 4X/5X : 3 pelotes
- Crochet 5 mm
- Crochet 5.5 mm
- Aiguille à laine
- Paire de ciseaux
Echantillon :
- Avec le crochet 5.5 mm 17 points granités et 19 rangs = 10 cm à 11 cm approximativement
- Patron du point granité utilisé dans l’échantillon : 20 ml
- Rang 1 : ms dans la 2eme maille en partant du crochet, *1 ml, sautez 1 ml, ms dans la maille qui suit* répétez de *à* sur tout le rang, 1 ml, tournez.
- Rang 2 : *sautez 1 ms, ms dans d’esp de la ml, 1 ml, répétez de * sur tout le rang, dans la dernière maille, 1 ml, tournez.
- Rép rang 2 jusqu’à ce que vous complétez 17 rangs puis mesurez.
Mesures finales :
- Largeur (Approximativement) : 117 (127, 137, 147) cm
- Profondeur : 48 ( 49, 63.5, 71) cm
Point utilisés et abréviations :
- mc = maille coulée
- m. = maille
- ms = maille serrée
- br = bride
- rép = répétez
- esp = espace
Point puff :
- [faites un jeté, et ramenez le fil] 3 fois, vous allez avoir 7 boucles sur le crochet, faites un jeté, puis faites sortir les 7 boucles.
Point 3puff ens :
3 puff ensemble [faites un jeté, ramenez le fil] 3 fois dans chacune des 3 mailles à coté, vous allez avoir 19 boucles sur votre crochet, faites un jeté, puis faites sortir les 19 boucles.
Notes :
- Ce poncho est fait de 2 grands rectangles ,dans lesquels on travaillera presque un demi avec notre point fantaisie et un demi en point dentelle puis on va coudre les épaules .
- Ce design est fait de façon à ce que la partie réalisées au point granités couvre tout le buste et que la dentelle fleurie suit pour s’arrêter aux hanches. Vous etes donc libre d’ajouter ou de retirer des rangs selon la morphologie de votre corps, par exemple : les femmes qui on un tour de poitrine plus grands peuvent avoir besoin de plus de rangs dans la partie buste donc quelques rangs de plus en point granité, pour les femmes par exemple qui ont un tour de taille ou de hanches plus grands peuvent ajouter quelques rangs dans la partie dentelle ou moins si vous avez un tour plus petit, en tout cas le poncho reste modifiable selon vos préférences, ça sera votre poncho réalisé fièrement par vous..amusez-vous donc !
- La 1 ml du début du rang quand on travaille le point granité est comptée comme une maille .
- La 1 ml du début du rang quand on travaille la partie dentelle n’est pas comptée.
1 ere partie en point granité :
- Dans cette partie on va alterner ms et ml, prenez le temps de compter vos mailles dès le début.
- Rappelez vous qu’à partir du 2eme rang on fera 1 ms dans l’esp fait par la 1 ml du rang précédent suivi d’une ml.
- On fera 2 pièces (Devant et Dos)
- Utilisez le crochet 5.5 mm
Patron :
- Commencez par 196 (210, 226, 240)
- R1 : ms dans la 2eme maille en partant du crochet, *1 ml, sautez 1 maille ,ms dans la maille qui suit*, rép ce qui est entre **, sur tout le rg, 1 ml, tournez. [196 (210, 226, 240)]
- R2 : * sautez une m., ms dans l’esp de la ml du rg précédent, 1 ml*, rép ce qui est entre **, 1 ms dans la maille de hauteur du rg précédent, 1 ml, tournez.
- R3- R44 (44, 60, 60) : Rép R2 .
Réalisez le dos et le devant en suivant ces étapes.
2 eme partie : Dentelle Fleurie
Note :
- Cette dentelle sera réalisée en répétant 5 rangs
- Il est important de garder la meme tension surtout dans le point puff afin d’avoir de belles fleurs.
- Il est préférable de garder une tension minime durant toute cette partie pour avoir le meilleur résultat possible .
On utilisera le crochet 5 mm.
Patron :
- R1 : ms dans la première maille, * 3 ml, sautez 2 ms, ms dans la m. qui suit* rép ce qui est entre **, ms dans la toute dernière maille, 5 ml ( comptées comme br+ 2 ml du rg qui suit), tournez. [65 (70, 75, 80) esp 3 ml, 66 (71, 76, 81) ms]
- R2 : ms dans dans le premier esp des 3 ml du rg précédent, *3 ml, ms dans l’esp qui suit*, rép ce qui est entre ** sur tout le rang, quand vous faites la dernière ms dans le dernier esp, faites 2 ml, br dans la dernière ms du rang, 1 ml, tournez [65 (70, 75, 80) ms, 64( 69, 74, 79) esp de 3 ml, 2 esp 2ml et 2 br]
- R3 : ms dans la première maille, 3 ml, sautez le premier esp, ms dans l’esp des 3ml, 3 ml, *[un jeté, ramener le fil pour former une boucle] 3 fois dans chacune des 3 ms suivantes, vous allez avoir 19 boucles sur le crochet, faites un jeté, puis faites sortir toutes ces boucles = 3puff ens. puis faites 1 ml (en serrant un peu ) pour fermer, 3 ml, dans la ml qu’on a fait pour fermer la 3 puff ens faites [1 jeté, ramenez le fil ] 2 fois, 1 jeté, puis faites sortir les 5 boucles que vous avez sur le crochet, 1 ml, ça constituera une fleur à 4 pétales**, [ms dans l’esp des 3ml, 3 ml] 3 fois, rép de * sur tout le rang, à la fin faites ** puis faites une ms dans l’esp 3 ml, 3 ml, ms dans la 3 eme maille de hauteur, 5 ml, tournez. [ 13( 14, 15, 16) Fleurs à 4 pétales]
- R4 : ms dans l’esp des 3 ml, *3 ml, puff dans le centre de la fleurs à 4 pétales réalisée dans le rang précédent, [ 3 ml, puff dans la meme maille] 2 fois, on aura donc une fleur à 3 pétales, 3 ml, sautez l’esp qui suit la fleur à 4 pétales du rg précédent, ms dans l’esp qui suit**, 3 ml, ms dans l’esp qui suit, rép de * sur tout le rg, quand vous faites la dernière fleurs à 3 pétales arrêtez vous à **, 2 ml, br dans dernière maille, 1 ml, tournez. [13 ( 14, 15, 16) fleurs completes avec 3 esp entre elles, (un esp, ms, esp à 2 ml, br) dans chaque extrémité]
- R5 : ms dans la br (en haut), 3 ml, sautez esp ‘ à 2 ml), ms dans l’esp (à 3 ml), *3 ml, ms dans l’esp qui suit* rép ce qui est entre ** sur tout le rang, faites la dernière ms dans la 3 eme maille (en haut des 3 ml), 3 ml, tournez. [65 (70, 75, 80) esp, 66(71, 76, 81) ms]
- R6 : [ un jeté, ramenez le fil pour former une boucle]2 fois dans la première ms, [ un jeté, ramenez le fil pour former une boucle] 3 fois dans la ms qui suit, puis un jeté pour faire sortir les 11 boucles que vous avez sur le crochet, 1 ml pour fermer,
3 ml, dans la ml qu’on a fait pour fermer les 3 puff ens faites [1 jeté, ramenez le fil ] 2 fois, 1 jeté, puis faites sortir les 5 boucles que vous avez sur le crochet, 1 ml, ça constituera une fleur à 3 pétales, [ms dans l’esp des 3ml, 3 ml] 3 fois,* 3 puff ens dans les 3 ms suivantes, 1ml pou fermer, 3 ml, dans la ml qu’on a fait pour fermer les 3 puff ens faites [1 jeté, ramenez le fil ] 2 fois, 1 jeté, puis faites sortir les 5 boucles que vous avez sur le crochet, 1 ml, [ms dans l’esp qui suit, 3 ml] 3 fois, rép de * sur tout le rg, vous aurez à la fin 2 ms restantes [ un jeté, ramener le fil] 3 fois dans la première puis [un jeté, ramenez le fil] 2 fois la 2eme maille, un jeté et faites sortir toutes les boucles sur le crochet, 1 ml ( serrée pour fermer) 1 ml , 1 br dans la maille de hauteur, 3 ml, tournez. [ demi fleur dans chaque extrémités, 12( 13, 14, 15) fleurs à 4 pétales avec 3 esp entre chacune d’elles] - R7 : [ un jeté, ramenez le fil pour former une boucle] 2 fois dans la ml qu’on a fait pour fermer les derniers 3 puff ens, un jeté, faites sortir les 5 boucles, 3 ml,[un jeté, ramenez le fil pour former une boucle] 3 fois dans la meme maille d’avant, un jeté, ramenez le fil à travers les 7 boucles, 3 ml, sautez l’esp,[ ms dans l’esp qui suit, 3 ml] 2 fois, *un point puff au centre de la fleur à 4 pétales du rg précédent, [3 ml, puff dans la meme maille] 2fois, 3 ml, sautez un esp, [ ms dans l’esp, 3 ml] 2 fois, rép de * sur tout le rang, quand vous arrivez à la dernière fleur du rg précédent, travaillez cette séquence dans l’esp fait par la 1 ml du rg précédent : [ un jeté, ramenez le fil pour former une boucle] 2 fois, un jeté, faites sortir les 5 boucles, 1 ml, br en haut des 3 ml, 1 ml, tournez. [ une demi fleur de chaque coté, 12 ( 13,14, 15) fleurs avec 3 esp entre chacune d’elles, br+ 1 ml dans chaque extrémité]
- R8 : ms dans la première maille, 3 ml, ms dans l’esp qui suit, *3 ml, ms dans l’esp qui suit ; rép de * sur tout le rang,ms dans la ml en haut des 3 ml du rg précédent, 5 ml, tournez. [65( 70,75, 80) esp, 66 ( 71, 76, 81) ms}
- R9 : sautez le premier esp, ms dans l’esp qui suit, 3 ml, *3 puff ens dans les 3 ms qui suivent, fermez avec 1 ml, 3 ml,
- dans la ml qu’on a fait pour fermer la 3 puff ens faites [1 jeté, ramenez le fil ] 2 fois, 1 jeté, puis faites sortir les 5 boucles que vous avez sur le crochet, 1 ml**, [ms dans l’esp qui suit, 3 ml] 3 fois , rép de * sur tout le rang, à la fin arrêtez vous à ** puis faites 1 ms dans le dernier esp, 3 ml, ms dans la dernière ms du rang précédent, 5 ml, tournez. [13(14, 15, 16) Fleurs à 4 pétales]
- Répétez les rangs 4 à 9 jusqu’à ce que le poncho atteint la longueur que vous souhaitez ( il est recommandé que ça soit 3 ou 6 cm au dessous du nombril) puis répétez R4 encore une fois , coupez le fil et nettoyez.
- Cousez les épaules ( coté point granité) en laissant une ouverture pour l’encolure (selon vos mesures)
- pour une taille S/M cousez 80 mailles de chaque coté en laissant près de 24 cm ouverte.
- Pour des tailles plus grands cousez 88, 96, 104 mailles pour garder les meme 24 cm pour que la tete puisse entre aisément
N’oubliez pas que vous pouvez également fermer les cotés pour former un haut stylé aussi !


