I am constantly being asked what the magic ring (or magic circle) is in crochet, or how do you make a crochet magic circle?, so I decided to put together an easy step-by-step picture tutorial to teach you how to crochet the magic ring (also called the magic circle, or magic loop)! This method is perfect for beginning round crochet projects such as hats, afghan squares, or cushions. I especially like using the magic ring method because because it doesn’t leave an unsightly hole at the top of the hat/center of the project. And, if you weave the tail in the way I suggest at the end of the tutorial it is just as secure as the double magic circle method.
The crochet magic circle (or magic ring) is started in the same way you make a slip-knot, but you won’t be pulling it tight. Let’s get started on the tutorial, and I’ll show you what I mean!
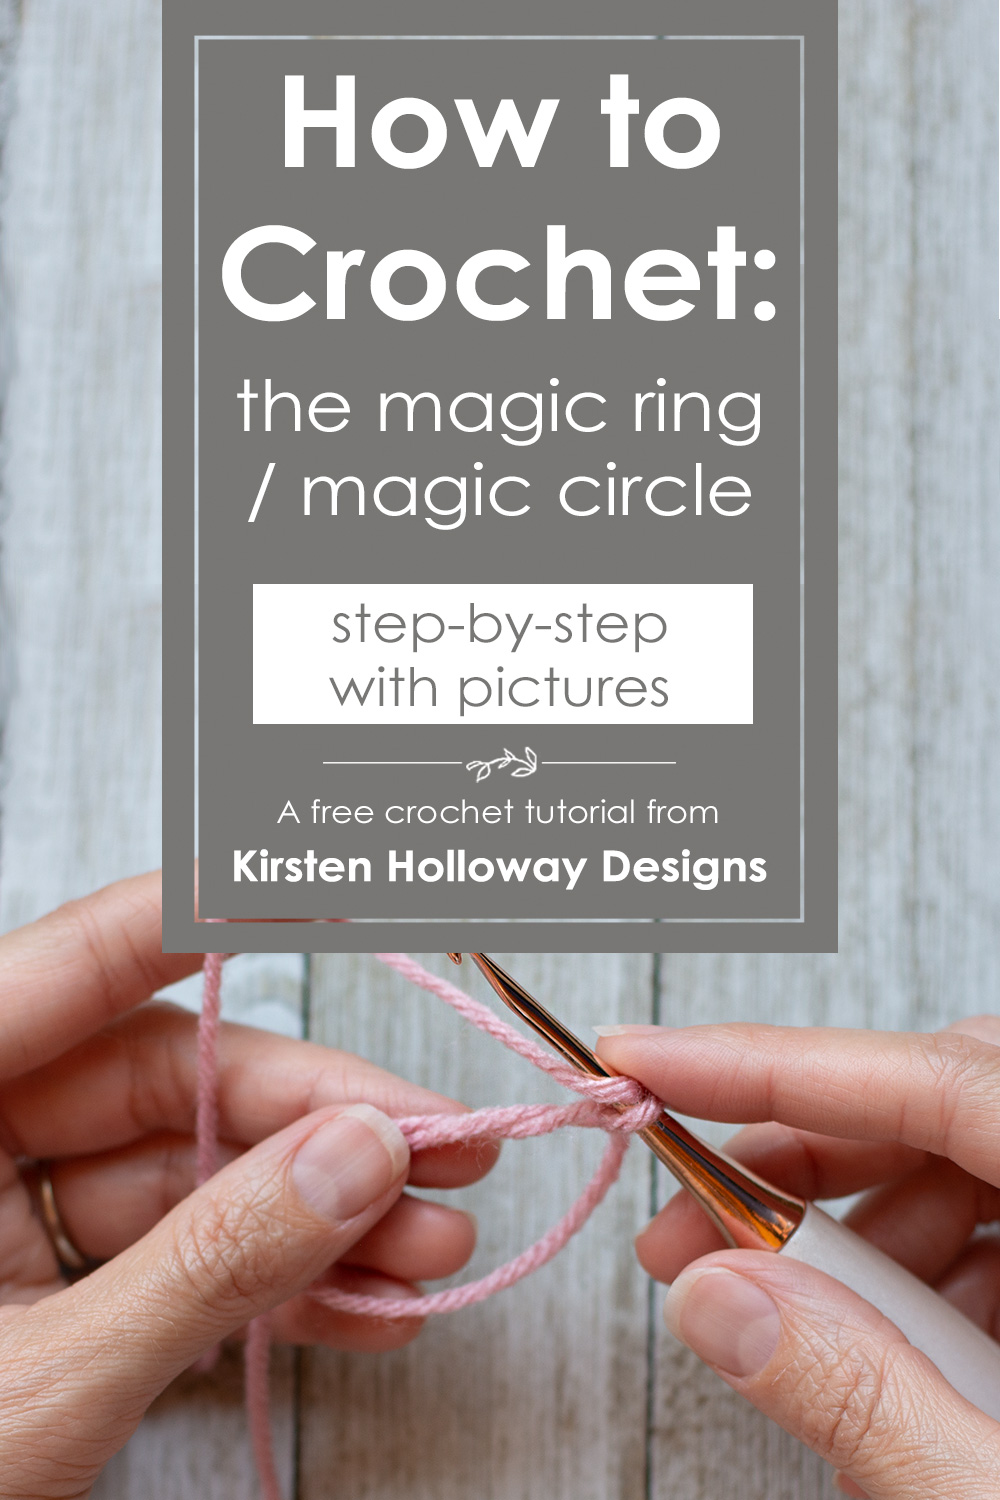
How to Crochet the Magic Ring (Magic Circle) | Step-by-step Tutorial
For this crochet tutorial I am using:
Watch a video of the steps here, or scroll through the tutorial below, instead.
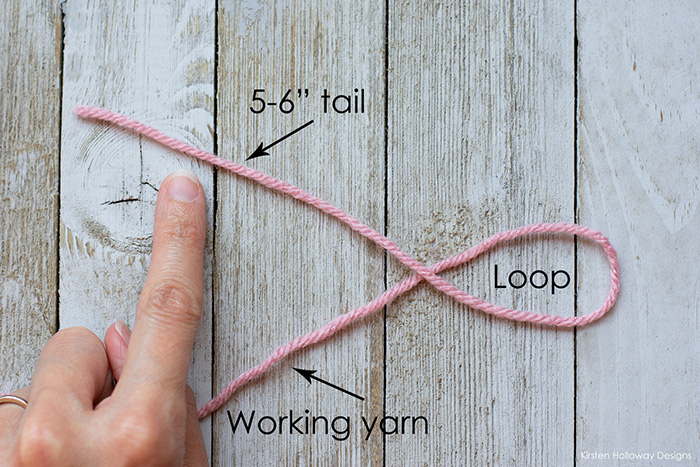
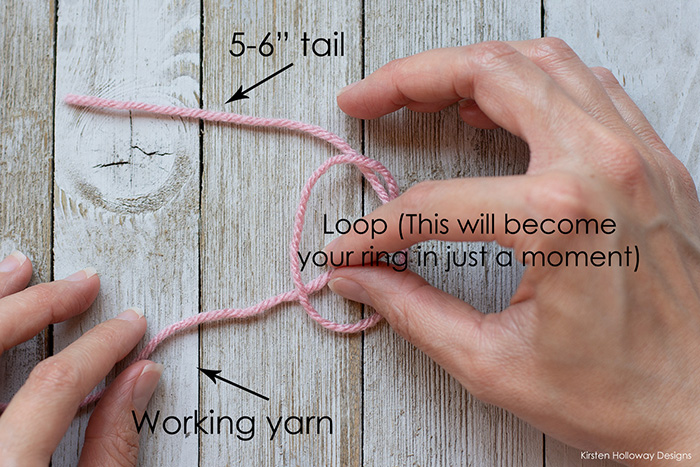
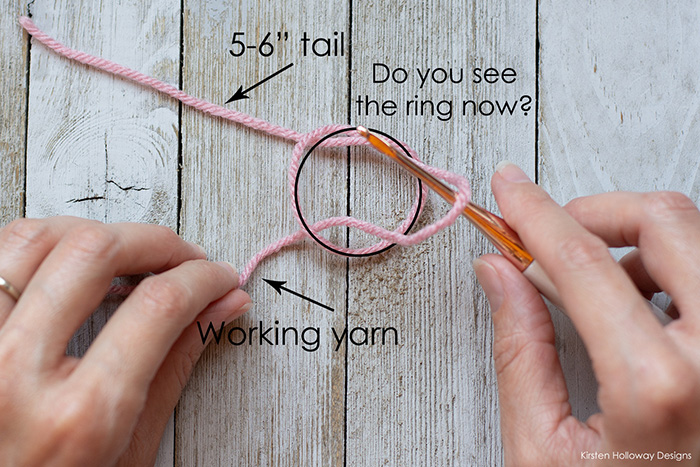
Step 1: To begin with, lay your yarn on a flat surface and create a loop as illustrated in the picture. It is important to leave 5-6″ for the tail (if you are using a bulky/chunky yarn you will want to leave even more). You will be weaving this tail in around the very center of your ring after you finish your first round so the circle does not come undone.
Step 2: Put your thumb and forefinger in through the loop:

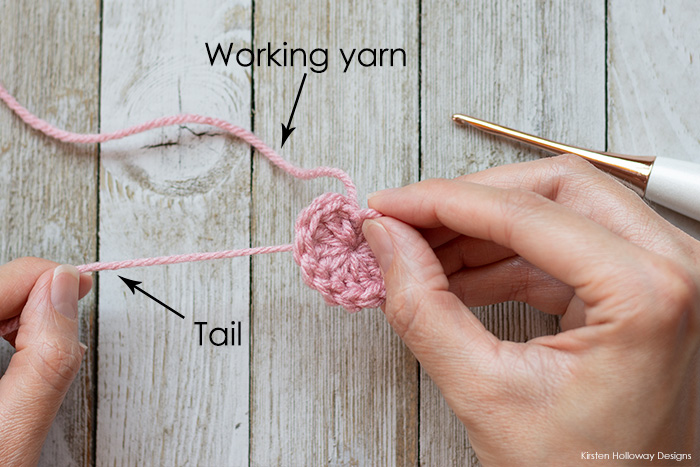
Then twist, and grab your working yarn through the center of the loop (do not grab the tail accidentally!):
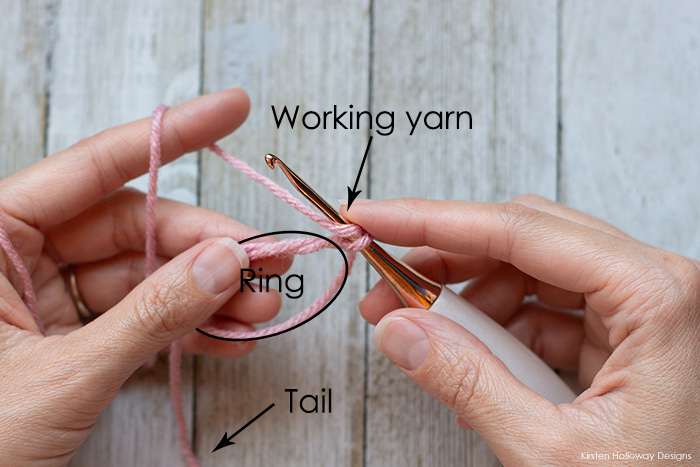
Step 3: Pull the yarn through the center of the loop (this . You can either use your fingers or a hook. Make sure you do not cinch it down all the way, however!
I have drawn a ring on the next few images to show you what part of the yarn you’ll be working stitches into a little later on and to hopefully make the tutorial clearer and easier to understand.
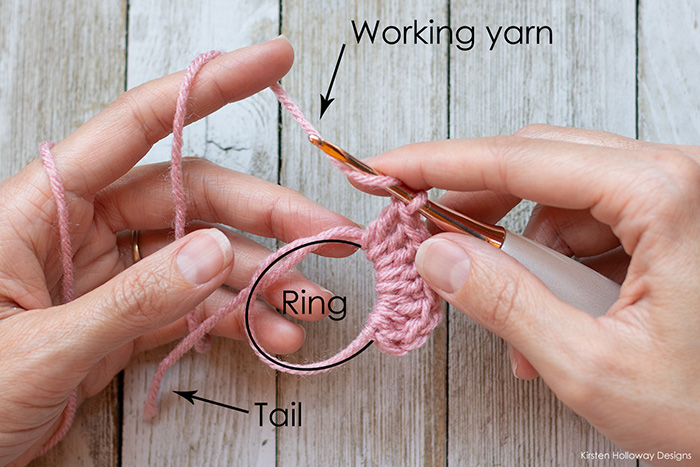
Step 4: You should now have a ring that you can start working your stitches into. I chain 1 to begin, then work around the ring:
After a crocheting a few stitches around the ring you should have something that looks like this:
Step 5: When you finish working the required number of stitches, join to your first stitch with a slip stitch. Pull the ring tight by tugging on the tail (but DO NOT CLIP IT).
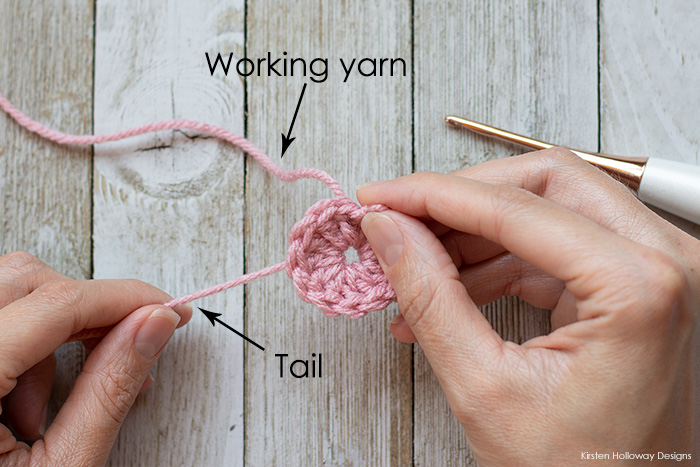
Again, DO NOT CUT THE TAIL when you are done. This will cause your piece to come undone and you will lose all that hard work. Instead, weave the whole tail in AROUND THE VERY CENTER of the ring. This will make the beginning of your piece secure.
And that’s it! Running through it a few more times will help solidify the instructions in your mind, but I also suggest that you bookmark this page so you can have it as a handy reference for your next project that’s crocheted in the round. You can also watch this picture tutorial in video format on my YouTube channel.
All of my top-down hats are crocheted using this technique and I love how there is no hole at the top of the hat when I’m done. Check out my free hat patterns over here if you need something cozy for your head (or the head of a family member)!
As you continue to practice and develop your abilities your crochet will take on a whole new dimension! After you master the magic ring/magic circle why not check out my tutorial for how to crochet in the 3rd loop of a hdc stitch (hint: it’s different from the back loop or front loop). It gives nice texture to just about any project!
Thank you so much for stopping by! If you found this guide helpful please consider sharing a link with your friends. Together we help each other. 💕