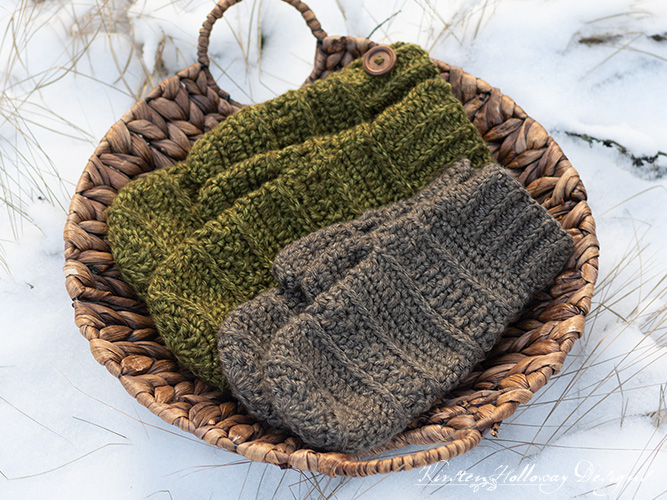
These textured mittens for men are cozy and warm. The free crochet pattern comes in 2 sizes and even women should be able to wear the smaller size with some adjustments. Find the free crochet pattern instructions below, or purchase a print-optimized, ad-free PDF by clicking here.
Click here to add this pattern to your Ravelry queue!
I designed these warm winter mittens to fit my husband’s size XL hands, but I have included some notes for modifying the length just a little if your husband or boyfriend’s hands aren’t quite so big. There are a lot of notes in this crochet pattern to provide you with ways of adjusting these mittens to fit more than just the 2 hand sizes listed. Please read through all of the notes before beginning the pattern and BE SURE to check your gauge.
Make it a set with the Wanderlust beanie or the Wanderlust scarf (also comes in a cowl)
For this crochet mitten pattern I used Lion Brand Heartland yarn. It’s one of my favorite yarns because I love the slight variation in hue and the softness of anything crocheted with it. This yarn is a thinner than some worsted weight yarns like Red Heart Super Saver, and is much thinner than Caron One Pound. You’ll want to keep this in mind if you decide to substitute because your mittens may turn out a different size than they are supposed to if you don’t!

Disclaimer: This post contains affiliate links. When you purchase something using these links a small percentage of the sales price goes to me. However, you do not pay any extra for the item you purchase.
Difficulty:
Intermediate
Materials Needed:
190-240 yards #4 worsted weight Lion Brand Heartland yarn in Joshua Tree or Mammoth Cave
4mm (G) hook, or hook needed to obtain gauge
Yarn needle
Scissors
2 7/8″ wooden buttons per pair of mittens (optional)
Stitch markers (optional)
Stitches used:
sl st = slip stitch
sc = single crochet
hdc = half double crochet
dc = double crochet
sc2tog = single crochet 2 together
dc2tog = double crochet 2 together
FPdc = front post double crochet
BPsc = back post double crochet
rsc = reverse single crochet (crab stitch)
Additional Terms:
hdc in the 3rd loop = Look at the top of the stitch, and locate the sideways “V”, bend the stitch to look at the back, and you should see another “V”. You’ll be working into the back loop of that “V”, this is called the 3rd loop.
st/sts = stitch/stitches
prev =previous
Gauge:
7 dc or hdc in 2″
Measurements:
L/XL: 10 1/2″ tall x 4 3/4″ wide across fingers
S/M: 9 1/2″ tall x 4″ wide across fingers
Additional Notes:
-ch-1 at beginning of round does not count as a stitch.
-These mittens come in 2 sizes: XL- Men’s, and Women’s Large (which should fit most young teen boys). To shorten your mitten just a little bit replace hdc rounds with sc and work in the back bump of the sc instead of the 3rd loop of the hdc. To increase size try going up to a 4.5mm hook.
-LionBrand Heartland is a light worsted weight yarn. Unless your tension is very tight, if you use a thicker yarn, be warned: you may very well end up with mittens that will fit a giant–or you’ll need to add a lining to make them fit properly.
-If you want a simple FPsc/BPsc ribbed wrist band it is possible to move into crocheting that as soon as you have finished the decrease rounds on both sizes of mittens. Stitch count will be the same as your last decrease round.
Wanderlust Mittens Pattern (US Terms):
Click here to purchase an ad-free, print-optimized PDF of this pattern on LoveCrafts
OR
Pick up the printable version of this pattern on Etsy instead
Right-hand mitten – Large/X-Large:
Round 1: 12 dc in magic circle, join with sl st to first dc. (12)
Round 2: ch 1, dc in first st, FPdc around same st, *dc in next st,FPdc around same st; repeat from * around, join with sl st to first dc. Note: Each stitch should have a regular dc worked in the top, and a FPdc worked around it. (24)
Round 3: ch 1, 2 hdc in first st, hdc in next st *2 hdc in next st, hdc in next st; repeat from * around, join with sl st to first hdc. (36)
Round 4: ch 1, working in 3rd loop of hdc, dc in each st around, join with sl st to first dc. (36)
Round 5: ch 1, sc in each st around, join with sl st to first sc. (36)
Round 6: ch 1, dc in each st around, join with sl st to first dc. (36)
Round 7: ch 1, hdc in each st around, join with sl st to first hdc. (36)
Round 8: ch 1, working in 3rd loop of hdc, sc in each st around, join with sl st to first sc. (36)
Round 9: ch 1, FPdc around first st, BPdc around next st *FPdc around next st, BPdc around the next st; repeat from * around, join with sl st to first FPdc. (36)
You will be alternating here and working FP stitches around the BP stitches from the previous round, and vice-versa. This is intentional.
Round 10: ch 1, BPdc around first FPdc, FPdc around next BPdc *BPdc around next FPdc, FPdc around next BPdc; repeat from * around, join with sl st to first BPdc. (36)
Round 11: ch 1, hdc in each st around, join with sl st to first hdc. (36)
Round 12: ch 1, working in 3rd loop of hdc, dc in each st around, join with sl st to first dc. (36)
Round 13: ch 1, sc in each st around, join with sl st to first sc. (36)
Round 14: ch 1, dc in each st around, join with sl st to first dc. (36)
Round 15: ch 1, hdc in each st around, join with sl st to first hdc. (36)
Round 16: ch 1, working in 3rd loop of hdc, sc in each st around, join with sl st to first sc. (36)
In this next round you will create the thumb hole. It is important that you maintain very relaxed tension when chaining the space for the thumb to go.
Round 17: ch 1, FPdc around first st, BPdc around next st *FPdc around next st, BPdc around the next st; repeat from * until there are 6 sts left in the round, ch 10, sk 6 sts, join with sl st to first FPdc. (15 FPdc, 15 BPdc, 1 ch-10 sp)
Round 18: ch 1, BPdc around first FPdc, FPdc around next BPdc *BPdc around next FPdc, FPdc around next BPdc; repeat from * until you get to ch-10 sp, dc in each of the next 10 chains, join with sl st to first BPdc. (15 FPdc, 15 BPdc, 10 dc)
Round 19: ch 1, hdc in each st around, join with sl st to first hdc. (40)
Round 20: ch 1, working in 3rd loop of hdc, *dc2tog, dc in next 8 sts; repeat from * around, join with sl st to first dc2tog. (36)
Round 21: ch 1, *sc2tog, sc in next 7 sts; repeat from * around, join with sl st to first sc. (32)
Round 22: ch 1, dc in each st around, join with sl st to first dc. (32)
Round 23: ch 1, hdc in each st around, join with sl st to first hdc. (32)
Fasten off, weave in ends.

Left-hand Mitten – Large/X-Large:
Round 1: 12 dc in magic circle, join with sl st to first dc. (12)
Round 2: ch 1, dc in first st, FPdc around same st, *dc in next st, FPdc around same st; repeat from * around, join with sl st to first dc. Note: Each stitch should have a regular dc worked in the top, and a FPdc worked around it. (24)
Round 3: ch 1, 2 hdc in first st, hdc in next st *2 hdc in next st, hdc in next st; repeat from * around, join with sl st to first hdc. (36)
Round 4: ch 1, working in 3rd loop of hdc, dc in each st around, join with sl st to first dc. (36)
Round 5: ch 1, sc in each st around, join with sl st to first sc. (36)
Round 6: ch 1, dc in each st around, join with sl st to first dc. (36)
Round 7: ch 1, hdc in each st around, join with sl st to first hdc. (36)
Round 8: ch 1, working in 3rd loop of hdc, sc in each st around, join with sl st to first sc. (36)
Round 9: ch 1, FPdc around first st, BPdc around next st *FPdc around next st, BPdc around the next st; repeat from * around, join with sl st to first FPdc. (36)
You will be alternating here and working FP stitches around the BP stitches from the previous round, and vice-versa. This is intentional.
Round 10: ch 1, BPdc around first FPdc, FPdc around next BPdc *BPdc around next FPdc, FPdc around next BPdc; repeat from * around, join with sl st to first BPdc. (36)
Round 11: ch 1, hdc in each st around, join with sl st to first hdc. (36)
Round 12: ch 1, working in 3rd loop of hdc, dc in each st around, join with sl st to first dc. (36)
Round 13: ch 1, sc in each st around, join with sl st to first sc. (36)
Round 14: ch 1, dc in each st around, join with sl st to first dc. (36)
Round 15: ch 1, hdc in each st around, join with sl st to first hdc. (36)
Round 16: ch 1, working in 3rd loop of hdc, sc in each st around, join with sl st to first sc. (36)
In this next round you will create the thumb hole. It is important that you maintain very relaxed tension when chaining the space for the thumb to go. When skipping 5 sts at the beginning of the round the stitch you join in is not counted in this number. Skip 5 sts beyond the join.
Round 17: ch 11, sk 5 sts, *FPdc around next st, BPdc around next st; repeat from * around, join with sl st to 2nd ch. (15 FPdc, 15 BPdc, 1 ch-11 sp)
Round 18: ch 1, dc in same st as join, dc each of the next 9 chains, *BPdc around next FPdc, FPdc around next BPdc; repeat from * around, join with sl st to first dc. (15 FPdc, 15 BPdc, 10 dc)
Round 19: ch 1, hdc in each st around, join with sl st to first hdc. (40)
Round 20: ch 1, working in 3rd loop of hdc, *dc2tog, dc in next 8 sts; repeat from * around, join with sl st to first dc2tog. (36)
Round 21: ch 1, *sc2tog, sc in next 7 sts; repeat from * around, join with sl st to first sc2tog. (32)
Round 22: ch 1, dc in each st around, join with sl st to first dc. (32)
Round 23: ch 1, hdc in each st around, join with sl st to first hdc. (32)
Fasten off, weave in ends.
Thumb (both mittens):
You will now be working around the thumb hole in this next round. In order to reduce the gap for cold air to enter I have written a dc2tog at both sides of the thumb hole opening. You will work the first leg near the top of the stitch and the second leg near the bottom of the stitch. The right and left-hand mittens have a different round 1, but the rest of the thumb will be the same. The first stitch of the round can be made using a chainless starting method.
Round 1 Left-hand Mitten: With cuff end facing down and mitten end facing up, attach yarn to top of thumb hole, alternate FPdc, and BPdc around next 10 sts, dc2tog in side of opening, alternate FPdc, and BPdc around next 6 sts, dc2tog in side of opening, join with sl st to first FPdc. (18)
Round 1 Right-hand Mitten: With cuff end facing down and mitten end facing up, attach yarn to bottom of thumb hole, alternate FPdc, and BPdc around next 6 sts, dc2tog in side of opening, alternate FPdc, and BPdc around next 10 sts, dc2tog in side of opening, join with sl st to first FPdc. (18)
Round 2: ch 1, hdc in each st around, join with sl st to first hdc. (18)
Round 3: ch 1, working in 3rd loop of hdc, *dc2tog, dc in next 7 sts; repeat from *, join with sl st to first dc2tog. (16)
Round 4: ch 1, sc in each st around, join with sl st to first sc. (16)
Round 5: ch 1, *dc2tog, dc in next 6 sts; repeat from *, join with sl st to first dc2tog. (14)
Round 6: ch 1, sc in each st around, join with sl st to first sc. (14)
Round 7: ch 1, dc in each st around, join with sl st to first dc. (14)
Round 8: ch 1, sc2tog around, join with sl st to first sc2tog. (7)
Fasten off leaving 8” tail for sewing end of thumb closed.
Sew end of thumb closed with 8″ tail.
Fasten off securely and weave in ends.
Wrist Band (both mittens):
There are 2 options for your wrist band. You can either make a solid ribbed band, or you can make one with a button closure. The solid band will be warmer, but the button makes it easier to get the mitten on and off without stretching the band. See notes for proper positioning of the button.
Solid ribbed band (make 2):
Leaving 8” tail,
Row 1: ch 11, hdc in 2nd ch from hook, hdc in each st across. (10)
Rows 2-24: ch 1, turn, working in 3rd loop of hdc from prev row, hdc in each st across. (10)
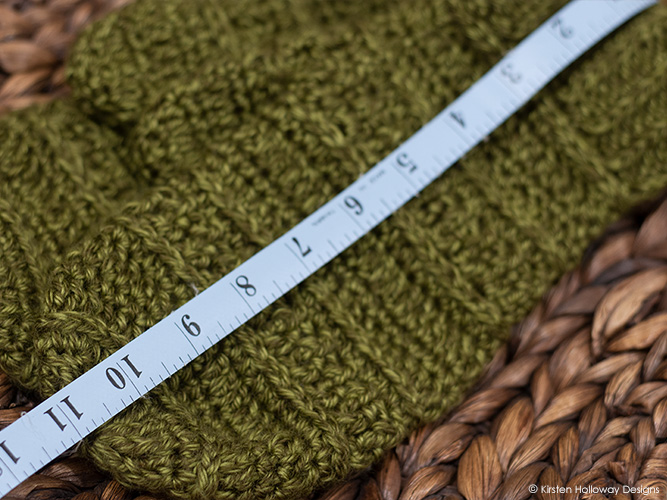
The band should measure about 8” long by approximately 2 1/4″ wide and wrap comfortably around your wrist.
Sew ends of band together with 8” tail.
With 15” length of yarn, sew cuff to 3rd loop of hdc in round 23 of mitten.
Band with button closure (make 2):
Leaving 8″ tail,
Row 1: ch 11, hdc in 2nd ch from hook, hdc in each st across. (10)
Rows 2-26: ch 1, turn, working in 3rd loop of hdc from prev row, hdc in each st across. (10)
Your band should measure about 9” long and wrap around the wrist leaving a small amount of overlap. If you wish to have more overlap repeat row 2 a couple more times.
Continue with adding the button loop:
Button loop row: rsc in next 5 sts, ch 10 (you can use tight tension here), rsc in next 5 sts.
Fasten off, weave in end.
Sew button to end of band with 8” tail.
Position button cuff so that the button sits on the wrist joint just above the thumb. This positioning aims to reduce the chances of the button getting in the way of activities.
Here’s a tip to help you position your button: Hold your hand out and point away from your body. The button should sit just at your wrist joint. The loop should come from the back of your hand and fasten over the button toward the palm. Repeat this exercise for the other mitten. Remember to take into account that the band will be sewn on differently for each hand!
With 15” length of yarn, sew cuff to 3rd loop of hdc in round 23 of mitten. You will have a small amount of the band left over if you have done this correctly. This will provide some coverage under the button to keep your wrist warmer.
Fasten off, weave in all ends.
Men’s Small/Medium Mitten Pattern:
This size will also fit most younger teens and some women with large hands. If you need the circumference of the L/XL pattern but not the length see the notes on how you can adjust this pattern to fit:

Right-hand Mitten – Small/Medium:
Round 1: 12 dc in magic circle, join with sl st to first dc. (12)
Round 2: ch 1, dc in first st, FPdc around same st, *dc in next st, FPdc around same st; repeat from * around, join with sl st to first dc. Note: Each stitch should have a regular dc worked in the top, and a FPdc worked around it. (24)
If you need the shorter length of this mitten but need the circumference of the larger mitten you may increase to 40 sts in the next round (take a look at round 3 of the L/XL size). Maintain that stitch count throughout the mitten until you come to the decreases, then follow the decreases in round 20 and 21 of the L/XL mittens. You will be working different stitches in this pattern, but the decrease frequency will be the same.
Round 3: ch 1, 2 hdc in first st, hdc in next 2 sts, *2 hdc in next st, hdc in next 2 sts; repeat from * around, join with sl st to first hdc. (32)
Round 4: ch 1, working in 3rd loop of hdc, dc in each st around, join with sl st to first dc. (32)
Round 5: ch 1, sc in each st around, join with sl st to first sc. (32)
Round 6: ch 1, dc in each st around, join with sl st to first dc. (32)
Round 7: ch 1, hdc in each st around, join with sl st to first hdc. (32)
Round 8: ch 1, working in 3rd loop of hdc, sc in each st around, join with sl st to first sc. (32)
Round 9: ch 1, FPdc around first st, BPdc around next st *FPdc around next st, BPdc around the next st; repeat from * around, join with sl st to first FPdc. (32)
You will be alternating here and working FP stitches around the BP stitches from the previous round, and vice-versa. This is intentional.
Round 10: ch 1, BPdc around first FPdc, FPdc around next BPdc *BPdc around next FPdc, FPdc around next BPdc; repeat from * around, join with sl st to first BPdc. (32)
Round 11: ch 1, hdc in each st around, join with sl st to first hdc. (32)
Round 12: ch 1, working in 3rd loop of hdc, dc in each st around, join with sl st to first dc. (32)
Round 13: ch 1, sc in each st around, join with sl st to first sc. (32)
Round 14: ch 1, dc in each st around, join with sl st to first dc. (32)
Round 15: ch 1, hdc in next 27 sts, ch 9, sk 5 sts, join with sl st to first hdc. (27 hdc, 1 ch-9 sp)
Round 16: ch 1, working in 3rd loop of hdc, sc in next 27 sts, when you get to ch-9 sp, work sc in back bump of each ch, join with sl st to first sc. Note: when we go to create the thumb hole we will work those stitches into the back bump or bar of the sc stitch. It will be hard to find because of the FP/BP sts that will be worked around them in the next round. You may wish to place stitch markers now so you can find them when you make the thumb. (36)
Round 17: ch 1, FPdc around first st, BPdc around next st *FPdc around next st, BPdc around the next st; repeat from * around, join with sl st to first FPdc. (18 FPdc, 18 BPdc)
Round 18: ch 1, BPdc around first FPdc, FPdc around next BPdc *BPdc around next FPdc, FPdc around next BPdc; repeat from * around, join with sl st to first BPdc. (36)
If you increased to 40, at round 3 follow the decrease pattern found in round 20 and 21 of the L/XL mittens for round 19 and round 21. Your final stitch count will be 32 instead of 28. Then follow the wrist band instructions for the L/Xl size.
Round 19: ch 1, *hdc2tog, hdc in next 7 sts; repeat from * around, join with sl st to first hdc2tog. (32)
Round 20: ch 1, working in 3rd loop of hdc, dc in each st around, join with sl st to first dc. (32)
Round 21: ch 1, *sc2tog, sc in next 6 sts; repeat from * around, join with sl st to first sc. (28)
Fasten off, and weave in ends.
We’ll crochet wrist bands for each mitten after we complete the left-hand mitten below:
Left-hand Mitten – Small/Medium:
Round 1: 12 dc in magic circle, join with sl st to first dc. (12)
Round 2: ch 1, dc in first st, FPdc around same st, *dc in next st, FPdc around same st; repeat from * around, join with sl st to first dc. Note: Each stitch should have a regular dc worked in the top, and a FPdc worked around it. (24)
If you need the shorter length of this mitten but need the circumference of the larger mitten you may increase to 40 sts in the next round (take a look at round 3 of the L/XL size). Maintain that stitch count throughout the mitten until you come to the decreases, then follow the decreases in round 20 and 21 of the L/XL mittens. You will be working different stitches in this pattern, but the decrease frequency will be the same.
Round 3: ch 1, 2 hdc in first st, hdc in next 2 sts, *2 hdc in next st, hdc in next 2 sts; repeat from * around, join with sl st to first hdc. (32)
Round 4: ch 1, working in 3rd loop of hdc, dc in each st around, join with sl st to first dc. (32)
Round 5: ch 1, sc in each st around, join with sl st to first sc. (32)
Round 6: ch 1, dc in each st around, join with sl st to first dc. (32)
Round 7: ch 1, hdc in each st around, join with sl st to first hdc. (32)
Round 8: ch 1, working in 3rd loop of hdc, sc in each st around, join with sl st to first sc. (32)
Round 9: ch 1, FPdc around first st, BPdc around next st *FPdc around next st, BPdc around the next st; repeat from * around, join with sl st to first FPdc. (32)
You will be alternating here and working FP stitches around the BP stitches from the previous round, and vice-versa. This is intentional.
Round 10: ch 1, BPdc around first FPdc, FPdc around next BPdc *BPdc around next FPdc, FPdc around next BPdc; repeat from * around, join with sl st to first BPdc. (32)
Round 11: ch 1, hdc in each st around, join with sl st to first hdc. (32)
Round 12: ch 1, working in 3rd loop of hdc, dc in each st around, join with sl st to first dc. (32)
Round 13: ch 1, sc in each st around, join with sl st to first sc. (32)
Round 14: ch 1, dc in each st around, join with sl st to first dc. (32)
Round 15: ch 1, ch 9, sk 5 sts, hdc in next 27 sts, join with sl st to first ch. (27 hdc, 1 ch-9 sp)
Round 16: ch 1, working in back bump of ch, sc in same st as join, sc in back bump of next 8 chains, working in 3rd loop of hdc, sc in next 27 sts, Note: that first stitch after the chain is easy to miss so watch for it! Join with sl st to first sc. (36)
Round 17: ch 1, FPdc around first st, BPdc around next st *FPdc around next st, BPdc around the next st; repeat from * around, join with sl st to first BPdc. (18 FPdc, 18 BPdc)
Round 18: ch 1, BPdc around first FPdc, FPdc around next BPdc *BPdc around next FPdc, FPdc around next BPdc; repeat from * around, join with sl st to first BPdc. (36)
If you increased to 40, at round 3 follow the decrease pattern found in round 20 and 21 of the L/XL mittens for round 19 and round 21. Your final stitch count will be 32 instead of 28. Then follow the wrist band instructions for the L/Xl size.
Round 19: ch 1, *hdc2tog, hdc in next 7 sts; repeat from * around, join with sl st to first hdc2tog. (32)
Round 20: ch 1, working in 3rd loop of hdc, dc in each st around, join with sl st to first dc. (32)
Round 21: ch 1, *sc2tog, sc in next 6 sts; repeat from * around, join with sl st to first sc. (28)
Fasten off, and weave in ends.
Thumb (both mittens):
For the right-hand mitten you will start working along the bottom opening of the thumb hole. For the left-hand mitten you will start working along the top opening of the thumb hole. The first stitch of the round can be made using a chainless starting method.
Round 1 for right-hand mitten: sc along the 5 sts at the bottom of the thumb hole, sc in side of hdc, working in back bump of sc, sc in next 9 sts, join with sl st to first sc. (16)
Round 1 for left-hand mitten: sc in side of hdc, working in back bump of sc, sc in next 9 sts, sc along 5 sts at bottom of thumb hole Note: 1 of these 5 sts may be worked into a stitch with another stitch in it- the important thing is that your stitches are even and that you have 16 total, join with sl st to first sc. (16)
Round 2: ch 1, dc in each st around, join with sl st to first dc. (16)
Rounds 3: ch 1, sc2tog, sc in next 6 sts, sc2tog, sc in next 6 sts, join with sl st to first sc2tog. (14)
Round 4: ch 1, dc in each st around, join with sl st to first dc. (14)
Round 5: ch 1, sc2tog, sc in next 5 sts, sc2tog sc in next 5 sts. (12)
Round 6: ch 1, dc in each st around, join with sl st to first dc. (12)
Round 7: ch 1, sc2tog around. (6)
Fasten off leaving 6” tail for sewing thumb hole shut.
Fasten off securely and weave in ends.
Wrist Band (both mittens):
There are 2 options for your wrist band. You can either make a solid ribbed band, or you can make one with a button closure. The solid band will be warmer, but the button makes it easier to get the mitten on and off without stretching the band. See notes for proper positioning of the button.
Solid ribbed band (make 2):
Leaving 8” tail,
Row 1: ch 9, hdc in 2nd ch from hook, hdc in each st across. (8)
Rows 2-22: ch 1, turn, working in 3rd loop of hdc from prev row, hdc in each st across. (10)
Sew ends of band together with 8” tail.
The band should measure about 7” long by approximately 2 1/4″ wide and wrap comfortably around your wrist.
With 15” length of yarn, sew cuff to round 21 of mitten.
Fasten off, weave in all ends.
Band with button closure (make 2):
Leaving 8″ tail,
Row 1: ch 9, hdc in 2nd ch from hook, hdc in each st across. (8)
Rows 2-24: ch 1, turn, working in 3rd loop of hdc from prev row, hdc in each st across. (8)
Your band should measure about 8” long and wrap around the wrist leaving a small amount of overlap. If you wish to have more overlap repeat row 2 a couple more times.
Continue with adding the button loop:
Button loop row: rsc in next 4 sts, ch 10 (you can use tight tension here), rsc in next 4 sts.
Fasten off, weave in end.
Sew button to end of band with 8” tail.
Position button cuff so that the button sits on the wrist joint just above the thumb. This positioning aims to reduce the chances of the button getting in the way of activities.
Here’s a tip to help you position your button: Hold your hand out and point away from your body. The button should sit just at your wrist joint. The loop should come from the back of your hand and fasten over the button toward the palm. Repeat this exercise for the other mitten. Remember to take into account that the band will be sewn on differently for each hand!
With 15” length of yarn, sew cuff to round 21 of mitten. You will have a small amount of the band left over if you have done this correctly. This will provide some coverage under the button to keep your wrist warmer.
Fasten off, weave in all ends.
Want more gorgeous crochet patterns, and a little encouragement for your day? Sign up for my newsletter here! That way you’ll never miss out on special events, or freebies I’m offering.
JOIN ME ON SOCIAL MEDIA
I would love to see a picture when you’re done, so please feel free to come by my Facebook group and show off your finished project! Be sure to tag @kirstenhollowaydesigns when you share pictures of your project on Instagram!
You can also follow me on Facebook, Pinterest, Instagram, and Ravelry for more beautiful crochet patterns.
PATTERN TERMS AND CONDITIONS:
You are welcome to share the link to this pattern, using one image of your choice, on your site, but please do not share the written patterns themselves, this includes my Ravelry downloads or translations of these patterns, or use additional images. You do not have permission to use my images by themselves to create pinnable graphics for Pinterest, however they may be included in a roundup pin if there are 4 or more other patterns. If you sell finished items online, please do not use my pictures for your listings. I’m positive that your work is of high enough quality for you to sell the finished piece. Have confidence in your abilities! <3 Thank you!
This pattern was made to be used by individuals and small business crocheters alike. Selling your finished pieces in boutiques, at farmer’s markets, craft shows, and other local events is encouraged! Please credit/link Kirsten Holloway Designs when selling finished products online. The only thing I require is that this pattern not be used commercially to produce hundreds of thousands of copies. If you enjoyed this pattern or found it useful, why not share a link to this post with your friends?


These are beautiful! Is there any chance you will be releasing the pattern in child and toddler size as well? I just started the wanderlust hat for my 3 year old and I also successfully tweaked the pattern for a newborn size hat a few months ago, I would really love to make matching mittens for them too! Thank you for the lovely patterns!
Katie,
If you want to get tiny sized mittens you could try using a #3 yarn and smaller hook (maybe a 3.25mm or even smaller) and following the small/medium size. 🙂 Best of luck!
What is the difference between the right and left hand? They seem the same up till the round with the chain, and for some reason it is looking weird on my left hand one, I was wondering if I could just make two “right” handed ones
Hi Layla,
The difference between the two is that the thumb holes will be on different sides of the mitten towards the back. Trying to make 2 of one hand would make for an awkward fit. You are welcome to apply to join my Facebook group and share pictures of your progress there. Sometimes it’s easier to answer questions when there’s a picture to go along with it. 😊
I’m having trouble with round 15/16 on the left hand small/medium mitten. I followed the instructions but I end up with 35 stitches at the end of the round.
You should be making a thumb hole in round 15, so you will create a chain and skip some stitches to allow for a thumb hole. In round 16 you should end up with 36 stitches so if you are only getting 35 you may have skipped a chain stitch accidentally. You should be able to add an extra stitch in the final chain in the round if you can’t find the stitch you skipped.
Hello! Beautiful pattern- I’ve just started and having some trouble in round8/9 of the body of the mitten. I completed round 8- sc in back loop only. Round 9 says FPdc/BPdc but I don’t really see a visible post from round 8??? Am I missing something?
That round is a bit of a tight squeeze. Work the post stitches around the top part of the sc stitch just below the sideways “V” on the top. 😊
Ok. Thank you. I think maybe my stitches were a bit too tight!
You’re welcome! 🙂
Thanks
You’re welcome! Enjoy the mitten pattern!
Many thanks to your generosity.
You’re welcome! I hope you enjoy crocheting the mittens!