Here we are at the final part of this crochet-a-long! I hope this has been an enjoyable experience for you. It’s definitely been fun for me!
This section will cover the earflaps, ties, and pom-pom creation. If earflaps aren’t your thing you’re welcome to add a simple ribbing of 2 or 3 rounds of FPhdc in the first stitch, followed by a BPhdc in the next (round 1), or hdc in the next stitch (in rounds 2 and 3).
One important thing to note about the earflaps: I suggest counting over certain number of stitches before starting the second earflap. This is only a suggestion. If you want your ear flaps closer together in the back, then go ahead and do that. For positioning earflaps on hats I’m personally going to wear, I put the hat on (with the first ear flap complete), position the hat and earflap where I want it over my ear, then figure out on the other side where the second earflap should go, and put a stitch marker in at the spot where I want it to start/end, then work it accordingly.
Because most of this section is worked in single crochet (which everyone should be familiar with), I’ve not included pictures of the earflaps or ties being worked. Scroll to the bottom of the page for a picture tutorial on how to make a pom-pom with a pom-pom maker, if you have never done this before and would like some help.
Once you are done, please consider sharing pictures of your finished projects on Ravelry. I’d love to see them all!
Size 3-6 months (use 3.75mm (F) hook), or 6-9 months (use 4mm (G) hook):
First earflap:
From the end of round 15, move straight into making the first earflap
Row 1: ch 1, sc in next 10 stitches, ch 1, turn
Rows 2-3: sc in each stitch across, ch 1, turn (10)
Row 4: sc2tog, sc in next 6 stitches, sc2tog, ch 1, turn (8)
Row 5: sc in each stitch across, ch 1, turn (8)
Row 6: sc2tog, sc in next 4 stitches, sc2tog, ch 1, turn (6)
Row 7: sc2tog, hdc in next 2 stitches, sc2tog (4)
Fasten off, and weave in ends.
Second earflap:
Count over 20 stitches from other earflap, attach yarn
Row 1: ch 1, sc in next 10 stitches, ch 1, turn (10)
Rows 2-3: sc in each stitch across, ch 1, turn (10)
Row 4: turn, sc2tog, sc in next 6 stitches, sc2tog, ch 1, turn (8)
Row 5: sc in each stitch across, ch 1, turn (8)
Row 6: sc2tog, sc in next 4 stitches, sc2tog, ch 1, turn (6)
Row 7: sc2tog, hdc in next 2 stitches, sc2tog (4)
sc around the edge of the earflaps, and hat.
Fasten off, and weave in ends.
(See bottom of page for ties and pom-pom instructions)
Sizes 9-12 months (use 3.75mm F hook), and Toddler (use 4mm G hook):
First earflap:
From the end of round 17, move straight into making the first earflap
Row 1: ch 1, sc in next 10 stitches, ch 1 turn, (10)
Rows 2-4: sc in each stitch across, ch 1 turn, (10)
Row 5: sc2tog, sc in next 6 stitches, sc2tog, ch 1 turn, (8)
Row 6: sc in each stitch across, ch 1 turn, (8)
Row 7: turn, sc2tog, sc in next 4 stitches, sc2tog, ch 1 turn, (6)
Row 8: turn, sc in each stitch across, ch 1 turn, (6)
Row 9: sc2tog, hdc in next 2 stitches, sc2tog (4)
Fasten off, and weave in ends.
Second earflap:|
Count over 22 stitches from other earflap, attach yarn,
Row 1: ch 1, sc in next 10 stitches, ch 1 turn, (10)
Rows 2-4: sc in each stitch across, ch 1 turn, (10)
Row 5: sc2tog, sc in next 6 stitches, sc2tog, ch 1 turn, (8)
Row 6: sc in each stitch across, ch 1 turn, ch 1 turn, (8)
Row 7: sc2tog, sc in next 4 stitches, sc2tog, ch 1 turn, (6)
Row 8: sc in each stitch across, ch 1 turn, (6)
Row 9: ch 1, turn, sc2tog, hdc in next 2 stitches, sc2tog (4)
sc around the edge of the earflaps, and hat.
Fasten off, and weave in ends.
(See bottom of page for ties and pom-pom instructions)
Child size (use 4mm G hook):
First earflap:
From the end of round 20, move straight into making the first earflap
Row 1: ch 1, sc in next 11 stitches
Rows 2-4: ch 1 turn, sc in each stitch across (11)
Row 5: ch 1, turn, sc2tog, sc in next 7 stitches, sc2tog (9)
Row 6: ch 1, turn, sc in each stitch across (9)
Row 7: ch 1, turn, sc2tog, sc in next 5 stitches, sc2tog (7)
Row 8: ch 1, turn, sc in each stitch across (7)
Row 7: ch 1, turn, sc2tog, dc in next 3 stitches, sc2tog (5)
Fasten off, and weave in ends.
Count 24 stitches over from other earflap and attach yarn.
Row 1: ch 1, sc in next 11 stitches
Rows 2-4: ch 1 turn, sc in each stitch across (11)
Row 5: ch 1, turn, sc2tog, sc in next 7 stitches, sc2tog (9)
Row 6: ch 1, turn, sc in each stitch across (9)
Row 7: ch 1, turn, sc2tog, sc in next 5 stitches, sc2tog (7)
Row 8: ch 1, turn, sc in each stitch across (7)
Row 7: ch 1, turn, sc2tog, dc in next 3 stitches, sc2tog (5)
sc around the edge of the earflaps, and hat.
Fasten off, and weave in ends.
(See bottom of page for ties and pom-pom instructions)
Adult size (use 4mm G hook):
First earflap:
From the end of round 21, move straight into making the first earflap
Row 1: ch 1, sc in next 12 stitches, ch 1, turn (12)
Rows 2-4: sc in each stitch across, ch 1, turn (12)
Row 5: sc2tog, sc in next 8 stitches, sc2tog, ch 1, turn (10)
Row 6: sc in each stitch across, ch 1, turn (10)
Row 7: sc2tog, sc in next 6 stitches, sc2tog, ch1, turn (8)
Row 8: sc in each stitch across, turn (8)
Row 9: sc2tog, sc in next 4 stitches, sc2tog, ch 1, turn (6)
Row 10: sc in each stitch across, ch 1, turn (6)
Row 11: sc2tog, dc in next 2 stitches, sc2tog (4)
Fasten off, and weave in ends.
Count 27 stitches over from other earflap, and attach yarn.
Row 1: ch 1, sc in next 12 stitches, ch 1,turn (12)
Rows 2-4: sc in each stitch across, ch 1, turn (12)
Row 5: sc2tog, sc in next 8 stitches, sc2tog, ch 1, turn (10)
Row 6: sc in each stitch across, ch 1, turn (10)
Row 7: sc2tog, sc in next 6 stitches, sc2tog, ch 1, turn (8)
Row 8: sc in each stitch across, ch 1, turn (8)
Row 9: sc2tog, sc in next 4 stitches, sc2tog, ch 1, turn (6)
Row 10: sc in each stitch across, ch 1, turn (6)
Row 11: sc2tog, dc in next 2 stitches, sc2tog (4)
sc around the edge of the earflaps, and hat.
Fasten off, and weave in ends.
(See bottom of page for ties and pom-pom instructions)
Finishing for all hats:
Option 1:
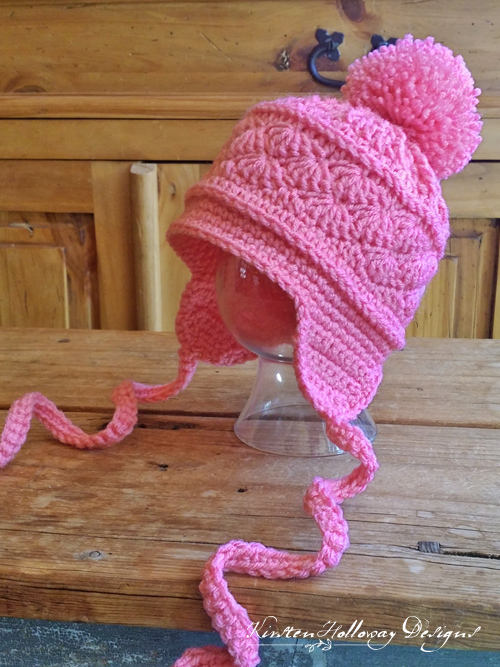
Make a pom-pom, and attach securely to the top of the hat. You may use a pom-pom maker, a cardboard circle, toilet paper roll, or your own hand to wind the yarn around in this step. You Tube has some excellent videos on ways of making a pom-pom that don’t require you to own a pom-pom maker.
Option 2:
Ties/Braids:
Attach yarn to bottom of earflap, stitch a chain as long as you want the ties to be, and sc in 2nd chain from hook, and in each stitch across. Attach securely to bottom of earflap I square knot the ends, then weave them back and forth a couple of times to weave in the ends so they don’t come out. The hat pictured has ties that are 50 chains long, and measure just a tiny bit over 12″ long.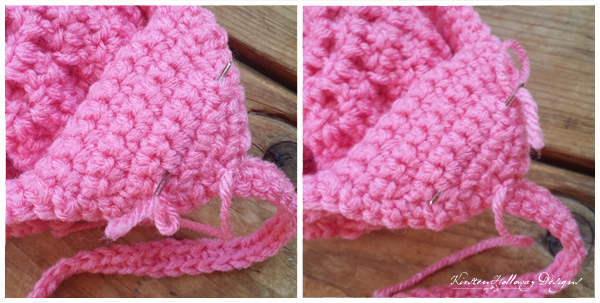
Or,
Cut 9, 2 ft lengths of yarn for each tie, thread them through the bottom of the earflaps, and braid. Fasten off with a piece of yarn wound around the bottom section of the braid.
You could also make 2 smaller pom-poms and tie those securely on–one to each earflap.
—————————————————————
How to Make a Pom-Pom for Your Hat
If you do own a pom-pom maker, or have purchased one for the purpose of this CAL, and don’t know how to use it, here’s how. Scroll down for the faux fur pom-pom tutorial:
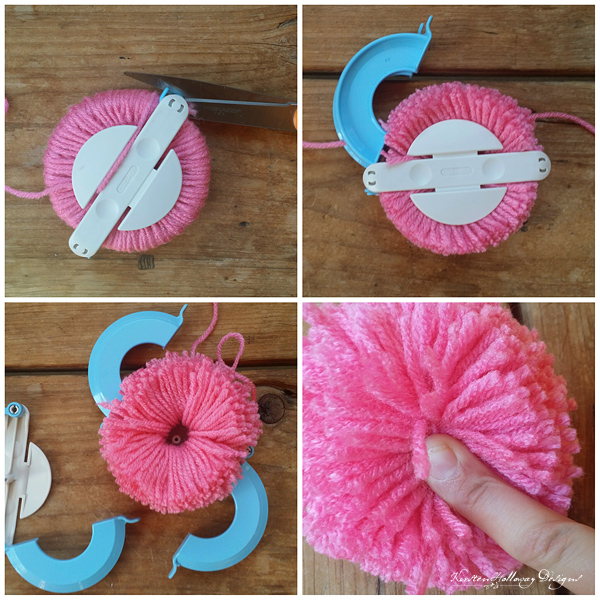
Open the tabbed ends so that your pom-pom maker looks a bit like an “S”. Begin wrapping yarn around one of the curves. Wrap it back and forth several times. I do between 5 and 7 layers (The picture at the top right shows you one wrap). Once you’ve wrapped your yarn around the top, move to the bottom and do the same thing. You should end up with what looks a little like a big yarn doughnut (yum).

Starting near the tabs, insert your scissors in the space between the two sides, and snip along the wrapped yarn. Once you are all the way around it should like the picture on the top right. Run a string around the entire pom-pom between the two parts (where you just cut), and tie it once just to hold it while you take the pom-pom maker apart. Carefully separate the two sides. You don’t want to lose any strings from the middle! While it is in this position, cinch the tie shut a little tighter, then call for a child to lend their finger (kind of like wrapping presents, right?) and have them press on the knot while you snug it further and finish the knot. If you lack a child you can call on, you can use your own finger to hold it, and try to get the tension as snug as you can without breaking the yarn. I tie a square knot so hopefully it won’t come apart as easily.
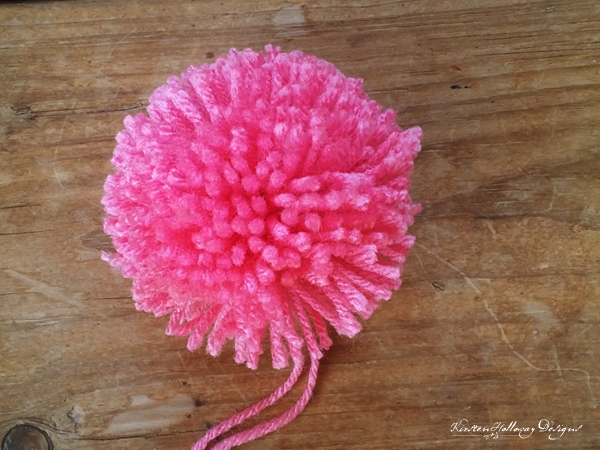
Give it a little trim to even up the edges since it will probably be a bit shaggy coming off the pom-pom maker. This is before the trim.
Faux Fur Pom-Pom Tutorial:
Faux Fur Pom-Pom Tutorial:
Materials Needed:
- ¼ yd Fashion Faux Fox Fur Fabric -Silver
Heavy-duty button thread
Sharp, heavy duty sewing needle
Golf-ball sized piece of polyester stuffing
Size 4 snaps for pom-pom
Assembling your faux fur pom-pom:
- Trace a circle around a small bowl or cup using a marker, on the back side of the faux fur fabric. Try a circle 5″ across for the adult and children’s hat sizes, and try a 4″ circle for the toddler and baby sizes.
- Cut out the circle. Only cut the fabric backing–not the fur itself! I recommend an XACT-O or similar craft knife.
- With your needle and heavy-duty button thread, sew a loose running stitch all the way around near the edge of the circle.
- Take a small, golf-ball-sized amount of polyester stuffing and put it in the middle of the circle.
- Tug on the ends of the thread to cinch the circle into a ball. It should be snug so the fiber fill doesn’t come out.
- Tie off securely, and then sew one part of the snap over the tiny hole that is left. Make sure it is the right part, facing the right direction or you’ll have to sew it on again!
- Sew the other end of the snap over the very top of your hat where you cinched it shut.
Want to make this hat again, or look back at the previous sections for any other reason? Here they are!
You can also find the pattern in its entirety, here.
Want more gorgeous crochet patterns, and a little encouragement for your day? Sign up for my newsletter here! That way you’ll never miss out on special events, or freebies I’m offering.
JOIN ME ON SOCIAL MEDIA
I would love to see a picture when you’re done, so please feel free to come by my Facebook group and show off your finished project! Be sure to tag @kirstenhollowaydesigns when you share pictures of your project on Instagram!
You can also follow me on Facebook, Pinterest, Instagram, and Ravelry for more beautiful crochet patterns.
PATTERN TERMS AND CONDITIONS:
You are welcome to share the link to this pattern, using one image of your choice, on your site, but please do not share the written patterns themselves, this includes my Ravelry downloads or translations of these patterns, or use additional images. You do not have permission to use my images by themselves to create pinnable graphics for Pinterest, however they may be included in a roundup pin if there are 4 or more other patterns. If you sell finished items online, please do not use my pictures for your listings. I’m positive that your work is of high enough quality for you to sell the finished piece. Have confidence in your abilities! <3 Thank you!
This pattern was made to be used by individuals and small business crocheters alike. Selling your finished pieces in boutiques, at farmer’s markets, craft shows, and other local events is encouraged! Please credit/link Kirsten Holloway Designs when selling finished products online. The only thing I require is that this pattern not be used commercially to produce hundreds of thousands of copies. If you enjoyed this pattern or found it useful, why not share a link to this post with your friends?