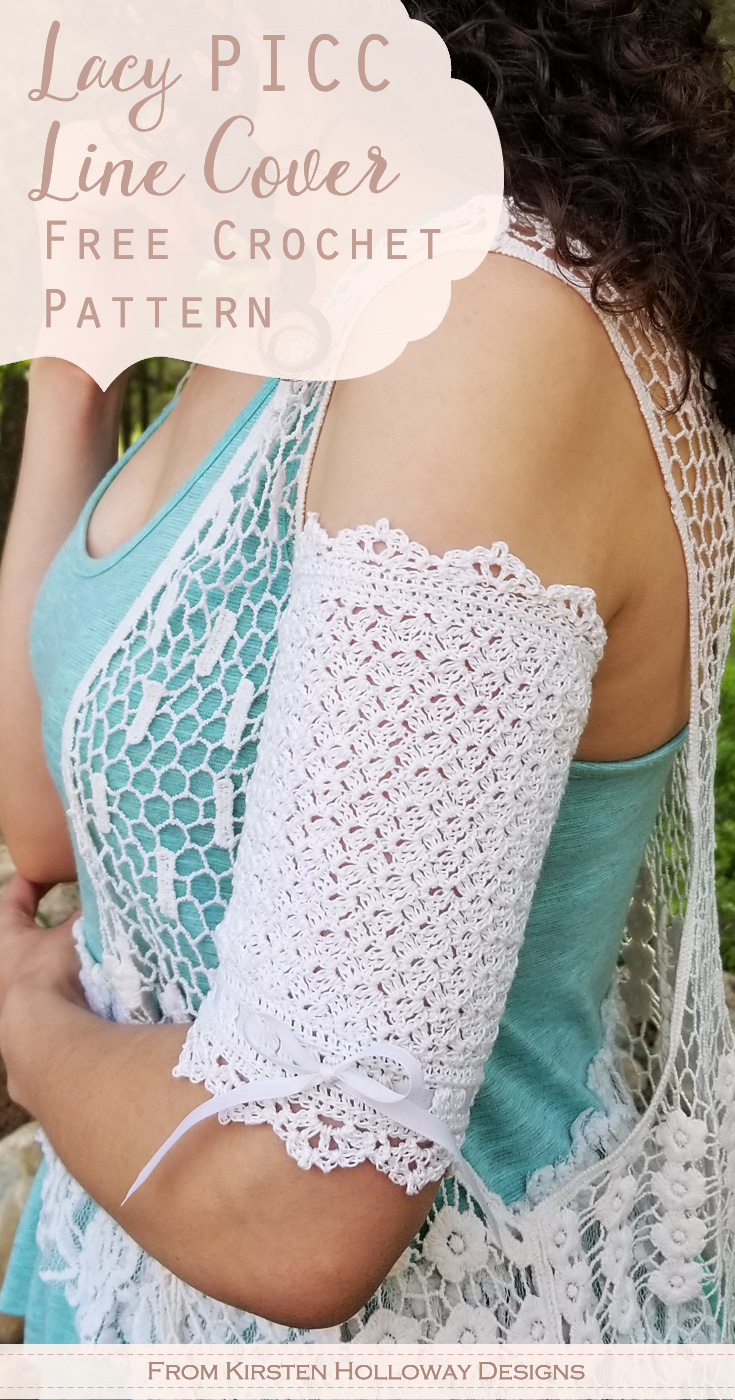
Use this written tutorial to crochet a beautiful lace PICC line cover for women undergoing IV treatments or chemotherapy. This free sleeve pattern is a protective and stylish alternative to traditional bandages. Make it with #10 cotton crochet thread for easy washing and care.
Click here to add this to your Ravelry queue!
If you plan to make this PICC cover to donate to a cancer center, or to someone who’s going through IV treatment, use coupon code “caring” to get the printable PDF pattern for free. You’re on your honor to make this happen.
One of the reasons I started designing was because I wanted to provide more beautiful patterns to those who craft for good causes. The Wrapped in Lace PICC Line Cover speaks specifically to that goal. An estimated 650,000 people receive chemotherapy treatment each year, in addition to those who require IV therapy for other illnesses like Cystic Fibrosis, Lyme Disease, and it doesn’t take a genius to know that that’s a lot of people in need. I’m sure at least a few of these individuals are ladies who would appreciate having a pretty PICC cover to go over their IV port. <3
This PICC cover pattern calls for #10 cotton crochet thread so it can easily washed in cold water, making it not only pretty, but convenient for the person receiving it. Since cancer, or other forms of IV therapy know no age limits, this PICC line cover can be adjusted for all ages and sizes. You will need the person’s upper arm measurements before starting this piece, but I have included some averages, should you plan to make these to donate to charity organizations. If you’re wanting to make this for babies, try using #20 or #30 thread, and a smaller hook.
This is an intermediate to advanced level pattern because of the need to figure out how to evenly space the edging stitches in multiples of 12 without making the cover edging wider than the body. I strongly recommend reading all the notes before beginning this pattern.
Disclaimer: This post contains affiliate links. When you purchase something using these links a small amount of the sales price goes to me to help keep this site, and the patterns on it free. You do not pay any extra for the item you purchase.
Difficulty:
Intermediate/Advanced
Materials Needed:
1.5mm steel hook, or hook needed to obtain gauge
150-200 yards Aunt Lydia’s #10 crochet thread in the color of your choice
scissors
yarn needle
(Optional) 1 yard ¼” ribbon
Stitches Used:
sl st = slip stitch
ch= chain
sc = single crochet
hdc = half double crochet
dc = double crochet
Additional Terms:
3-dc cluster: dc 3 together in the same stitch
hdc in the 3rd loop: work all stitches for the round in the 3rd loop of the hdc from previous round. Instructions: Look at the top of the stitch, and locate the sideways “V”, bend the stitch to look at the back, and you should see another “V”. You’ll be working into the back loop of that “V”, this is called the 3rd loop.
st/sts = stitch/stitches
sp/sps = space/spaces
Gauge:
For the main part or “body” of the cover: 4 rows give 1″ of height.
The piece should be 5″ wide before adding edging.
For the edging: 24 stitches to 3”.
Measurements:
Adult size is 7.5” tall, circumference will vary. Here are some average upper arm measurements for adults:
X-Small: 9”-11” around
Small: 11”-13” around
Medium: 13”-15” around
Large: 15”-17” around
X-Large: 17”-19” around
Additional Notes:
-ch-2 at beginning of new row counts as first dc in the body section. This keeps the edges relatively straight, which should be helpful when you go to crochet the edging.
-The bottom edging uses a ch-space instead of a ch-3 to make this part a little wider/more open. It is possible to use a ch-3 space on the bottom, the same as you did on the top edging. It’s only a minor difference.
-Feel free to block the finished edging, it should look nice either way.
-Edging stitch count is worked in multiples of 12. You must stick to this multiple or the lace won’t come out right. I recommend sticking with the lowest multiple of 12 that will not cinch the body in; putting a higher multiple in will make the edging flare out, and the cover won’t stay in place as well. See additional notes in pattern.
-A thin strip of 1/4″ elastic around the top and bottom of the pic cover sewn on under the lace edging may help this PICC cover to stay in place more securely.
Wrapped in Lace PICC Line Cover (US Terms):
Click here to purchase an ad-free, print-optimized PDF of this pattern on LoveCrafts
Body:
Row 1: Leaving a 18″ tail, ch 47 for adult, 35 for child, 23 for younger child/toddler, (dc, ch 2, sc) in 3rd ch from hook, *sk 3 sts, (2 dc, ch 2, sc) in next st; repeat from * across, ch 2 (counts as first dc of next row), turn.
Row 2: working in first ch-2 space, (dc, ch 2,sc), *move to next ch-2 space, (2 dc, ch 2, sc); repeat from * across, ch 2 (counts as first dc of next row), turn.
Repeat row 2 until the piece is long enough to wrap around the arm of the person you are making this for, then move to the edging.
Top Edging (worked in multiples of 12):
Round 1: ch 1, sc evenly along edge in multiples of 12. My upper arm is 10″ around (x-small adult size), and I put 72 stitches around the edge, join with sl st to first sc.
Round 2: ch 1, hdc in each st around, join with sl st to first hdc (stitch count should be the same as prev round).
Round 3: ch 1, working in 3rd loop of hdc, hdc in each st around, join with sl st to first hdc. (stitch count should be the same as prev round)
Round 4: *ch 3, sk 2 sts, sl st in next st; repeat from * around. (mine had 24 ch-3 sps)
Round 5: sl st into first ch-3 sp, ([dc, ch 1] 4 times, dc), sl st into next ch-3 sp, ch 3, *sl st into next ch-3 sp, ([dc, ch 1] 4 times, dc), sl st into next ch-3 sp, ch 3; repeat from * around, join to first sl st with sl st. (my cover had 8 shells)
The following round will add the pretty lacy bits over the shells you made in the previous round. These look especially pretty when blocked.
Round 6: sl st into first dc, ch 3, sl st into ch-1 sp, ch 3, sl st into next ch-1 sp, ch 3, sl st into same ch-1 sp, ch 3, sl st into next ch 1 sp, ch 3, sl st into final ch-1 sp, sl st into ch-3 sp, *sl st into next dc, ch 3, sl st into ch-1 sp, ch 3, sl st into next ch-1 sp, ch 3, sl st into same ch-1 sp, ch 3, sl st into next ch-1 sp, ch 3, sl st into final ch-1 sp, sl st into ch 3 space; repeat from * around, join with sl st to first sl st.
Fold the body in half, and using 18″ tail from beginning chain, sew the cuff edges together. I sewed into the stitches for the first row instead of the chain, to give it a tighter look.
Fasten off, and weave in ends.
Attach yarn to other end of the cover,
Bottom edging:
Round 1: ch 1, sc evenly along edge in multiples of 12. This number should be the same as the top edging, join with sl st to first sc.
Round 2: ch 1, hdc in each st around, join with sl st to first hdc. (stitch count should be the same as prev round)
Round 3: ch 1, working in 3rd loop of hdc, hdc in each st around, join with sl st to first hdc. (stitch count should be the same as prev round)
Round 4: ch 1, *3-dc cluster, ch 1, sk st; repeat from * around, join with sl st to first 3-dc cluster. (stitch count should be the same as prev round)
Round 5: ch 1, hdc in each st around, join with sl st to first hdc.
Round 6: ch 1, working in 3rd loop of hdc, hdc in each st around, join with sl st to first hdc. (stitch count should be the same as prev round)
Round 7: ch 4, sk 2 sts, sl st in next st, *ch 4, sk 2 sts, sl st in next st; repeat from * around, final sl at counts as join. (mine had 24 ch-4 sps)
Round 8: sl st into first ch-4 sp, ([dc, ch 1] 4 times, dc), sl st into next ch-4 sp, ch 4, *sl st into next ch-4 space, ([dc, ch 1] 4 times, dc), sl st into next ch-4 space, ch 4; repeat from * around, join to first sl st with sl st. (my cuff had 8 shells)
The following round will add the pretty lacy bits over the shells you made in the previous round. These look especially pretty when blocked.
Round 9: sl st into first dc, ch 3, sl st into ch-1 sp, ch 3, sl st into next ch-1 sp, ch 3, sl st into same ch-1 sp, ch 3, sl st into next ch-1 sp, ch 3, sl st into final ch-1 sp, sl st into ch-4 sp, *sl st into next dc, ch 3, sl st into ch-1 sp, ch 3, sl st into next ch-1 sp, ch 3, sl st into same ch-1 sp, ch 3, sl st into next ch-1 sp, ch 3, sl st into final ch-1 sp, sl st into ch-4 sp; repeat from * around, join with sl st to first sl st.
Fasten off, and weave in ends.
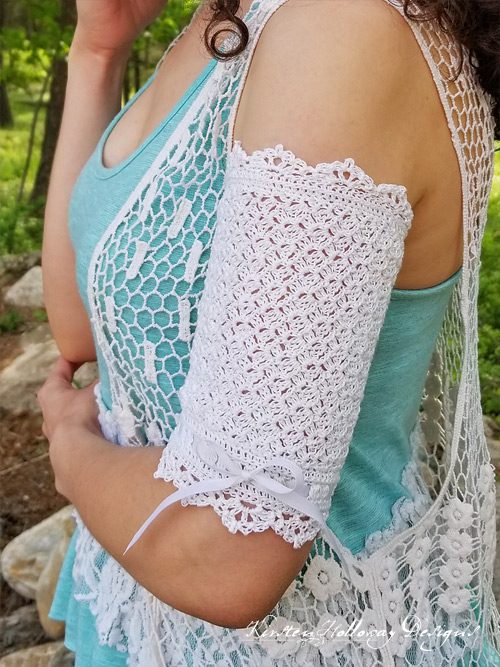
A ribbon can be woven through round 4 of the bottom edging, or it can be left plain.
For added embellishment, you can make several tiny flowers from my Delicate Flower Clip pattern and sew them to the cover.
JOIN ME ON SOCIAL MEDIA
I would love to see a picture when you’re done, so please feel free to come by my Facebook group and show off your cover before using or donating it! Be sure to tag @kirstenhollowaydesigns if you share pictures of your finished PICC line cover on Instagram, and use #WrappedInLacePICCLineCover!
You can also follow me on Facebook, Pinterest, Instagram, and Ravelry for more beautiful crochet patterns.
PATTERN TERMS AND CONDITIONS:
You are welcome to share the link to this pattern, using one image of your choice, on your site, but please do not share the written patterns themselves, this includes my Ravelry downloads or translations of these patterns, or use additional images. You do not have permission to use my images by themselves to create pinnable graphics for Pinterest, however they may be included in a roundup pin if there are 4 or more other patterns. If you sell finished items online, please do not use my pictures for your listings. I’m positive that your work is of high enough quality for you to sell the finished piece. Have confidence in your abilities! <3 Thank you!
This pattern was made to be used by individuals, and small business crocheters alike. Selling your finished pieces in boutiques, at farmer’s markets, craft shows, and other local events is encouraged! The only thing I require is that this pattern not be used commercially to produce hundreds of thousands of copies.
If you enjoyed this pattern or found it useful, why not share a link to this post with your friends?


