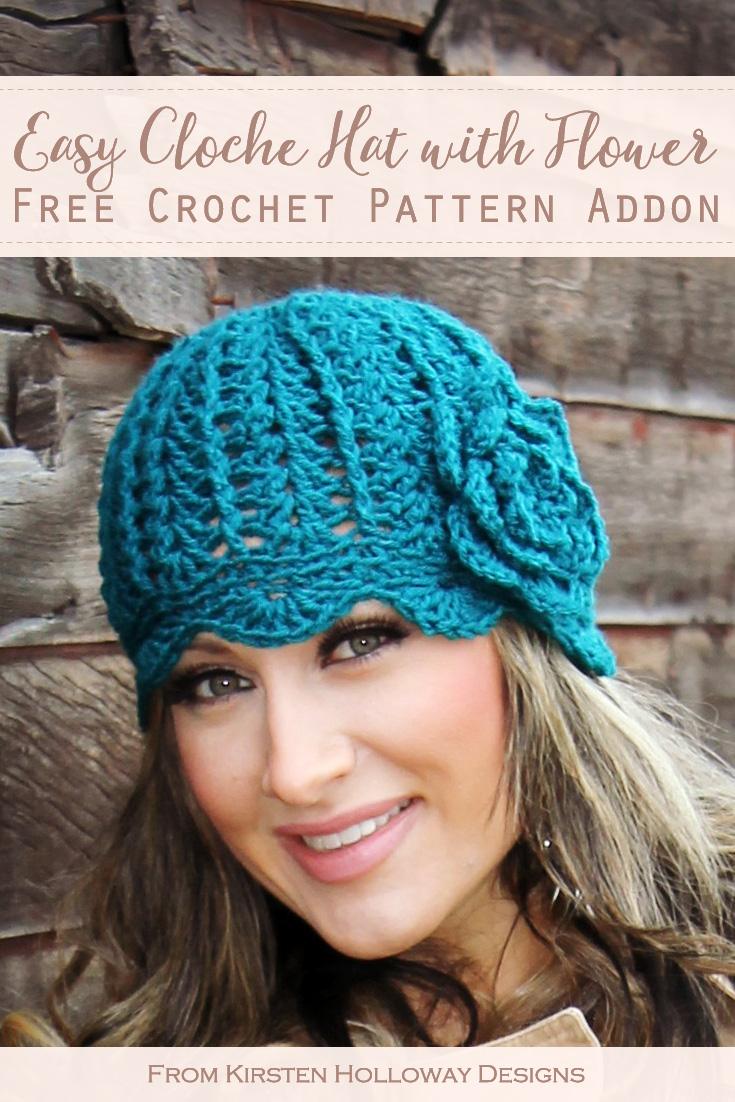
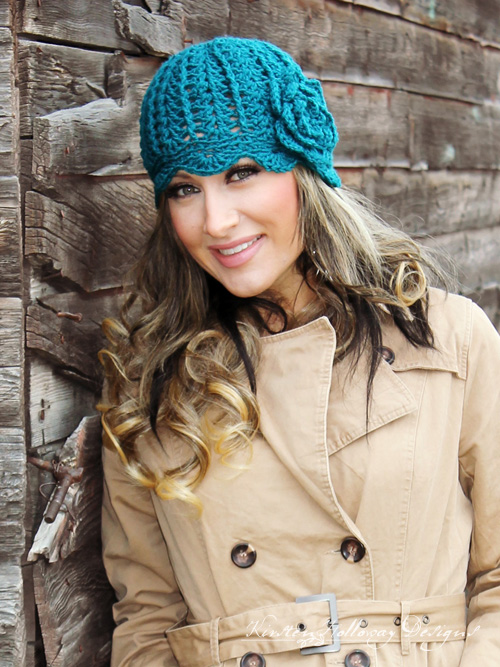
Sometimes life calls for a crochet pattern that is stylish and a little bit off the beaten path of basic crochet beanies. The Cover Story Cloche add-on brings that “wow” factor that you need! It uses simple shell stitches to add a scalloped edge, and a big bold flower to the side making this lacy cloche more feminine, with a vintage feel you’ll love!
This cloche is an add-on/modification of the Newsboy Slouch hat by Cre8tion Crochet. A big thank you Lorene who gave me permission to share my add-ons!
**For this pattern you’re going to need to head over to Cre8tion Crochet, and follow her Newsboy Slouch hat until the end of round 12, with one very important modification: You’ll need to use a 6.5mm (K) hook instead of the 9mm that Lorene calls for, unless you aren’t hitting the gauge measurements, then use the right hook for you to obtain the gauge (listed below). My add-on starts on round 13.**
 |
| Photo credit: H. C. Photography |
Disclaimer: This post contains affiliate links. When you purchase something using these links a small amount of the sales price goes to me to help keep this site, and the patterns on it free. You do not pay any extra for the item you purchase.
Materials Needed:
6.5mm (K) hook (for main part of hat)
6mm (J) hook (for add-on)
225-250 yards Red Heart With Love in “Mallard” or the color of your choice
Yarn needle
Scissors
Difficulty:
Easy
Stitches Used:
ch = chain
sl st = slip stitch
sc = single crochet
sc2tog = single crochet 2 together
dc = double crochet
tr = treble crochet
st/sts = stitch/stitches
sp/sps = space/spaces
prev = previous
Additional Terms:
BLO = back loop only
Additional Notes:
-ch-1 at beginning of round does not count as a stitch.
Cover Story Cloche Add-on Pattern (US Terms):
Using 6.5mm (K) hook,
Rounds 1-12: Follow the instructions on Cre8tion Crochet for the Newsboy Slouch.
Gauge:
The circle after round 2 should measure 3″.
The circle after round 5 should measure 7″.
After round 12, your hat should measure 7″ long, by 11 wide.
Now, to the add-on!
Cover Story Cloche Add-on (Teen/Adult):
*See bottom of post for additional sizing instructions*
Switch to 6mm (J) Hook:
Round 13: ch 1, working in BLO, sc in next 3 sts, sc2tog, *sc in next 3 sts, sc2tog; repeat from * around, join with sl st to first sc. (48)
Round 14: ch 1, working in BLO, sc in each st around, join with sl st to first sc. (48)
Round 15: sk 2 sts, 7 dc in next st, sk 2 sts, sl st in next st, *sk 2 sts, 7 dc in next st, sk 2 sts, sl st in next st; repeat from * around, final sl st counts as join. (8 shells)
Fasten off and weave in ends.
Flower:
Finished flower measures 5 1/4″ across
(Use 6mm hook):
Round 1: 6 sc in magic circle, join with sl st to first sc.(6)
Round 2: ch 1, 2 sc in each st around, join with sl st to first sc. (12)
Round 3: (sc, hdc, dc, hdc, sc) in first st, sl st in next st, *(sc, hdc, dc, hdc, sc) in next st, sl st in next st; repeat from * around, final sl st counts as join. (6 petals)
Round 4: sl st into back center of first petal from round 3, ch 3, *sl st into back center of next petal, ch 3; repeat from * around, join with sl st to first ch. (6 ch-3 sps)
Round 5: sl st into first ch-3 sp, (hdc, 5 dc, hdc, sl st), *sl st into to next ch-3 sp, (hdc, 5 dc, hdc, sl st); repeat from * around, join with sl st to first ch-3 sp. (6 petals)
Round 6: sl st into back center of first petal from round 5, ch 4 *sl st into back center of next petal, ch 4; repeat from * around, join with sl st to first ch. (6, ch-4 sps)
Round 7: sl st into first ch-4 sp, (hdc, 3 dc, 2 tr, 3 dc, hdc, sl st), *sl st into next ch-4 sp, (hdc, 3 dc, 2 tr, 3 dc, hdc, sl st); repeat from * around, join with sl st to first ch-4 sp. (6 petals)
Cut yarn, leaving a 24″ tail for sewing flower securely to hat. Using a yarn needle, sew flower to side of hat.
If you want additional cloche sizes:
Follow the same patterns above, with these modifications:
Child size, use a 5.5mm (I) hook for the entire project, just use tighter tension on rounds 13 and 14.
Toddler size can be made using a 5mm (H) hook for the entire project, just use tighter tension on rounds 13 and 14.
Baby sizes can be made using sport weight (#2) or DK (#3) yarn and a 4mm (G) hook for the entire project. You may need to leave out rounds 11 and 12 from the original pattern.
You can also follow me on Facebook, Pinterest, Instagram, and Ravelry for more beautiful crochet patterns.
Pattern Terms and Conditions:
You are welcome to share the link to this pattern, using one image of your choice, on your site, but please do not share the written patterns themselves, or use additional images. You do not have permission to use my images by themselves to create pinnable graphics for Pinterest, however they may be included in a roundup pin if there are 4 or more other patterns. If you sell finished items online, please do not use my pictures for your listings. I’m positive that your work is of high enough quality for you to sell the finished piece. Have confidence in your abilities! <3 Thank you!
This pattern was made to be used by individuals, and small business crocheters alike. Selling your finished pieces in boutiques, at farmer’s markets, craft shows, and other local events is encouraged! The only thing I require is that this pattern not be used commercially to produce hundreds of thousands of copies.
If you enjoyed this pattern or found it useful, why not share a link to this post with your friends?


Hi Kirsten
Love ❤️ your patterns. I’ve started making chemo caps. I think the added trim around the bottom would maybe give someone more of a lift.
Looking forward to making one or more for myself.
Thank you ?
Donna
Thank you for being a blessing to others, Donna! <3 I'm glad you're enjoying this add-on, and tend to agree that scallops, ruffles, and flowers bring a lift. 😀
AWESOME, I will definitely be making this hat! Thanks
Wonderful! You're very welcome! 🙂