This easy water bottle holder pattern uses jute instead of yarn to crochet a unique looking carrier that is also multi-functional. It uses single crochet and double crochet stitches, so even a beginner can make it. A simple strap is also included in the instructions so you can create a sling. Find the free crochet pattern instructions below, or purchase a print-optimized, ad-free PDF by clicking here.
Click here to add this to your Ravelry queue!
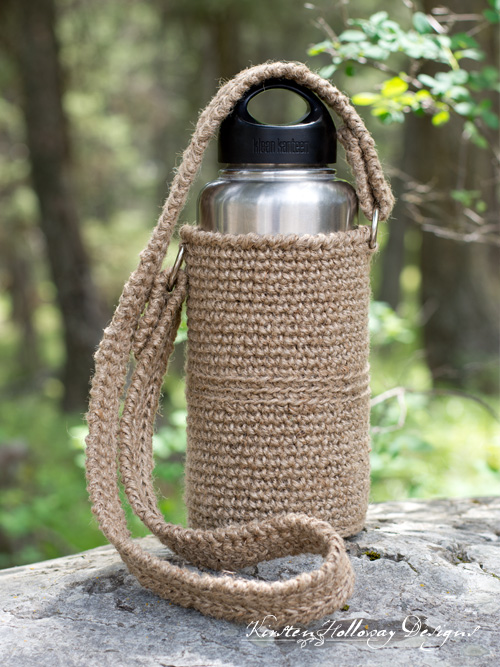
Father’s day is only weeks away (can you believe it?), and with that in mind, I have something a little different just for the special dad or father figure in your life. While I designed this to custom fit my husband’s bottle, this easy pattern should work for a variety of canteens, thermoses, and water bottles. If your dad, grandpa, or husband is a rough and rustic, outdoorsy kind of guy, there’s a good chance that this holder would make a welcomed gift this Father’s Day!
A water bottle holder with many uses
According to my outdoor-loving husband (who originally requested this crochet water bottle carrier to hold his Klean Kanteen), having items with more than one function is important especially when heading out on a hike, or camping trip. How does this water bottle holder have multiple uses, you ask? Jute is a natural fiber that can be used for cordage in an emergency camping or backpacking situation: the holder can be unraveled and used to string up a tarp for shelter or tie sticks together to make a framework for a shelter, and it could also be used as tinder to start a fire if you needed to stay warm. Pretty nifty, huh?
I just updated this pattern with a completely new design for 2020. My husband absolutely loved the old canteen carrier, but there were a few issues that this design has resolved. The major thing was the hook size I used in the original. Since I used a larger hook and single crochet for the handle, it was very stretchy and kept growing, and growing, and g r o w i n g… The other issue was that the body also started stretching and getting lax. The piece will stretch out with time given the nature of the material, but I switched to a smaller hook and tightened my tension for this version to hopefully avoid those problems and make this last longer (provided you don’t need to use it for cordage sooner). Usually, when crocheting with jute you will want to use very relaxed tension to save your hands, but in this case I think tighter tension will provide you with the best results.
Tips for crocheting with jute
If you have never crocheted with jute before it is important to keep a few things in mind:
1. Take a break if your hands start aching. Trying these stretches before you crochet may help you to be able to crochet longer. Listen to your body though and if you start feeling pain, stop working and give your hands and arms a rest.
2. A little itchiness is normal when working with twine, but if your hands stay red and itchy then you may have a sensitivity to the jute and should use a different material, such as hemp, or cotton cord, to crochet this next time.
3. Natural jute twine has a gasoline-like smell to it due to the oils in the manufacturing process. You can try reducing the smell by boiling it for 20 minutes in a pot of water to see if that removes the oils (this step may need to be done more than once or twice). Other options to try include sprinkling it with baking soda and letting it sit for 15 minutes, or you can soaking your jute in a diluted solution of cool water and vinegar: 4 parts water to 1 part vinegar, then letting it dry.
Disclaimer: This post contains affiliate links. When you purchase something using these links a small amount of the sales price goes to me to help keep this site, and the patterns on it free. You do not pay any extra for the item you purchase.
Difficulty:
Beginner/Easy
Materials Needed:
Approximately 100 yards Natural Jute 1.5mm twine
5mm (H) hook, or hook needed to obtain gauge
4mm (G) hook for edging
Yarn needle
Scissors
A dad, grandpa, or father figure who loves the outdoors
Stitches used:
sl st = slip stitch
ch = chain
sc = single crochet
rsc = reverse single crochet (crab stitch)
BPsc = back post single crochet
Additional Terms:
BLO = back loop only, work all stitches for the round in the back loop.
st/sts = stitch/stitches
Gauge:
3 1/2” in diameter after round 6
Measurements:
7” tall, and should fit a water bottle up to 11 1/2″ in circumference.
Additional Notes:
-I used tight tension when crocheting this carrier. Take frequent breaks if your hands start hurting.
-ch-1 does not count as a st.
-It is possible to make a narrower water bottle carrier by stopping at round 6 then continuing with the rest of the pattern at round 8.
-Despite my concerns about my hands holding up to working with jute (I have very sensitive skin), I found it easy. The most important thing to remember: use loose tension, and take breaks if your hands start to hurt.
-This pattern might also work with a #4 cotton yarn. I have not tried this yet though.
Jute Force Canteen Carrier/Water Bottle Holder Pattern (US Terms):
Click here to purchase an ad-free, print-optimized PDF of this pattern on LoveCrafts
Round 1: 6 sc in magic circle, join with sl st to first sc. (6)
Round 2: ch 1, 2 sc in each st around, join with sl st to first sc. (12)
Round 3: ch 1, 2 sc in first st, sc in next st *2 sc in next st, sc in next st; repeat from * around, join with sl st to first sc. (18)
Round 4: ch 1, 2 sc in first st, sc in next 2 sts *2 sc in next st, sc in next 2 sts; repeat from * around, join with sl st to first sc. (24)
Round 5: ch 1, 2 sc in first st, sc in next 3 sts *2 sc in next st, sc in next 3 sts; repeat from * around, join with sl st to first sc. (30)
Round 6: ch 1, 2 sc in first st, sc in next 4 sts *2 sc in next st, sc in next 4 sts; repeat from * around, join with sl st to first sc. (36)
Round 7: ch 1, 2 sc in first st, sc in next 5 sts *2 sc in next st, sc in next 5 sts; repeat from * around, join with sl st to first sc. (42)
Round 8: ch 1, BPsc around each sc, join with sl t to first BPsc. (42)
Rounds 9-21: ch 1, sc in each st around, join with sl st to first sc. (42)
Rounds 22-24: ch 1, working in BLO, sc in each st around, join with sl st to first sc. (42)
Round 24-36: ch 1, sc in each st around, join with sl st to first sc. (42)
With 4mm hook,
Round 37: ch 1, rsc in each st around. (42)
Fasten off. You can weave the ends in if you don’t plan to use this as cordage or tinder (only works with jute twine) in case of a backwoods emergency.
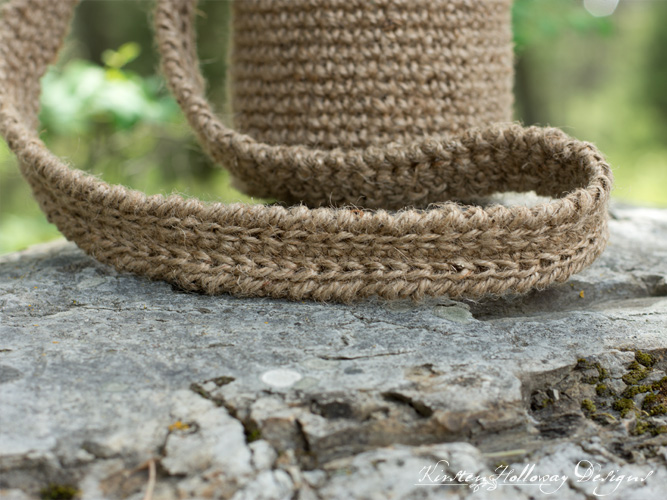
Strap:
This is optional. If you prefer, you can sew a D-ring to the side and then use a carabiner put through to clip the holder to a backpack or belt.
This makes a 3′ strap as written. Feel free to make it longer if you want the carrier to be worn cross-body.
Leaving 12” tail, chain, 141,
Round 1: sc in 2nd ch from hook, sc in next 139 sts, 2 sc in final st, continue work around end, sc in next 139 sts, 2 sc in final st.
With 4mm hook,
Round 2: ch 1, rsc (crab stitch) in each st around.
With 5mm hook,
Round 3: sl st around entire strap between rounds 1 and 2.
Fasten off leaving 12” tail
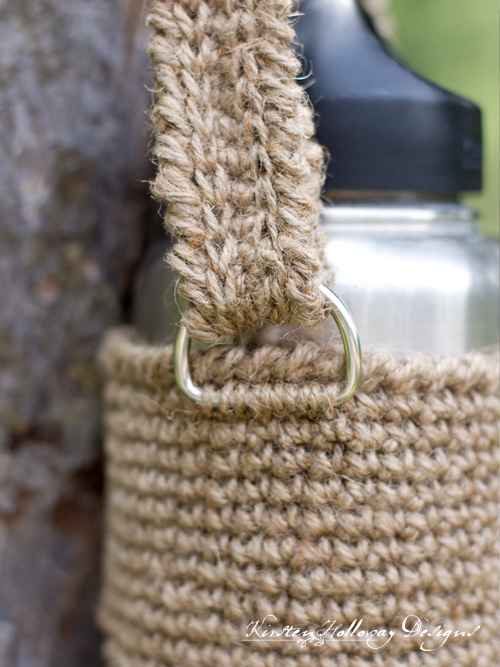
Sew ends of strap to D rings with 12” tails. I folded the ends of the straps over with a 2“ margin, and sewed down the very center of the strap.
Position one D ring at the top edge of the carrier and sew in place at round rounds 35 and 36. Position other D ring directly across from first D ring and sew in place. Use a 16″ piece of jute for sewing each.
Fasten off. You can weave the ends in if you don’t plan to use this as cordage or tinder (only works with jute twine) in case of a backwoods emergency.
I would love to see a picture when you’re done, so please feel free to come by my Facebook group and show off your project! Be sure to tag @kirstenhollowaydesigns when you share pictures of your finished water bottle holder on Instagram, and use #juteforcecanteencarrier!
You can also follow me on Facebook, Pinterest, Instagram, and Ravelry for more crochet patterns.
Pattern Terms and Conditions:
You are welcome to share the link to this pattern, using one image of your choice, on your site, but please do not share the written patterns themselves, or use additional images. You do not have permission to use my images by themselves to create pinnable graphics for Pinterest, however they may be included in a roundup pin if there are 4 or more other patterns. If you sell finished items online, please do not use my pictures for your listings. I’m positive that your work is of high enough quality for you to sell the finished piece. Have confidence in your abilities! <3 Thank you!
This pattern was made to be used by individuals, and small business crocheters alike. Selling your finished pieces in boutiques, at farmer’s markets, craft shows, and other local events is encouraged! The only thing I require is that this pattern not be used commercially to produce hundreds of thousands of copies.
If you enjoyed this pattern or found it useful, why not share a link to this post with your friends?


Leave a Reply