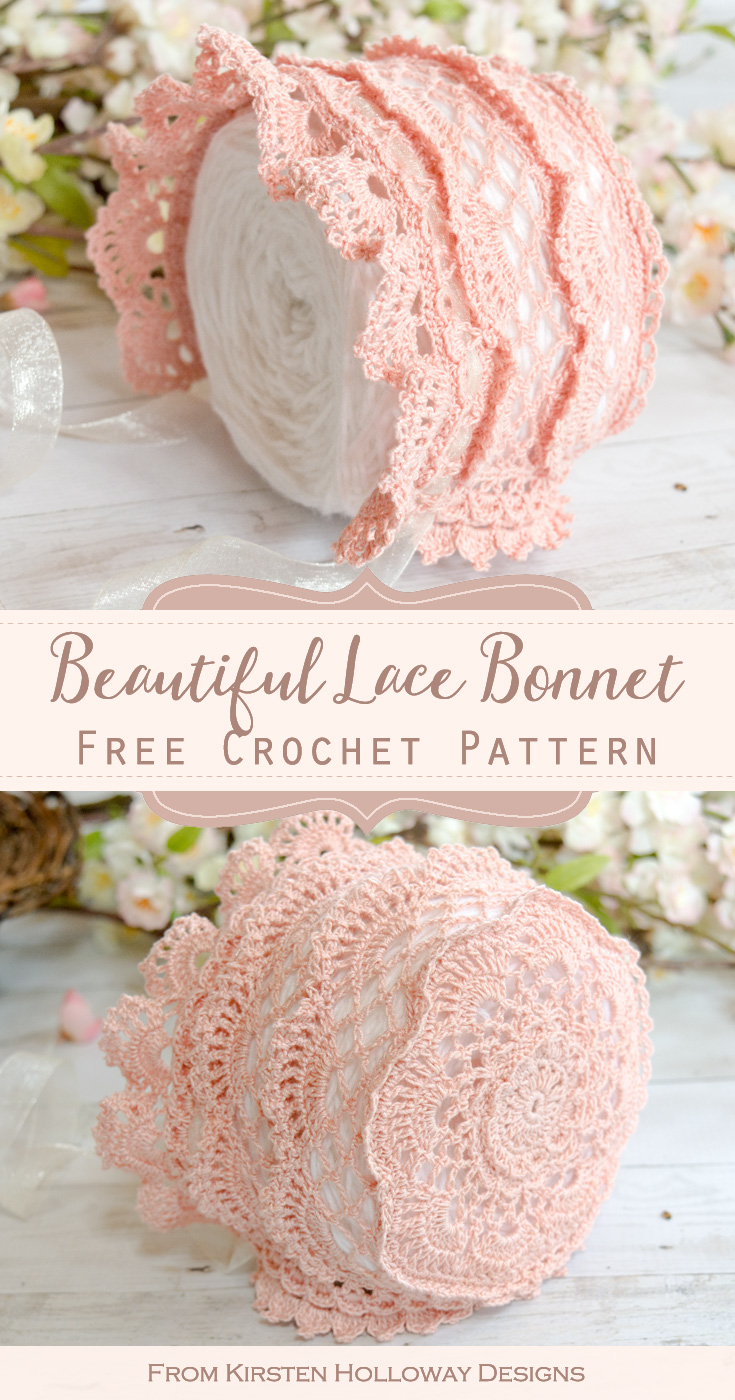
Crochet a beautiful, vintage style, lace baby bonnet with this free crochet pattern. Delicate shells, and petals add charm to this heirloom quality bonnet pattern. Find the free crochet pattern instructions below, or purchase a print-optimized, ad-free PDF by clicking here.
Crochet baby bonnets are a classic and stylish option for any baby’s wardrobe, and the Victoria Rose baby bonnet is destined to become a treasured part of your little one’s early months. Created from crochet thread, every detail has been lovingly crafted making this this lacy design a beautiful, yet modern take on the bonnets of the late 1800’s and early 1900’s.
Click here to add this to your Ravelry queue!
Disclaimer: This post may contain affiliate links. When you purchase something using these links a small amount of the sales price goes to me to help keep this site, and the patterns on it free. You do not pay any extra for the item you purchase.
Difficulty:
Advanced
Materials Needed:
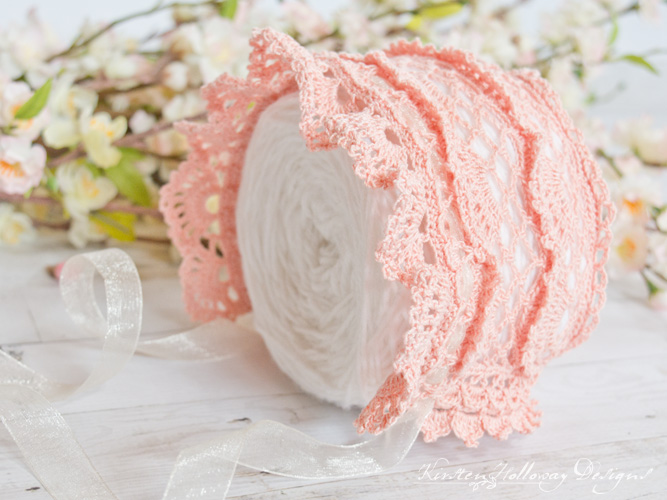
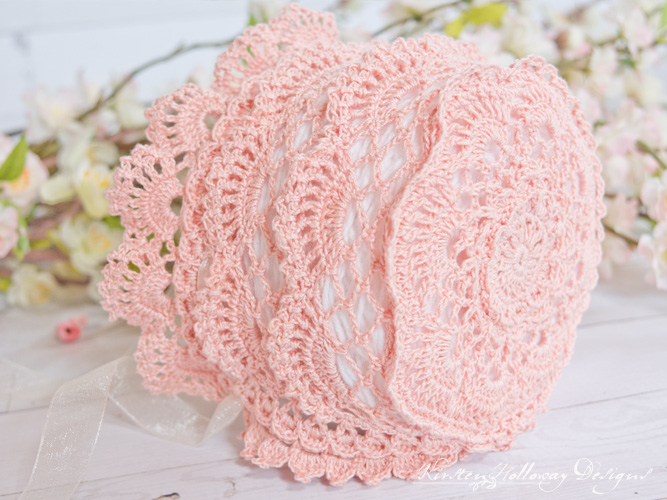
Approx 200 yards of #10 crochet thread in color of your choice. Pictured is Artiste Cotton thread in “Peach Blossom”. Aunt Lydia’s #10 Crochet Thread also works very well.
1.5 mm (7) steel hook. I suggest trying Clover Amour Hooks for a comfortable crochet experience.
Scissors
Yarn needle
Stitch markers
1 yard of 5/8” ribbon. It will bunch up. If you don’t want your ribbon to bunch, try using 3/8″.
Stitches Used:
ch/chs = chain/chains
sc = single crochet
hdc = half double crochet
dc = double crochet
FPsc = front post single crochet
BPsc = back post single crochet
sc2tog = single crochet 2 together
Additional Terms:
BLO = back loop only
FLO = front loop only
5-dc shell = 5 dc in designated stitch
9-dc Shell = 9 dc in designated ch sp
Fan = (dc, ch 1) in next 8 dc, 1 dc in last dc of shell
V-stitch = (dc, ch 1, dc) in same stitch
Cluster = dc2tog in same stitch
Picot = ch 3, sl st in 3rd chain from hook
st/sts = stitch/stitches
sp/sps = space/spaces
Measurements:
3-6 months: 5” front to back, 6 1/2” tall at tallest point, with plenty of stretch
Gauge:
Measures 1 3/4” across after round 5
Additional Notes:
-It is possible to make a preemie sized bonnet using #20 crochet thread and a 1.4mm steel hook. To make stringing a ribbon tie through this bonnet easier, substitute treble crochet stitches for double crochet stitches in row 34. Your V-stitch for that row will go: (tr, ch 1, tr) in same stitch.
-Scroll to the bottom of the page to see a picture of the preemie version of this hat. It is about 4″ front to back, and 5″ tall.
-If you plan to make this bonnet for organizations that support parents of “angel babies”, such as “Now I Lay Me Down To Sleep” (NILMDTS), check to see what requirements they have for their donations. For instance, NILMDTS cannot use items made with white yarn.
Victoria Rose Heirloom Baby Bonnet (US Terms):
Click here to purchase an ad-free, print-optimized PDF of this pattern on LoveCrafts
ch 4, join to first ch with sl st, forming a circle,
Round 1: ch 1, 12 sc in circle, join with sl st to first sc. (12 sc)
Round 2: ch 1, (cluster, ch 1) in same st as join, *(cluster, ch 1) in next st; repeat from * around, join with sl st to first cluster. (24 dc)
Round 3: ch 1, *sc in top of next cluster, 2 sc in ch-1 sp; repeat from * around, join with sl st to first sc. (36 sc)
Round 4: (hdc, 2 dc) in first st, (2 dc, hdc) in next st, sl st in next st, *(hdc, 2 dc) in next st, (2 dc, hdc) in next, sl st in next st; repeat from * around, final sl st counts as join. (12 petals)
Note: your edge will be floppy and not lay flat. This is ok.
Round 5: ch 2, sk st, *BPsc around each of the next 4 sts , sk 3 sts (this includes the sl st); repeat from * around, join with sl st to first BPsc. (48 BPsc)
Round 6: skip joined stitch, 5 dc shell in next BPsc, sk st, sl st in next st, *sk st, 5 dc shell in next, sk st, sl st in next; repeat from * around, final sl st counts as join. (12 shells)
Round 7:* ch 4, sk 2 sts, sl st around back post of next dc, ch 4, sk 2 sts, sl st in sl st between petals from prev round; repeat from * around. (24 ch-4 sps)
In the rounds 8-11 you will be slip stitching into the chains of the ch-4 or ch-5 sps at the beginning of each round. This gets you to the top of the chain space and makes a nicer looking transition between rounds.
Round 8: sl st in first 2 chs of first ch-4, ch 1, sc in ch-4 sp, ch 4, *sc in next ch-4 sp, ch 4; repeat from * around, join with sl st to first sc. (24 ch-4 sps)
Round 9: sl st in first 2 chs of first ch-4, ch 1, sc in ch-4 sp, ch 5, *sc in next ch-4 sp, ch 5; repeat from * around, join with sl st to first sc. (24 ch-5 sps)
Round 10: sl st in first 3 chs of first ch-5, *ch 5, sl st in next ch-5 sp, 9 dc shell in next ch-5 sp, sl st in next ch-5 sp; repeat from * around, placing last sl st in 3rd sl st from beginning of round. (8 shells, 8 ch-5 sps)
Round 11: sl st in first 3 ch of ch-5, ch 1, sc in first ch-5 sp,*create fan across shell by placing (1 dc, ch 1) in first 8 dc, 1 dc in last dc of shell, sc in ch-5 sp, repeat from * around, join with sl st to first sc. (144 stitches, 8 fans)
Round 12: ch 1, hdc in each dc, each ch-1 sp, and each sc around, join with sl st to first hdc. (144)
This is where we begin working in rows for the sides of the bonnet:
Row 13: ch 1, working in 3rd loop of hdc, sc in next 108 sts, ch 1, turn. (108 sc)
Row 14: sc in first st, [ch 5, sk 5 sts, sc in next st] 17 times, ch 5, sk 4 sts, sc in 5th st, ch 5, turn. (18 ch-5 sps, 18 sc)
Row 15: sc in first ch-5 sp, *ch 5, sc in next ch-5 sp; repeat from * until you sc in the final ch-5 sp, ch 2, dc into sc from prev row, ch 5, turn. (18 ch-5 sps, 18 sc, 1 dc)
Row 16: sc in ch-5 sp, *ch 5, sc in next ch-5 sp; repeat from * until you arrive at last ch-5 sp, omit final sc, sl st into 3rd ch of last ch-5 sp, ch 5, turn. (18 sps)
Row 17: *sl st in ch-5 sp, 9-dc shell in next ch-5 sp, sl st in next ch-5 sp, ch 5; repeat from * across until you join the last shell in the final ch-5 sp, omit last ch 5, and ch 2 and dc in dc from prev row, turn. (6 shells, 7 sps)
Row 18: *create fan across next shell, sc in ch-5 sp, repeat from * across, join final fan with sl st in 3rd ch of final ch-5 sp, turn. (6 fans)
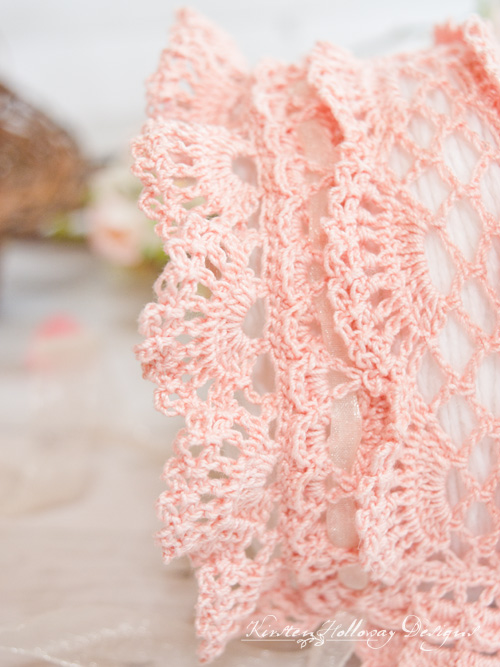
In row 19 you will be creating the little ruffled edge that sticks out above the bonnet.
Row 19: *ch 4, sl st in each ch-1 sp from previous row and in sc between fans; repeat from * around, attach final ch-4 loop to top of dc from previous row, ch 1, turn. (54 ch-4 loops)
In row 20 you’ll go back to increasing the bonnet’s length by working post stitches around the double crochet stitches you created when you made the fans in row 18, as well as around the sc stitches between the fans. Note: keep your chains loose so the bonnet doesn’t start to cinch in.
Row 20: working across fan made in row 18, *[FPsc around dc, ch 1] 8 times, FPsc around last dc of fan, FPsc around sc; repeat from * to end of row, ch 1, turn. (108)
Row 21: hdc in each FPsc and each ch-1 sp across, ch 1, turn. (108 hdc)
Rows 22-29: Repeat rows 14-21 one time, omitting the turn at the end of row 21.
Continue working this next part down around the bottom edge of the bonnet:
Using stitch markers to mark the beginning and end of each section in row 30 may help you keep your numbers straight.
Row 30: Working in the ends of rows 13-29, evenly space 25 sc along nearest bottom side, 24 sc across the back by working in 3rd loop of hdc [sc2tog, sc in the next] 12 times, evenly space 25 sc along far bottom side, at end of row, ch 3 (counts as first dc), turn.
Row 31: sk 2 sts, *(dc, ch 1, dc) in next (V-stitch made), sk 2 sts* repeat * to * 7 more times for a total of 8 V-stitches, sl st in next 2 sc, [ch 4, sk 3, sl st in BLO]4 times, sl st in next 2 sts, sk 2 sts, repeat * to * 8 times, dc in final st, ch 1, turn
Row 32: *(hdc, 4 dc, hdc) in ch-1 sp, sl st between V-stitches; repeat from * 7 more times for a total of 8 petals, sl st over 2 sts, [(sl st, 5 hdc, sl st) in ch-4 sp] 4 times for a total of 4 petals, sl st over 2 sts and into first ch-1 sp repeat * to * 8 more times for a total of 8 petals, ch 2, turn. (20 petals)
Note: Your edge will be floppy, this is ok. We’ll fix it in the next row.
Row 33: skip first hdc of petal and FPsc around next 4 dc sts, *skip 2 hdc, FPsc around next 4 dc sts* repeat * to * 6 more times. When you get to the back of the bonnet sl st across it, skip first hdc of side petal from row 32, FPsc around next 4 dc sts; repeat * to* 7 more times, ch 3 (counts as a dc). (64 FPsc)
Continue working this next section down the front edge of the bonnet, working in the V-stitches in row 29. You will need to have a total of 31 V-stitches when you finish this section. I’ve given you approximate stitch locations for working the first V-stitch, and last 2 V-stitches. It is important that you have 2 V-stitches after working the stitches across row 29. Your second V-stitch of this row should be in the first hdc of row 29.
Row 34: V-stitch in side of hdc from petal in row 32, skip to first hdc from row 29 and work a V-stitch, *sk 3 sts, V-stitch in next; repeat from * 28 more times, placing final V-stitch in side of hdc of petal from row 32, dc in side of FPsc from row 33, ch 1, turn. (31 V-stitches)
Row 35: (hdc, 4 dc, hdc) in first ch-1 sp (this is the V-stitch you just made), sl st between first and second V-stitch, *(hdc, 4 dc, hdc) in next ch-1 sp, sl st between V-stitches; repeat from * 29 more times for a total of 31 petals, ch 2, turn. (31 petals)
Row 36: skip first hdc of petal and FPsc around next 4 dc, *skip 2 hdc, FPsc around next 4 dc* repeat from * to end. (124)
Round 37: working down the bottom side of the bonnet, work 3 slip stitches along the dc from row 34 until you come to the FPsc sts from row 34, *ch 4, sl st between petals* repeat * to * 7 more times for a total of 8 ch-4 sps, then working in front of the 4 petals across the back, [ch 4, sl st in FLO of row 31 4 times for a total of 4 ch-4 loops, ch 4, sl st between petals repeat * to * 7 more times for a total of 8 ch-4 sps, work 3 sl st in dc at end of bottom side, then continue working next section around corner on top of row 36, sc in first 2 sts, [ch 5, skip 3, sc in next] 30 times for a total of 30 ch-5 sps (yes, ch-5 is correct for this final section), sc in final 2 sts of row. Do not join, instead, ch 1, turn. (20 ch-4 sps, 30 ch-5 sps)
Row 38: working back the way you came, sl st over 2 sc sts just made and to top of first ch-5 sp (this will be roughly 6 sl st), work 9-dc shell in next ch-5 sp, join with sl st in next ch-5 sp, *ch 5, sc in next ch-5 sp, 9-dc shell in next ch-5 sp, join with sl st in next ch-5 sp; repeat from * until you join last shell in final ch-5 sp, sl st down remaining chs and 2 sc sts (this will be roughly 5 sl sts), turn. (10 shells, 9 ch-5 sps)
Row 39: *create fan across next shell, sc in ch-5 sp; repeat from * across, join final fan with sl st in end of row, turn. (10 fans)
Row 40: *(ch 4, sl st) in each ch-1 sp and the sc between the fans, repeat from * across attaching final ch-4 loop to top of dc from previous row.

Continue working along bottom edge:
Row 41: sl st down to first ch-4 sp, sl st into first ch-4 sp, (ch 3, 2 dc, picot, 2 dc, ch 3, sl st) *sl st into next ch-4 sp, (ch 3, 2 dc, picot, 2 dc, ch 3, sl st); repeat from * 19 more times for a total of 20 petals. (20 petals)
Fasten off.
Attach yarn with a sl st to any hdc in round 12, and work in ridge at back of hat: *ch 4, sk 2, sl st in next, repeat from * around. (48 ch-4 loops)
Fasten off and weave in ends.
Attach ribbon ties near bottom, front of hat, or weave it through row 34.
Want more gorgeous crochet patterns, and a little encouragement for your day? Sign up for my newsletter here! That way you’ll never miss out on special events, or freebies I’m offering.
JOIN ME ON SOCIAL MEDIA
I would love to see a picture when you’re done, so please feel free to come by my Facebook group and show off your project! Be sure to tag @kirstenhollowaydesigns when you share pictures of your finished bonnet on Instagram, and use #victoriarosebabybonnet!
You can also follow me on Facebook, Pinterest, Instagram, and Ravelry for more beautiful crochet patterns.
PATTERN TERMS AND CONDITIONS:
You are welcome to share the link to this pattern, using one image of your choice, on your site, but please do not share the written patterns themselves, this includes my Ravelry downloads or translations of these patterns, or use additional images. You do not have permission to use my images by themselves to create pinnable graphics for Pinterest, however they may be included in a roundup pin if there are 4 or more other patterns. If you sell finished items online, please do not use my pictures for your listings. I’m positive that your work is of high enough quality for you to sell the finished piece. Have confidence in your abilities! <3 Thank you!
This pattern was made to be used by individuals, and small business crocheters alike. Selling your finished pieces in boutiques, at farmer’s markets, craft shows, and other local events is encouraged! The only thing I require is that this pattern not be used commercially to produce hundreds of thousands of copies.
If you enjoyed this pattern or found it useful, why not share a link to this post with your friends?


