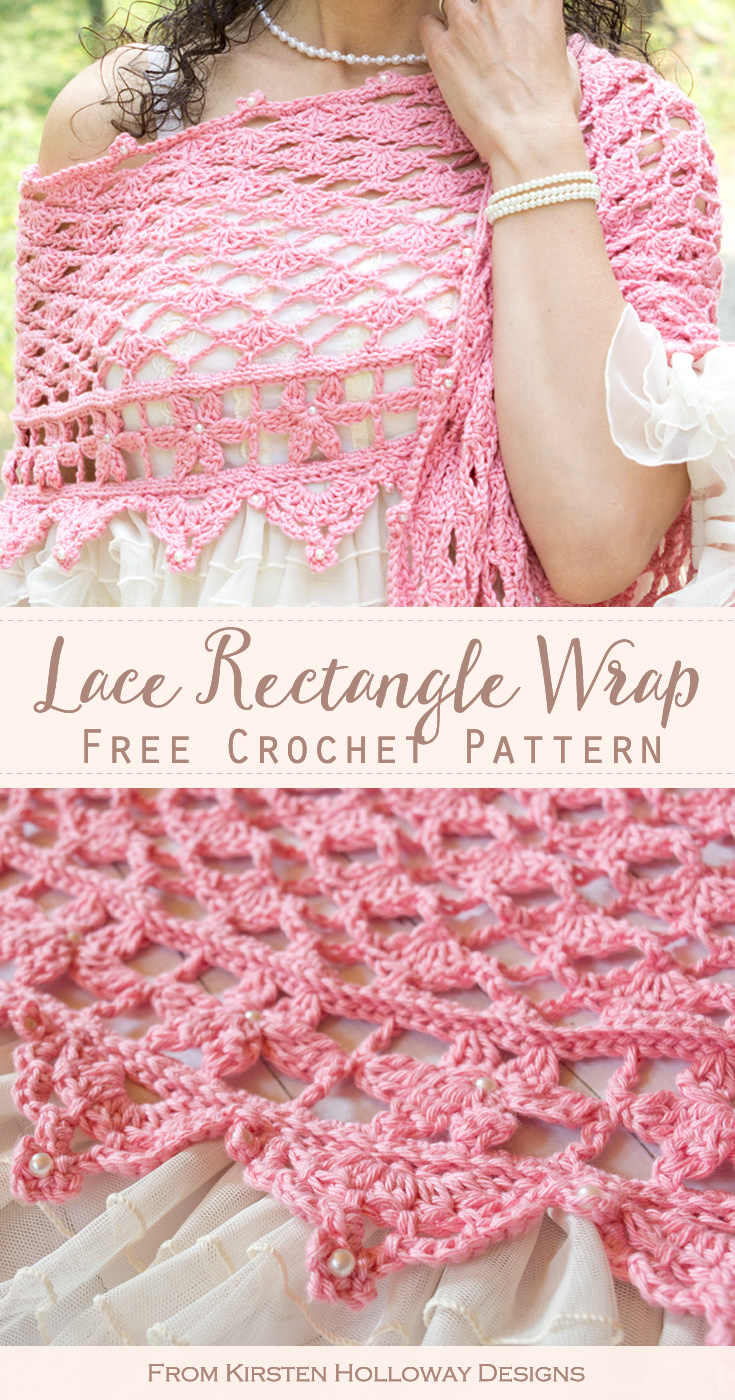
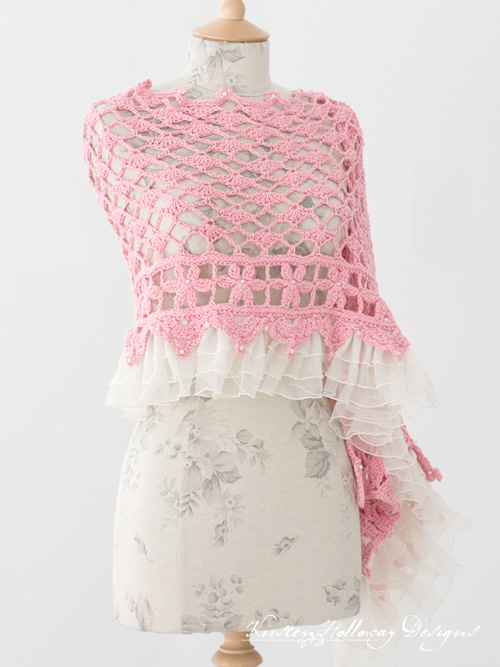
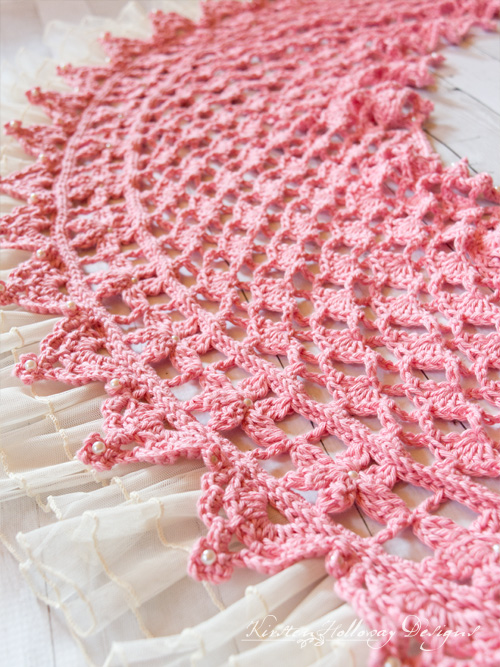
Crochet wraps are an elegant project fit for all sorts of special events. This stunning rectangle wrap pattern includes pearl beads and a luxurious lace ruffle that’s sure to melt the heart of your inner princess. Because of all the delicate details it could easily be worn in weddings or other formal events. Or if you prefer, throw this wrap on over a blouse and jeans to really take your outfit to the next level! The majority of this wrap is quick and easy to make. The thing that takes some extra time is sewing on all the pearl beads, but I promise it will be worth it in the end! Find the free crochet pattern instructions below, or purchase a print-optimized, ad-free PDF by clicking here.
Click here to add this pattern to your Ravelry queue!
The yarn I used in the crochet pattern is some soft, silky KnitPicks Shine Sport that they sent me to play with. I adore the way it feels! It glides over my hands and crochet hook like butter, and I experienced almost no splitting. Since it is a cotton blend it is a little bit thicker than some #2 sport weight yarns, but cotton is cool and comfortable so I don’t think you’ll notice the difference too much when you go to wear this beautiful crochet wrap.
I mean look at that yarn; isn’t it glorious?!
Intermediate crocheters should be able to crochet this pattern fairly easily, but I’ve included some pictures of a few of the steps so you can make sure you’re on track.
Let’s get started, shall we? I’ve linked to some of the materials I used in the “Materials Needed” section so you can purchase the exact items I used.
Disclaimer: This post contains affiliate links. When you purchase something using these links a small amount of the sales price goes to me. You do not pay any extra for the item you purchase.
Difficulty:
Intermediate
Materials Needed:
5.5mm hook
5 balls (550 yards) KnitPicks Shine Sport in “Blush” <–click here to purchase.
Scissors
Yarn needle for weaving in ends
100 6mm round faux pearl beads with large (2mm-2.5mm) centers – available from Hobby Lobby <–click here to purchase
2 1/2 yards Ivory Triple Layer Pleated Tulle Trim (4 1/2″ tall) – available from Hobby Lobby <–click here to purchase
White Upholstery thread <–click here to purchase
Sewing thread that matches your yarn color
Sewing needle
Sewing pins for pinning tulle ruffle in place
Stitches Used:
ch = chain
sl st = slip stitch
sc = single crochet
FPsc = front post single crochet
dc = double crochet
tr = treble crochet
2trcl = treble crochet 2 together in same stitch making a cluster
3trcl= treble crochet 3 together in same stitch making a cluster
Additional Terms
Shell = 5 dc in same stitch
3 picot cluster = **ch 3, sl st into front loop and left leg of sc creating picot ** repeat ** to ** 2 more times. If you’re not sure where to insert your hook look for the pictures near the lace fans section that demonstrates this technique. It will make neater picot clusters.
Gauge:
I had approximately 17 sc in 4”. Gauge is not particularly important for this wrap though.
Measurements:
6’ long, 14” tall. May be made taller, see pattern for those notes.
Additional Notes:
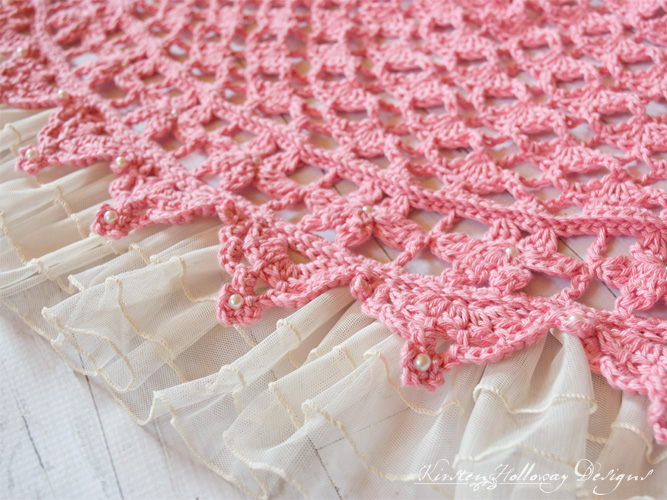
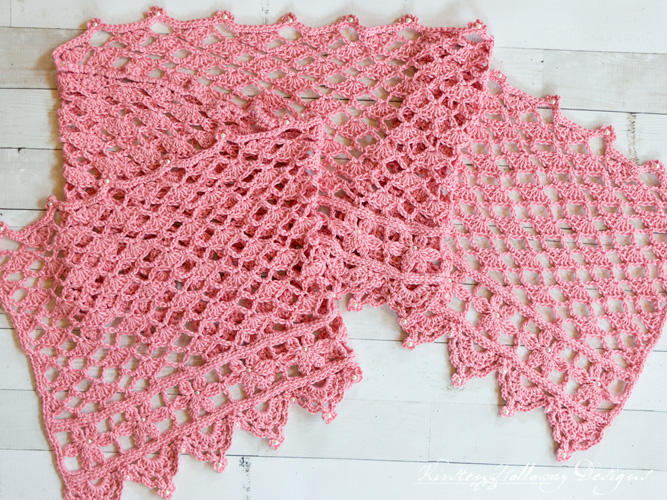
-It is possible to make this without the lace ruffle. See picture near the bottom of post for an example without the lace.
-Pattern is worked in multiples of 12 + 1, plus 3 for the turning chain. If you want to make this longer please take into account the extra yardage you will need for the ruffle, as well as the extra pearls you will need for the flowers, picots and fans.
Day Dream – A Beaded Lace Rectangle Wrap Crochet Pattern (US Terms):
Click here to purchase an ad-free, print-optimized PDF of this pattern on LoveCrafts
Ch 304,
Row 1: 2 dc in 4th ch from hook, *sk 2sts, sc in next st, ch 5, sk 5 sts, sc in next st, sk 2 sts, shell in next st; repeat from * across ending with only 3 dc in final st, ch 1, turn. (24 5-dc shells, 2 3-dc half-shells, 25 ch-5 sp)
Row 2: sc in top of first dc, *ch 5, sc in ch-5 sp, ch 5, sc in top of shell; repeat from * ending with a sc in the top of ch-3 from previous row. Ch 5 (counts as first dc + ch 2 for next row), turn. (50 ch-5 sps)
Row 3: sc in ch-5 sp, shell in sc from previous row, *sc in next ch-5 sp, ch 5, sc in next ch-5 sp, shell in sc from previous row; repeat from * across. When you reach final ch-5 sp work this sequence: sc in final ch-5 sp, ch 2, dc in final sc st of row. Ch 1, turn. (25 shells, 25 ch-5 sps, 1 ch-2 sp, 1 dc)
Row 4: sc in top of dc *ch 5, sc in top of shell, ch 5, sc in ch-5 sp; repeat from * across, ending with a sc in the top of 3rd ch from previous row. Ch 3, turn (counts as first dc of next row). (50 ch-5 sps)
Row 5: 2 dc in sc, sc in ch-5 sp, *ch 5, sc in next ch-5 sp, shell in sc from previous row, sc in next ch-5 sp; repeat from * across. After you put your final sc in the final ch-5 sp, work 3 dc in final sc st of row, ch 1, turn.
Repeat rows 2-5 2 more times (if you want a taller wrap then repeat rows 2-5 until your piece measures about 4” shorter than your desired height), then repeat row 2 once, only chaining 1 for the turn. Note: Each repeat of rows 2-5 uses approximately 1 ball of KnitPicks Sport Shine and gives you about 4” of height.
Row 15: sc in first sc, *5 sc in ch-5 sp, sc in sc from previous row; repeat from * across, ch 1, turn. (301 sc)
Row 16: FPsc around each st across, ch 8 (counts as first tr + ch 4 of next row), turn. (301 FPsc)
Row 17: 2trcl in 4th ch from hook, sk next 3 sts in row 16, 3trcl, sk 3 sts from row 16, 3trcl in next st, ch 4, 2trcl in top of 3trcl just worked, sk 3 sts in row 16, *(tr in next st, ch 4, 2trcl in top of tr just worked, sk 3 sts in row 16, 3trcl in next st, sk 3 sts in row 16, 3trcl, ch 4, 2trcl in top of 3trcl just worked, sk 3 sts in row 16; repeat from * across, ch 7 (counts as first tr + ch 3 of next row), turn. (25 lower petal groups [4 petals in each group], 25 tr)
Row 18: 3trcl in center of petals from previous row, ch 3, 3trcl in center of petals from same flower from previous row, ch 3, tr in tr from previous row *ch 3, 3trcl in center of petals of next flower from previous row, ch 3, 3trcl in center of petals from same flower from previous row, ch 3, tr in tr from previous row; repeat from * across, ch 1, turn. Note: final tr will be worked in the 4th ch from previous row. (25 upper petal groups [2 petals in each group], 75 ch-3 sp, 25 tr)
Sometime in the next 2 rows you will probably need to join a new ball of yarn if working with the recommended KnitPicks Shine Sport. At that time string 25 6mm large hole (2mm-2.5mm opening) pearl beads onto the yarn. You will need them when we get to the lace fans at the bottom.
Row 19: sc in final tr of previous row, *4 sc in ch-3 sp; repeat from * across, ch 1, turn. (301 sc)
Row 20: FPsc around each st across, ch 5 turn. (301 FPsc)
Round 21: sk 3 sts, sl st in next, *ch 5, sk 3 sts, sl st in next* repeat from * to * 74 more times, then work 2 sc in corner and continue working this next part along the end of the wrap. sc evenly along end of wrap. Note: count your stitches so you can put the same stitch count on the other end when we get there. Put 2 sc in corner and continue working this next section up along the top edge. Sc in same st as first dc, sc in ch 2 sp, *sc in sc, 3 sc in ch-5 sp **ch 3, sl st into first ch creating picot ** repeat ** to ** 2 more times, then work 2 sc in ch-5 sp, sc in sc, 2 sc in ch-2 sp, sc in dc, 2 sc in ch-2 sp; repeat from * across the top, when you get to the final st put 2 sc in corner and sc evenly across end, sl st into first ch-5 sp of round.
The lace fans in this next section will be worked in back and forth rows. Each fan consists of 3 rows, worked one at a time. It may seem confusing at first but if you take it one step at a time you should have it figured out quickly. I’ve also included a video to show you just what to do. Remember, if you have to add a new ball of yarn during this section don’t forget to string the remaining beads on the new strand before you begin.
Lace Fan:
Fan row 1: Working into next ch-5 sp, *2 dc cluster, ch 1* repeat * to * 4 times, 2 dc cluster, sl st into next ch-5 sp, ch 3, turn,
Fan row 2: sc into ch 1 sp, ch 3, sc into next ch-1 sp, ch 4, sc into next ch-1 sp, ch 3, sc into next ch-1 sp, ch 3, sl st into same ch-5 sp, ch 1, turn
Fan row 3: (4 sc, sl st) in first ch-3 sp, (4 sc, sl st) in next ch-3 sp, (3 sc, 3 picot cluster, 2 sc, sl st) in ch-4 sp, (4 sc, sl st) in next ch-3 sp, 4 sc, in next ch-3 sp ,sl st in next ch-5 sp. Now you will make a bead picot that goes between the fans: ch 2, pull up a bead, ch 2, sl st into 2nd ch just below bead, (this should wrap your bead inside a picot) ch 1, sl st in next ch-5 sp.
Repeat Lace Fan rows 1-3 24 more times leaving out the bead picot step on the final fan.
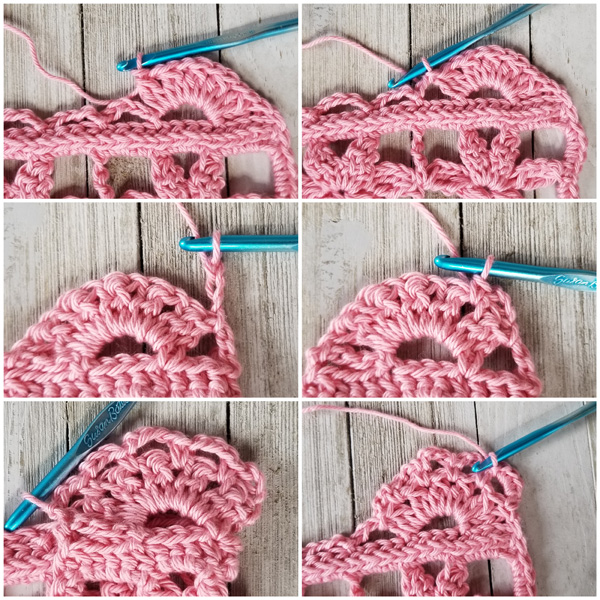
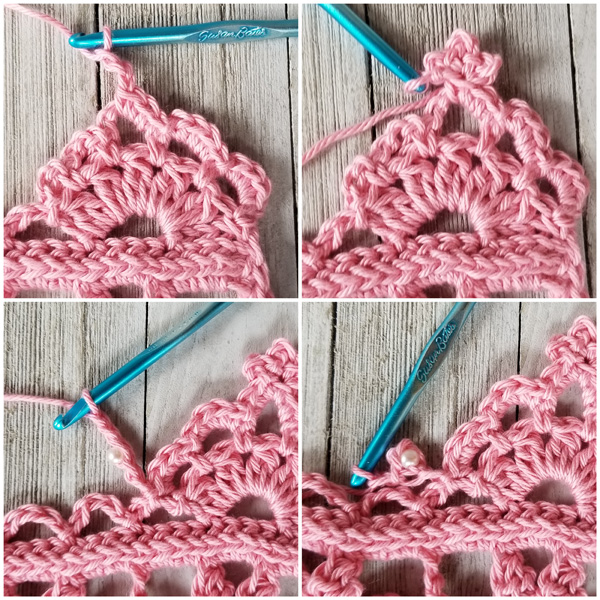
Here are some pictures that may help you get through this part. The steps are shows left to right, top to bottom:
Still stuck? Try watching this video that shows the steps (there’s no talking in this video):
Fasten off and weave in ends.
Cut 10 ft long piece of yarn, sew 25 pearl beads in each of the flowers running the string through the petals of the flowers to hide it.
Cut another 10 ft long piece of yarn and working through the top row of sc from round 21, sew a pearl bead in the center of each picot cluster. The picture below shows how to do that:
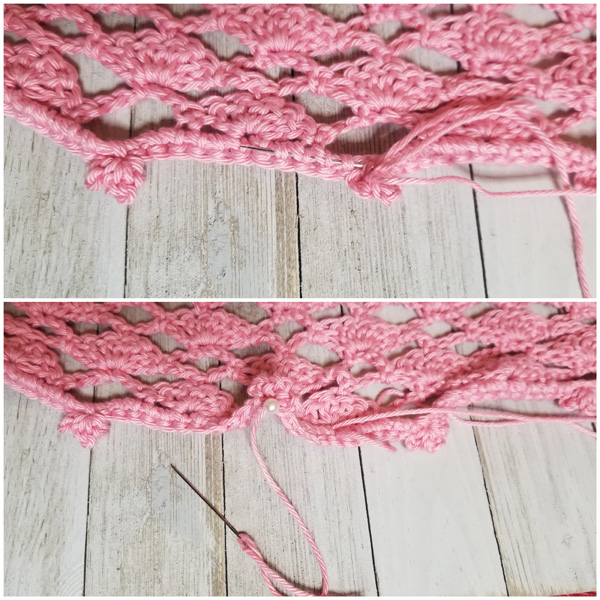
Using sewing thread in color that matches your yarn, sew a pearl bead in center of each 3 picot cluster at end of fan. The image below is how it should look at this point.
Spread wrap out on table and pin lace ruffle in place along rows 19 and 20. Don’t skip this part. You want to make sure your ruffle is long enough to cover the entire bottom of the wrap. Also, I folded my ends 2″ for seam allowance. You will want to sew the ruffle on in row 20 so the top of the lace doesn’t stick up above row 19. I sewed one stitch in every other FPsc of the row.
I would love to see a picture when you’re done, so please feel free to come by my Facebook group and show off your project! Be sure to tag @kirstenhollowaydesigns when you share pictures of your finished wrap on Instagram, and use #daydreamrectangelwrap!
You can also follow me on Facebook, Pinterest, Instagram, and Ravelry for more beautiful crochet patterns.
Pattern Terms and Conditions:
You are welcome to share the link to this pattern, using one image of your choice, on your site, but please do not share the written patterns themselves, or use additional images. You do not have permission to use my images by themselves to create pinnable graphics for Pinterest, however they may be included in a roundup pin if there are 4 or more other patterns.
This pattern was made to be used by individuals, and small business crocheters alike. Selling your finished pieces in boutiques, at farmer’s markets, craft shows, and other local events is encouraged! The only thing I require is that this pattern not be used commercially to produce hundreds of thousands of copies. Also, if you sell finished items online, please do not use my pictures for your listings. I’m positive that your work is of high enough quality for you to sell the finished piece. Have confidence in your abilities! <3 Thank you!
Sharing a link to this post with your friends is also always appreciated!


