
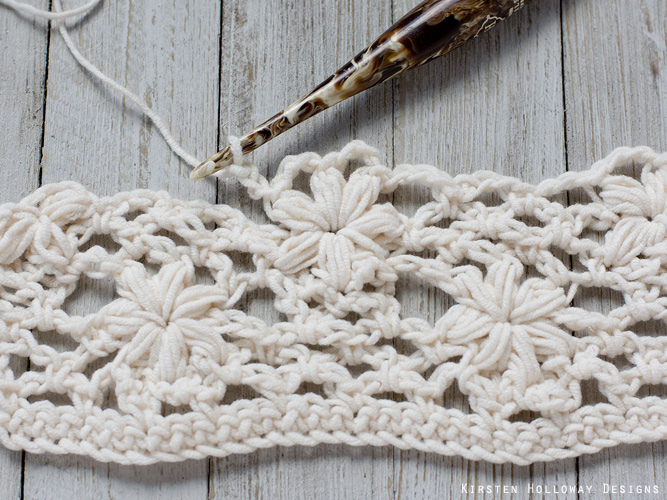
This lacy summer scarf crochet pattern has a gorgeous flower design that is perfect for summer! The stitch is delicate and open meaning it is lightweight and comfortable as a warm weather accessory. Find the free crochet pattern instructions below, or purchase a print-optimized, ad-free PDF by clicking here.
Click here to add this to your Ravelry queue!

If crocheting lace is something that is new to you, never fear! This pattern has a step-by-step, beginner-friendly picture tutorial for making the lace. It’s quite picture intensive so I have placed it at the bottom of the pattern. It takes you from row 1 through row 9 so if you’re a visual learner it makes the process of working this pattern very easy.
It is easy to customize this unique scarf pattern to be as long or as short as you wish. I recommend making it longer so the ends of the ruffles fall around hip level. The way the ruffles are made with so many layers makes the ends a little bit bulky so having the ends hang lower keeps them out of the way.

My scarf was 7 ft long after blocking and it hung just about right on me (I’m 5’4″) and the mannequin it is shown on.
You may wish to make your scarf longer if you are taller. Caron Cotton Cakes skeins come with 530 yards so you’ll have some extra yardage leftover after you make the scarf as long as the pattern calls for to make the scarf longer if you need to.

Speaking of Caron Cotton Cakes, this was my first time using this yarn and I loved how soft it is and how nice the drape is! It’s a cotton acrylic blend that has nice stitch definition–which I love for summery projects! On the website it is listed as a #4 worsted weight, but it is thinner than many #4 yarns. I would compare it to Caron Simply Soft in it’s thickness. This yarn comes in a variety of self-striping and solid colors to achieve the look you want. I used Cream for the scarf that is pictured, and I have a second one in the works using Silver Cloud.
Disclaimer: This post contains affiliate links. When you purchase something using these links a small amount of the sales price goes to me to help keep this site, and the patterns on it free. You do not pay any extra for the item you purchase.
Difficulty:
Easy/Intermediate
Materials Needed:
Approximately 425-435 yards (1 skein) Caron Cotton Cakes in “Cream” or the color of your choice
5mm (H) hook, for flower lace section
4mm (G) hook for scarf ends
Yarn needle
Scissors
Stitches Used:
sl st = slip stitch
ch = chain
sc = single crochet
dc = double crochet
3dc cluster = dc3tog in the same stitch
sk = skip
yo = yarn over
st(s) = stitch(es)
sp(s) = space(s)
prev = previous
Additional Terms:
Working in the 3rd loop of hdc. Instructions: From the front, look at the top of the stitch, and locate the sideways “V”, bend the stitch to look at the back, and you should see another “V”. You’ll be working into the back loop of that “V”, this is called the 3rd loop.
Puff stitch: [yo, draw up a loop] 3 times, you will have 7 loops on your hook, yo, pull through all 7 loops.
3pufftog: [yo, draw up a loop] 3 times across each of the next 3 sc sts, you will have 19 loops on your hook, yo, pull through all 19 loops.
Gauge:
Gauge is not especially important.
Measurements:
7 ‘ long by 7 1/2″ wide when blocked
Additional Notes:
-Ch-1 at beginning of row does not count as a stitch.
Shabby Chic Lace Scarf with Flowers and Ruffle (US Terms):
Click here to purchase an ad-free, print-optimized PDF of this pattern on LoveCrafts
Ch 32,
Row 1: sc in second ch from hook and in each remaining st across, ch 1, turn. (31 sc)
Row 2: sc in first st, *ch 3, sk 2 sts, sc in next st; repeat from * across working final sc in turning ch-1, ch 5 (counts as first dc+ch 2 of next row), turn. <10 ch-3 sps, 11 sc>
Row 3: sc in first ch-3 sp, *ch 3, sc in next ch-3 sp; repeat from * across, when you finish working in final ch-3 sp ch 2, dc in final sc of row, ch 1, turn. <11 sc, 10 ch-3 sps, 2 ch-2 sps and 2 dc>
Row 4: sc in first st, ch 3, sk first ch-sp, sc in next ch-3 sp, ch 3, *[yo, draw up a loop] 3 times across each of the next 3 sc sts, you will have 19 loops on your hook, yo, pull through all 19 loops—this will be referred to as a 3pufftog st from now on, using tight tension ch 1 to close, ch 3, working in the ch-1 you used to close your 3pufftog st [yo, pull up a loop] 3 times, yo, pull through all 7 loops on your hook, ch 1, this will make a 4 petaled flower**, [sc in next ch-3 sp, ch 3] 3 times; repeat from * across, end final repeat at ** and work sc in next ch-3 sp, ch 3, sc in 3rd ch of turning ch, ch 5, turn. <2 4-petaled flowers>
Row 5: sc in ch-3 sp, *ch 3, puff in center of 4 petal flower made in prev row, [ch 3, puff in same st] 2 times, this will make a 3-petaled flower, ch 3, sk ch-3 sp immediately following 4 petal flower in prev row, sc in next ch-3 sp**, ch 3, sc in next ch-3 sp; repeat from * across, when you complete the final 3-petaled flower stop at **, ch 2, dc in beg sc (or ch if working row 5-10 repeats) from prev row, ch 1, turn. <2 completed flowers with 3 ch-3 sps between each, (one ch-3 sp, sc, ch-2 sp, dc) at each end>
Row 6: sc in top of dc, ch 3, sk ch-2 sp, sc in ch-3 sp, *ch 3, sc in next ch-3 sp; repeat from * across, working last sc in 3rd ch of turning ch, ch 3, turn. <10 ch-3 sps, 11 sc>
Row 7: [Yo, draw up a loop] 3 times in first sc, [yo, draw up a loop] 3 times in next sc, you will have 13 loops on your hook, yo, pull through all 13 loops, using tight tension ch 1 to close, ch 3, working in the ch-1 you used to close your puff sts [yo, pull up a loop] 3 times, yo, pull through all 7 loops on your hook, ch 1, this will make a 3 petaled flower, [sc in next ch-3 sp, ch 3] 3 times, 3pufftog across next 3 sc sts, using tight tension, ch 1 to close, ch 3, working in the ch-1 you used to close your 3pufftog st [yo, pull up a loop] 3 times, yo, pull through all 7 loops on your hook, ch 1, [sc in next ch-3 sp, ch 3] 3 times, when you have 2 sc sts left in your row [yo, draw up a loop] 3 times in second to last sc, [yo, draw up a loop] 3 times in final sc, yo and draw through all loops, using tight tension ch 1 to close, ch 1, dc in final sc, ch 3, turn. <half flower on each end, 1 4-petaled flower with 3 ch-3 sps between each>
Row 8: [Yo, draw up a loop] 3 times in ch-1 used to close the puff sts, yo, pull through all 7 loops on your hook, ch 3, [yo, draw up a loop] 3 times in same st as before, yo, pull through all 7 loops on your hook, ch 3, sk ch-3 sp, [sc in next ch-3 sp, ch 3] 2 times, puff in center of 4 petal flower made in prev row, [ch 3, puff in same st] 2 times, ch 3, sk ch-3 sp, [sc in next ch-3 sp, ch 3] 2 times, when you come to final flower work the following sequence in the ch-1 sp: [Yo, draw up a loop] 3 times, yo, pull through all 7 loops on your hook, ch 1, dc in top of ch-3, ch 1, turn. <half flower on each end, 1 completed flower with 3 ch-3 sps between each, dc + ch-1 on each end>
Row 9: Sc in first st, ch 3, sc in ch-3 sp, *ch 3, sc in next ch-3 sp; repeat from * across, place final sc in top of ch-3 from prev row, ch 5, turn. <10 ch-3 sps, 11 sc>
Row 10: Sk first ch-3 sp, sc in next ch-3 sp, ch 3, *3pufftog across next 3 sc sts, using tight tension ch 1 to close, ch 3, working in the ch-1 you used to close your 3pufftog st [yo, pull up a loop] 3 times, yo, pull through all 7 loops on your hook, ch 1**, [sc in next ch-3 sp, ch 3] 3 times; repeat from * across, end final repeat at ** then sc in final ch-3 sp, ch 3, sc in final sc of row, ch 5, turn. <2 4-petaled flowers>
Repeat rows 5-10 until your scarf is about 6 1/2 ft long, then work rows 5 and 6 ending row 6 with a ch-1 instead of a ch-3, turn:
Ending row: sc in first sc, 3 sc in next 9 ch-3 sps, 2 sc in final ch-3 sp, sc in final sc of row. <31 sc>
Fasten off, and weave in ends.
Scarf Ends:
With 4mm hook,
With front side facing, attach yarn to opposite end of row,
Row 1: hdc in each st across, ch 1, turn. <31 hdc>
Row 2: working in 3rd loop, sc in each st across, ch 3 (counts as first dc of row 3, turn. <31 sc>
Row 3: 3-dc cluster in next st, *ch 1, sk st, 3-dc cluster in next st; repeat from * across, dc in final st of row. <15 3-dc clusters, 14 ch-1 sps, 1 dc>
Fasten off and weave in ends.
With front side facing, attach yarn to opposite end of row,
Row 4: hdc in 3rd ch from prev row, hdc in each 3-dc cluster and ch-1 sp across, hdc in final dc, ch 1, turn. <31>
Row 5: working in 3rd loop, sc in each st across. <31>
Fasten off, and weave in ends. Repeat for other end of scarf
Block, then continue with ruffle.
Sewing ruffles for the ends of your scarf:
Note: it will be helpful to block this scarf first, then get measurements for your ruffles. My scarf measured 7 1/2” across after I took it off the blocking board.
If creating fabric ruffles is not your thing you are welcome to only use the lace along the scarf ends. You could also potentially find an old ruffly curtain at a thrift store and cut out a section to attach to the ends of your scarf. I would not have been able to realize this design without the help of my mom. Since I make no claims to being a seamstress these directions are a bit rough. If you can hem a rectangle, baste a running stitch for the gather, and then sew all the layers together afterward that is basically what we did. You may have a much easier way of completing this process. If you do, please follow that method instead. The fewer grey hairs we can acquire, the better!
Materials Needed:
1/2 yard of 4” Ivory Ruffled Lace Trim. <–Click here to purchase the exact kind of lace I used
1/2 yard Gauze fabric in “Cream” <–Click here to purchase the exact kind of fabric I used
1/2 yard Chiffon in “Ivory” <–Click here to purchase the exact kind of fabric I used
1 package of 7/8″ Bias tape in “Ivory” <–Click here to purchase the exact kind of bias tape I used
Sewing machine for putting ruffle together
Needle and thread for sewing ruffle to scarf
Rotary cutter
Cutting mat
Ruler or measuring tape for measuring
straight pins
The patience of a saint
Bottom layer: Gauze
Cut rectangle of gauzy fabric 2 times wider than the measurement across the end of the scarf, by 10” long. My rectangle was 15” x 10”. Hem the side edges and sew a basting stitch across the top of the 15″ side. Gather to the width of your scarf.
Middle layer: Chiffon
Note: This fabric is gorgeous, but very tricky to work with. If you have never tried to sew with it before you may wish to use another fabric (your future sanity will thank you). The key to success is using a sharp rotary cutter to cut the initial rectangle out (do not even attempt to cut this fabric with scissors) an iron to press the seams in place, lots of pins, and even more patience. My rectangles turned out a bit more like parallelograms than rectangles, but hopefully you can’t really tell. Shabby chic is supposed to look a bit “shabby”, so a not-quite-square rectangle adds to the charm—I think.
Using a rotary cutter, cut rectangle of the chiffon fabric at least 2 times as wide as the measurement across the scarf, by 13” tall. My rectangle was 16” x 13”. You may want to get enough fabric so that if you make a mistake on this you have some extra fabric to make another piece. Sew along short sides leaving 1/2” of seam allowance on edges. Fold in half (You ruffle will measure 16″ wide by 6.5″ tall now). If you know how to make a French Seam I highly recommend doing that here at the top of the rectangle. If you do not know how or do not wish to do this coat each raw edge with fray check. Fold rectangle in half with wrong side sewing. Sew along top leaving 1/2” for seam allowance. Turn right side out, and sew a running stitch along seam. Gather the top edge. Pat yourself on the back. This is a beast to work with and as such I don’t think I’ll be using it again for quite a while! 🤣
Top layer: Lace
Measure across the scarf ends, then cut your lace at least 1 1/4” wider than this measurement. This will give you at least 1/2” seam allowance on each side. Fold the ends over and sew to create a nice finished edge.
Putting your ruffle together:
1. Create the ruffle by placing your layers on top of each other, pinning them in place, and then sewing them.
2. Wrap bias tape around front and back of the top of the ruffle and sew in place to create a nice smooth edge that will not fray out. This makes a neat little “packet”. This is optional, but if you want your scarf to last and be more durable, I highly recommend it.
3. Pin the ruffle packet in place along the bottom edge of the scarf. Hand stitch it to the scarf, or if you are feeling adventurous you can attempt to sew on your crochet with the machine. I have not tried this, so do at your own risk!
Repeat for the other end of the scarf.
Ok,
So you’re totally lost on how to create the flower lace stitch? No problem. This somewhat lengthy picture tutorial will walk you through creating the lace pattern used in this design!

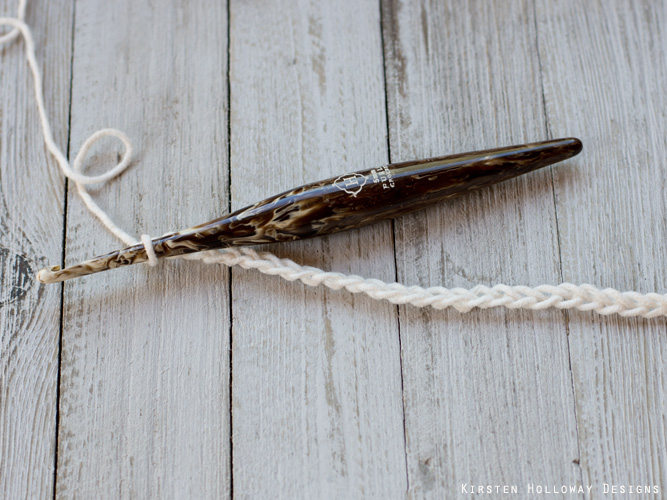
Step 1: ch 32

Step 2: Row 1: sc in second ch from hook and in each remaining st across, ch 1, turn. (31 sc)
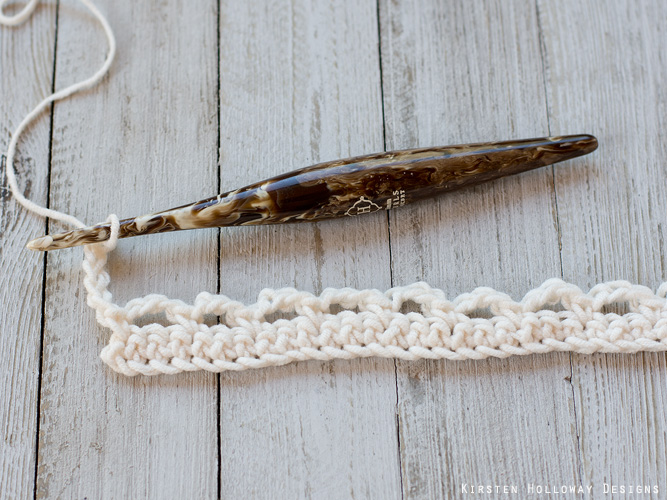
Step 3: Row 2: sc in first st, *ch 3, sk 2 sts, sc in next st; repeat from * across working final sc in turning ch-1, ch 5 (counts as first dc+ch 2 of next row), turn.
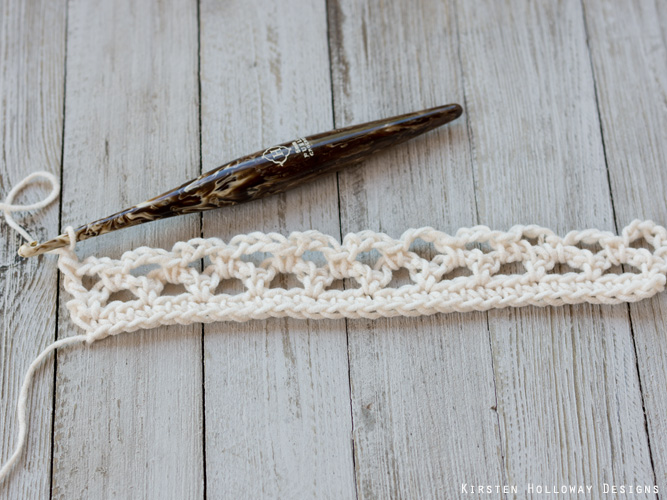
Step 4: Row 3: sc in first ch-3 sp, *ch 3, sc in next ch-3 sp; repeat from * across, when you finish working in final ch-3 sp ch 2, dc in final sc of row, ch 1, turn.

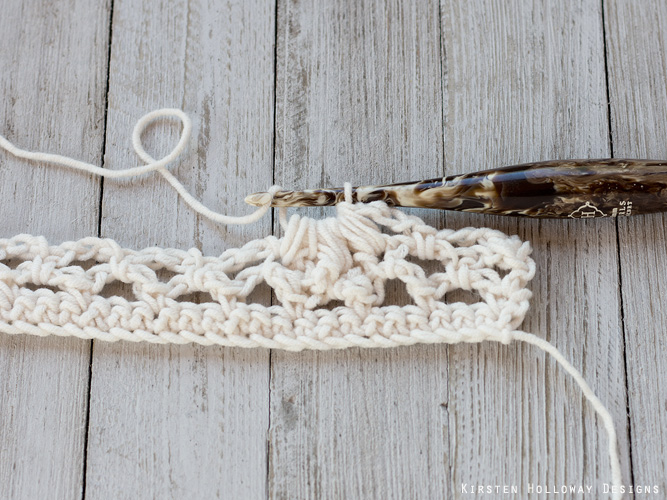
Step 5: Row 4: sc in first st, ch 3, sk first ch-sp, sc in next ch-3 sp, ch 3, *[yo, draw up a loop] 3 times across each of the next 3 sc sts, you will have 19 loops on your hook,
Step 6: yo, pull through all 19 loops—this will be referred to as a 3pufftog st from now on,


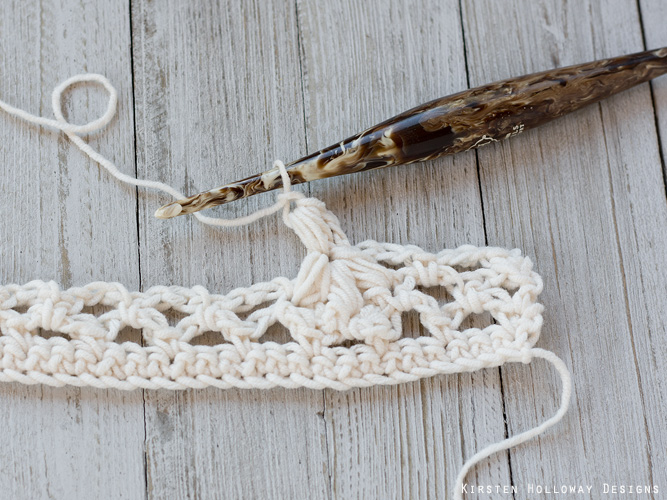


Step 7: using tight tension ch 1 to close,
Step 8: ch 3, working in the ch-1 you used to close your 3pufftog st [yo, pull up a loop] 3 times,
Step 9: ch 1, this will make a 4 petaled flower
Step 10: sc in next ch-3 sp,
Step 11: sc in next ch-3 sp, 2 more times,
Step 12: [yo, draw up a loop] 3 times across each of the next 3 sc sts, you will have 19 loops on your hook,
Step 13: using tight tension ch 1 to close, ch 3,
Step 14: working in the ch-1 you used to close your 3pufftog st [yo, pull up a loop] 3 times, ch 1, this will make a 4 petaled flower, sc in next ch-3 sp, ch 3,
Step 15: sc in 3rd ch of turning ch, ch 5, turn.
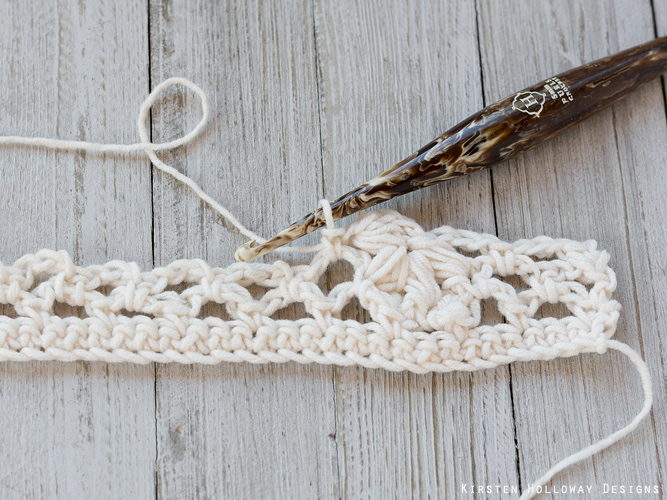
Step 16: Row 5: sc in ch-3 sp, ch 3,


Step 17: puff in center of 4 petal flower made in prev row, [ch 3, puff in same st] 2 times, this will make a 3-petaled flower, ch 3,
Step 18: [ch 3, puff in same st] 2 times, this will make a 3-petaled flower, ch 3,
Step 19: sk ch-3 sp immediately following 4 petal flower in prev row, sc in next ch-3 sp, ch 3, sc in next ch-3 sp, ch 3,
Step 20: puff in center of 4 petal flower made in prev row, [ch 3, puff in same st] 2 times, this will make a 3-petaled flower, ch 3, sc in next ch-3 sp, ch 2, dc in beg sc (or ch if working row 5-10 repeats)
Step 21: Row 6: sc in top of dc, ch 3, sk ch-2 sp, sc in ch-3 sp, *ch 3, sc in next ch-3 sp; repeat from * across, working last sc in 3rd ch of turning ch, ch 3, turn.
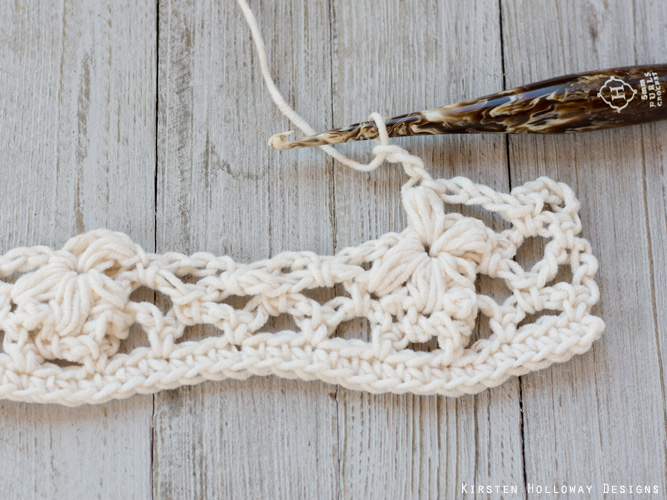
Step 22: Row 7: [Yo, draw up a loop] 3 times in first sc, [yo, draw up a loop] 3 times in next sc, you will have 13 loops on your hook,
Step 23: yo, pull through all 13 loops, using tight tension ch 1 to close, ch 3, working in the ch-1 you used to close your puff sts, [yo, pull up a loop] 3 times, yo, pull through all 7 loops on your hook, ch 1, this will make a 3 petaled flower, sc in next ch-3 sp,
Step 24: ch 3, [sc in next ch-3 sp, ch 3] 2 times,


Step 25: 3pufftog across next 3 sc sts,
Step 26: using tight tension, ch 1 to close, ch 3, working in the ch-1 you used to close your 3pufftog st [yo, pull up a loop] 3 times, yo, pull through all 7 loops on your hook, ch 1, [sc in next ch-3 sp, ch 3] 3 times when you have 2 sc sts left in your row [yo, draw up a loop] 3 times in second to last sc, [yo, draw up a loop] 3 times in final sc,
Step 27: yo and draw through all loops, using tight tension ch 1 to close, ch 1, dc in final sc, ch 3 (not pictured below), turn.
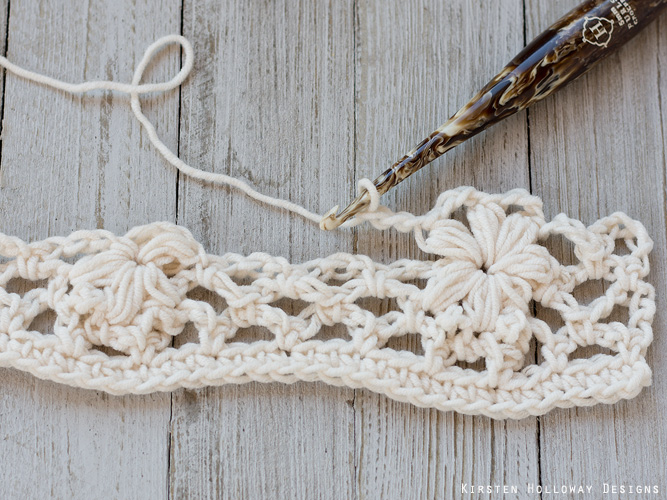
Step 28: Row 8: [Yo, draw up a loop] 3 times in ch-1 used to close the puff sts, yo, pull through all 7 loops on your hook, ch 3, [yo, draw up a loop] 3 times in same st as before, yo, pull through all 7 loops on your hook, ch 3, sk ch-3 sp,
Step 29: [sc in next ch-3 sp, ch 3] 2 times,
Step 30: puff in center of 4 petal flower made in prev row, [ch 3, puff in same st] 2 times, ch 3,
Step 31: sk ch-3 sp, [sc in next ch-3 sp, ch 3] 2 times, when you come to final flower work the following sequence in the ch-1 sp: [Yo, draw up a loop] 3 times, yo, pull through all 7 loops on your hook, ch 1, dc in top of ch-3, ch 1, turn.
Step 32: Row 9: sc in first st, ch 3, sc in ch-3 sp, *ch 3, sc in next ch-3 sp; repeat from * across, place final sc in top of ch-3 from prev row, ch 5, turn.
Row 10 is very similar to row 4 so I have not included it in this picture tutorial. Repeat rows 5-10 until your scarf is about 6 1/2 ft long, then work rows 5 and 6 ending row 6 with a ch-1 instead of a ch-3, turn. Scroll up to the main pattern to begin the scarf ends.
I would love to see a picture when you’re done, so please feel free to come by my Facebook group and show off your project! Be sure to tag @kirstenhollowaydesigns when you share pictures of your finished scarf on Instagram.
You can also follow me on Facebook, Pinterest, Instagram, and Ravelry for more crochet patterns.
Pattern Terms and Conditions:
You are welcome to share the link to this pattern, using one image of your choice, on your site, but please do not share the written patterns themselves, or use additional images. You do not have permission to use my images by themselves to create pinnable graphics for Pinterest, however they may be included in a roundup pin if there are 4 or more other patterns.
This pattern was made to be used by individuals, and small business crocheters alike. Selling your finished pieces in boutiques, at farmer’s markets, craft shows, and other local events is encouraged! Please credit/link Kirsten Holloway Designs when selling finished products online. The only thing I require is that this pattern not be used commercially to produce hundreds of thousands of copies. Also, if you sell finished items online, please do not use my pictures for your listings. I’m positive that your work is of high enough quality for you to sell the finished piece. Have confidence in your abilities! <3 Thank you!
Sharing a link to this post with your friends is also always appreciated!


