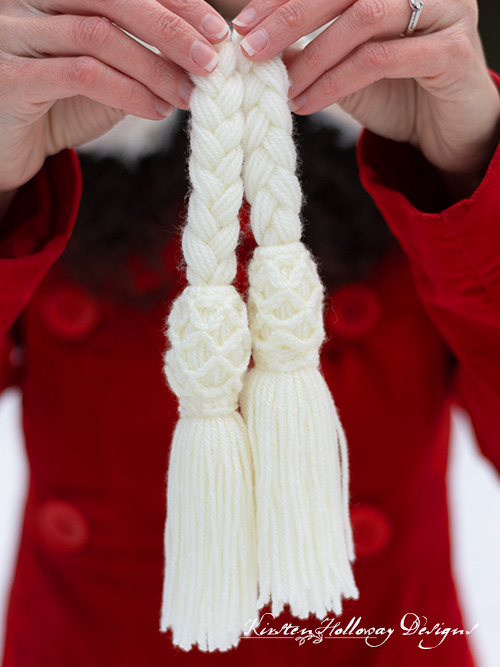
Yes, this beautiful tassel is attached to the true END of a braid–not the center. I have seen many beautiful tassels but never attached to the end of the braid. This easy tutorial will show you how to make your own crocheted tassel that can be attached to the raw end of braided ties. I’ll also walk you through how to set up your braided ties for a more luxurious look. If you already have that part down scroll down to “step 1”.
Click here to add this to your Ravelry queue!
Helpful Tips Before You Begin Your Tassel
To begin with you will need a braided tie. It’s up to you how long you wish to make your braids. The longer the tie the more luxurious it looks, but if you are worried about choking, keep them to 12″. Remember, hats with ties and tassels are never toys. Do not allow the child to play with the hat.

As a rule of thumb, I like:
- 12″ ties for baby hats
- 15″ ties for toddler hats
- 18″ ties for kid’s hats
- 24″ ties for adult hats
I cut the strands of yarn that I use double the length that I want the finished tie, so for example, if I want a 12″ tie, I cut 24″ strands. Once I pull them half-way through the bottom of the earflap they will come up to 12″.
The amount of strands you use for each braided tie is up to you. For the ties in this tutorial I used 7 48″ strings per strand; a 3-strand braid has 21 strings. Folded in half that makes for a 24″ tie.
Braid all 3 sections into a tie.
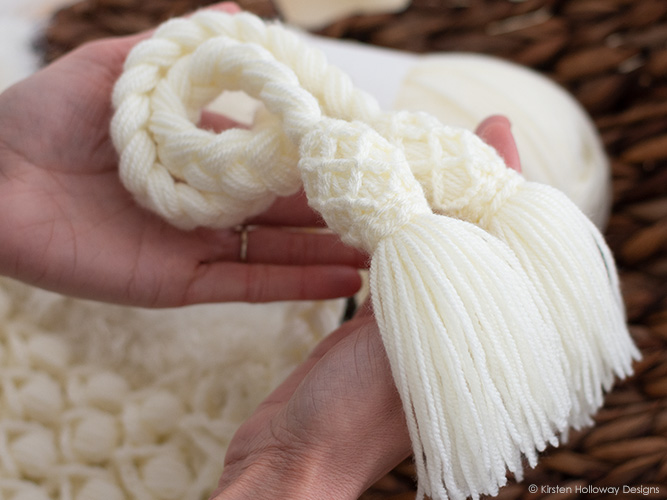
This will work to make a double-ended tie for home-decor purposes! Just remember these tassels are not toys. I’ve tried to construct them as sturdy as I can, but even the best wrapped and knotted tassel can still pull out if it’s rough-housed with. (I have 3 expert “testers” of this fact on my “staff” here at home. “Unbreakable” is a challenge around here, not a scientifically proven fact. 🤦♀️) Anyway, I digress…
How to Crochet a Fancy Tassel
For this tutorial I am using:
- Approx 80 yards #3 light weight Paintbox Yarns Simply DK in Champagne White for both ties and tassels. Tassels by themselves will use about 40 yards.
- a 3.25mm crochet hook
- a 5mm crochet hook (only for helping me pull yarn through tight places)
- Scissors
- Ruler or tape measure.
You can use any weight of yarn for this tassel. Just be sure to use the recommended hook size for the yarn you use. You will find this information on the label.
After you have braided your tie:
Step 1 – Preparing the end of the braid:
Cut a 12” strand of yarn. Wrap it tightly around the bottom of your braid several times and then tie it off as tightly as you can. Add a few dots of super glue to help hold it in place if needed.
The goal is to make sure it is as tight and secure as you possibly can as this will hold your tassel yarn and we do not want the tassel to come undone. That being said, these ties and tassels will probably not hold up to repeatedly being swung around by the tassel ends. 😅 Sensibility and common sense is a must in setting expectations.
Repeat for the other tie.

Leaving about 1” or up to 2” of space below the tied piece of string, trim the bottom part of the braid off even. You will want as much of this part as possible to sit neatly up under the cap that we’ll crochet in the next step.
Step 2 – Crocheting the tassel cap:
This cap measures approximately 2” tall x 1 1/4” wide.

All chains in this section should be worked with tight tension. The tighter the better. This will accentuate the diamond lattice look on the outside of the top of the tassels. The chain at the top just needs to be large enough to squeeze your braided ties through (and if you’ve done it right it will be a little bit of a squeeze).
Stitches Used:
sl st = slip stitch
ch = chain
sc = single crochet
TASSEL CAP (MAKE 2):
With 3.25mm (D) hook, ch 6 (if you used fewer strings of yarn in your ties than I did, try chaining 5 instead), join with sl st to first ch,
Round 1: ch 1, 10 sc in ch-6 sp, join with sl st to first sc. (10)
Round 2: *ch 5, sk st, sl st in next st; repeat from * around. Final sl st counts as join (5 ch-5 sp)
Remember to keep your tension on the chains tight.
Rounds 3-5: sl st up first ch 3 sts of first ch-5 sp, *ch 5, sl st in next ch-5 sp; repeat from * around, final sl st will be worked in 3rd sl st at beginning of round. (5 ch-5 sp)
Round 6: sl st up 3 ch sts, ch 1, 1 sc in ch-5 sp, *2 sc in next ch-5 sp* repeat * to * 3 times, sc in final ch-5 so where you placed your first sc of round, join with sl st to first sc. (10 sc)
Round 7: ch 1, sc in each sc stitch around, join with sl st to first sc. (10 sc)
Round 8: Loosely sl st around bottom of tassel between rounds 6 and 7.
Fasten off leaving 12” tail for sewing cap to tassel.
Step 3 – Threading your tassel cap onto your tie:
Thread the end of your tie through the top of your tassel cap. Use a hook to help pull the strands through the opening. I slipped the cap over the top of my 5mm hook and pulled the tie ends through the top a few strings at a time.

Push the cap up the tie a little bit so that the last little bit of your braid is showing above the place where you wrapped the 12” string around the bottom of your tie. That will be just a little higher than what I show here:

Repeat for the other braid.
Step 4 – How to attach tassels to braids:
Cut 50 12” lengths of yarn. This will become the swishy, lower part of your tassel.
Once you have done this, tightly tie another 12” length of yarn around the very middle of the 50-strand bundle. Do this as tightly as possible. This step could be considered optional, but don’t skip over it! Doing this will help to help keep all your “ducks in a row” so to speak so the tassel strands don’t start falling out.

Loop them half-way through the end of your braided tie just above where you tightly wrapped your piece of yarn. I stuck my finger through to show you the approximate place this should be.


Flop the tassel strings down over the top of the tightly wrapped knot. Make sure they are smooth and there are no lumps. I used a wide-toothed comb to gently brush the strings and help make my tassel tangle free after completing this part.

Step 5 – Positioning the cap over the tassel:
Even up the ends of your tassel strings so one side isn’t longer than the other side, then gently ease your cap down over top of this whole creation.

Sew in place back and forth through the tassel strings using 12” tail on the tassel cap to secure.
If the lower part of your tassel strings are a bit wavy like mine were, soak the bottom of your tassel with cool water, squeeze out the excess water, hang your hat over the back of a chair and let the tie dry over night. Gravity should help to straighten the ends out. Trim the bottom of your tassel neatly.
Repeat for the other tie.
Get inspired and add these to all of your special hats!
Want more gorgeous crochet patterns, and a little encouragement for your day? Sign up for my newsletter here! That way you’ll never miss out on special events, or freebies I’m offering.
JOIN ME ON SOCIAL MEDIA
I would love to see a picture when you’re done, so please feel free to come by my Facebook group and show off your finished project! Be sure to tag @kirstenhollowaydesigns when you share pictures of your project on Instagram!
You can also follow me on Facebook, Pinterest, Instagram, and Ravelry for more beautiful crochet patterns.
PATTERN TERMS AND CONDITIONS:
You are welcome to share the link to this pattern, using one image of your choice, on your site, but please do not share the written patterns themselves, this includes my Ravelry downloads or translations of these patterns, or use additional images. You do not have permission to use my images by themselves to create pinnable graphics for Pinterest, however they may be included in a roundup pin if there are 4 or more other patterns. If you sell finished items online, please do not use my pictures for your listings. I’m positive that your work is of high enough quality for you to sell the finished piece. Have confidence in your abilities! <3 Thank you!
This pattern was made to be used by individuals and small business crocheters alike. Selling your finished pieces in boutiques, at farmer’s markets, craft shows, and other local events is encouraged! Please credit/link Kirsten Holloway Designs when selling finished products online. The only thing I require is that this pattern not be used commercially to produce hundreds of thousands of copies. If you enjoyed this pattern or found it useful, why not share a link to this post with your friends?


