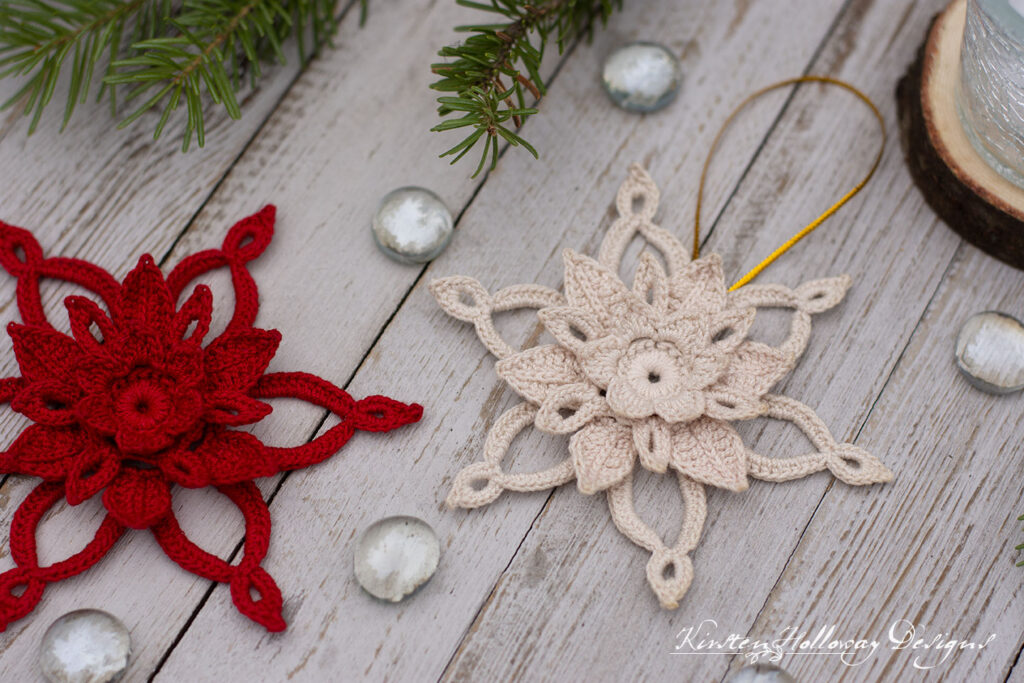
Crochet a beautiful stylized poinsettia flower design that works for ornaments, gift toppers, or as a hair clip! This 3D Christmas flower can be styled in a variety of ways! Find the free crochet pattern instructions below, or purchase a print-optimized, ad-free PDF by clicking here.
Click here to add this to your Ravelry queue!
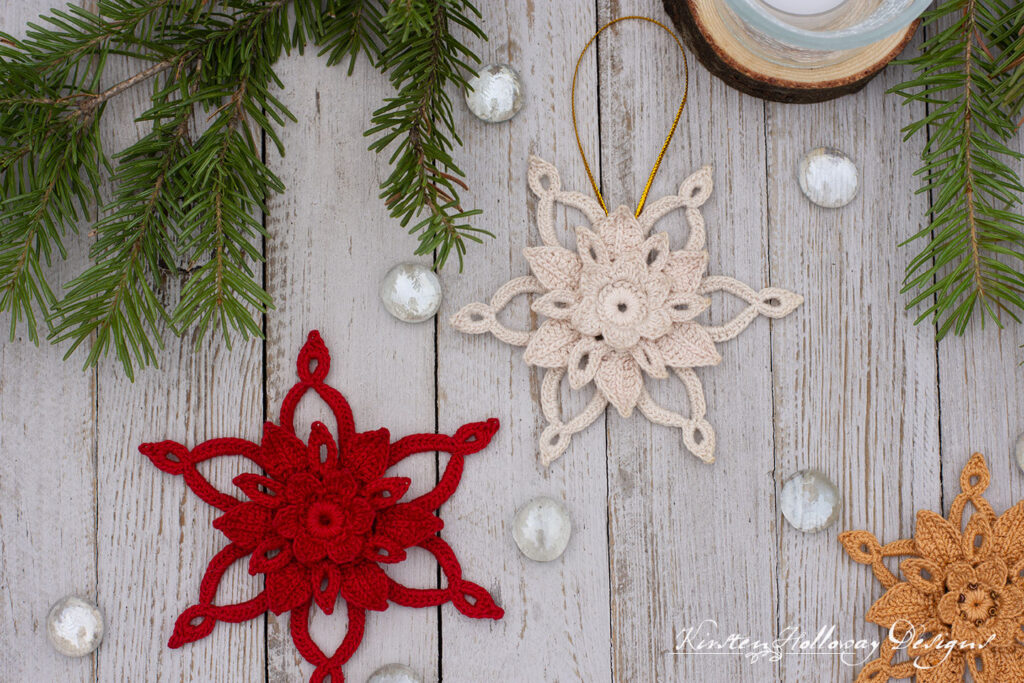
This crochet Poinsettia pattern capture the essence of this traditional Christmas flower and add some fun stylistic elements such as open petals that can also make this double as a snowflake!
I have used #10 crochet thread for this project because it holds it shape well and adds to the delicate beauty of the design. Aunt Lydia’s #10 thread comes in so many pretty colors that I’m sure you will be able to find something that will work for your needs!
You will want to use somewhat tight tension to crochet these ornaments and then starch the flowers when you finish. That way they will have the gorgeous 3D look you see in these pictures.
While this is an “intermediate” level crochet pattern, this tutorial contains quite a few pictures to help those of you who are visual learners.
Disclaimer: This post contains affiliate links. When you purchase something using these links a small percentage of the sales price goes to me. However, you do not pay any extra for the item you purchase.
Difficulty:
Intermediate
Materials Needed:
25-30 yds #10 Aunt Lydia’s Crochet Thread in Victory Red, Natural, or color of your choice
1.4mm steel hook
Yarn needle
Scissors
Stitch markers
8” very thin gold ribbon or cord
Blocking board
Starching spray
(Optional) Small piece of felt
(Optional) Hair clip or bobby pin
(Optional) Hot glue and glue gun
(Optional) Small seed beads, bead needle, and thread to embellish your flower further.
Stitches Used:
sl st = slip stitch
ch = chain
sc = single crochet
hdc = half double crochet
dc = double crochet
BPsc = back post single crochet
Additional Terms:
Tiny picot: ch 1, sl st back into same ch
Picot: ch 2, sl st into first ch
st/sts = stitch/stitches
sp/sps = space/spaces
prev = previous
Gauge:
Gauge is not particularly important for this project
Measurements:
Approximately 4 1/4” across
Additional notes:
-Ch-1 at beginning of round does not count as a stitch
-This pattern can be made larger or smaller by adjusting hook size and thread size.
-Progress pictures are included in the pattern that show how the rounds should look once they are completed to help those of you out who are more visual. I used #3 Fashion Crochet Thread and a 2.35mm hook so you could clearly see what was supposed to be happening. You will still want to use #10 thread and a 1.4mm hook for your project, or else you’ll get a huge flower–which, if that’s what you wanted, congratulations!
-This ornament makes a very cute hair clip! See notes further down in the pattern for turning your flower into something you can wear.
Pretty Poinsettia Flower Ornament (US Terms):
Click here to purchase an ad-free, print-optimized PDF of this pattern on LoveCrafts
ch 5, join with sl st to first ch,

Round 1: ch 1, 12 hdc in ch-5 sp, join with sl st to first hdc.

Round 2: ch 1, working over top of round 1 and through center of circle, 18 hdc, join with sl st to first hdc, place stitch marker to identify round since you’ll be working into this round again in round 5. (18)

Round 3: *ch 3, sk 2 sts, sl st in next; repeat from * around, final sl st counts as join. (6 ch-3 sps)

Round 4: *sl st into next ch-3 sp (ch 1, hdc, 2 dc, ch 1 sl st back into ch creating tiny picot, 2 dc, hdc, ch 1, sl st); repeat from * around, final sl st counts as join. (6 petals)

The following round is worked around the stitches from round 2 (marked with stitch marker).
Round 5: ch 1, working around sts from round 2, BPsc around each st, join with sl st to first BPsc. (18)

You will now create the chains that will become the hollow center petals in round 7, as well as form the spaces between each petal. If you chain somewhat loosely then you may wish to work an additional sl st around the entire chain to join them together more securely and reduce gaps. This step is optional, but it worked very nicely for me. You will be attaching each completed petal chain with a sl st into the tops of the BPsc sts from the prev round.
I have written the chain spaces that you will be creating in a way that may be a little different than what you are used to. You’ll see this idea again in round 11. The 6 hollow petals that you will be making consist of the equivalent of a ch-4 sp with an additional ch-6 sp at the points. Since the lower space is created separately from the top space I have broken up the ch-4 into essentially 2 ch-2 sps So when you see 12 ch-2 sps in the final stitch counts at the end of the round, know that there are only 6 petals and both “sides” of the petal opening consist of ch-2 sps.
Round 6: sl st into next st, *ch 10, sk 7 ch sts, sl st into 8th ch (this forms first ch-2 sp, and ch-7 sp), (optional: sl st around both parts of the chains to join them together more securely), ch 2 (this is your second ch-2 sp), sk 2 sts in current round, sl st; repeat from * around, final sl st will be worked in the first sl st of round and counts as join. (6 ch-7 sps, 12 ch-2 sps)


Round 7: ch 1, *3 sc in next ch-2 sp, (5 sc, dc, ch 1, sl st back into first ch creating tiny picot, dc, 5 sc) in ch-7 sp 3 sc in ch-2 sp; repeat from * around, join with sl st to first sc. (6 open-center petals, 36 sc)

In the following round the slip stitches are worked through the center of the petals from round 7 and the chains from round 6.
Round 8: ch 3, *sl st through center of ch-7 sp, ch 5, sk 6 sts; repeat from * around, join with sl st to first sl st. (6 ch-5 sps)

Round 9: ch 1, *(3 sc, ch 9, sl st loosely into second ch from hook and using tight tension again into next 8 chs, 3 sc) in ch-5 sp; repeat from * around, join with sl st to first sc. (6 ch-9 “spikes”, 36 sc)

This is how round 9 should look once it is completed:

Round 10: sl st across next st, *sk st (place st marker in skipped st) work this next part up the spike you created in prev round: hdc, dc, tr in next 2 sts, dc, hdc, sc, sl st into end ch, ch 1, sl st back into ch forming picot, sl st into end ch again, then work this part down the spike, in the back loop (this will put the pretty vs going up the center of your leaf): sc, hdc, tr in next 2 sts, dc, hdc, sk st (place st marker in skipped st), sl st across next 4 sts; repeat from * around, omitting last sl st on final repeat, join with sl st to first sl st. (6 petals)


Just another reminder about those stitch markers. I didn’t mark my stitches because I could find them under the bottoms of the petals, but if this is not a technique you have done before, please mark them to save your sanity. <3

Remember back to how you did round 6? The ch-sps in the following round are handled the same way. The 6 hollow petals that you will be making consist of the equivalent of a ch-18 sp with an additional ch-6 sp at the points. Since the lower space is created separately from the top space I have broken up the ch-18 into essentially 2 ch-9 sps (you’ll see me reference those in round 12). So when you see 12 ch-9 sps in the final stitch counts at the end of the round, know that there are only 6 petals and both “sides” of the petal opening consist of ch-9 sps (2×9=18).
But wait, there’s more! Maybe you want shorter outer petals on your flower (see the gold flower). You can achieve those by following the numbers inside the parentheses or brackets for rounds 11 and 12.

Round 11: ch 6, sk petal, sl st into first skipped st (marked with stitch marker) after petal from prev round, *chain 16 (13), sk 6 sts, sl st into next st, ch 9 (6), sl st into next skipped st from prev round (marked with stitch marker), ch 2, sl st into next skipped st from prev round (marked with stitch marker); repeat from * around. (12 ch-9 [6] sps, 6 ch-6 sps, 6 ch-2 sps)
Round 12: ch 1, *(14 [10] hdc, sc, sl st) in ch-9 [6] sp, (5 sc, dc, ch 2, sl st into 1st ch creating picot, dc, 5 sc, sl st) in ch-6 sp, (sc, 14 [10] hdc) in ch-9 [6] sp, sl st in ch-2 sp; repeat from * around final sl st counts as join.
Fasten off, and weave in ends.
Block and starch to help the flower hold its shape.
To make an ornament:
Cut 8” piece of thin ribbon or cord, fold in half and glue ends of ribbon to back of poinsettia.

To make a hair clip:
Cut out felt circle 1 1/2″ in diameter. Use hot glue, or needle and thread to attach felt circle to back of flower.
Attach flower to hair clip, or bobby pin.

Want more gorgeous crochet patterns, and a little encouragement for your day? Sign up for my newsletter here! That way you’ll never miss out on special events, or freebies I’m offering.
JOIN ME ON SOCIAL MEDIA
I would love to see a picture when you’re done, so please feel free to come by my Facebook group and show off your finished project! Be sure to tag @kirstenhollowaydesigns when you share pictures of your project on Instagram!
You can also follow me on Facebook, Pinterest, Instagram, and Ravelry for more beautiful crochet patterns.
PATTERN TERMS AND CONDITIONS:
You are welcome to share the link to this pattern, using one image of your choice, on your site, but please do not share the written patterns themselves, this includes my Ravelry downloads or translations of these patterns, or use additional images. You do not have permission to use my images by themselves to create pinnable graphics for Pinterest, however they may be included in a roundup pin if there are 4 or more other patterns. If you sell finished items online, please do not use my pictures for your listings. I’m positive that your work is of high enough quality for you to sell the finished piece. Have confidence in your abilities! <3 Thank you!
This pattern was made to be used by individuals and small business crocheters alike. Selling your finished pieces in boutiques, at farmer’s markets, craft shows, and other local events is encouraged! Please credit/link Kirsten Holloway Designs when selling finished products online. The only thing I require is that this pattern not be used commercially to produce hundreds of thousands of copies. If you enjoyed this pattern or found it useful, why not share a link to this post with your friends?


