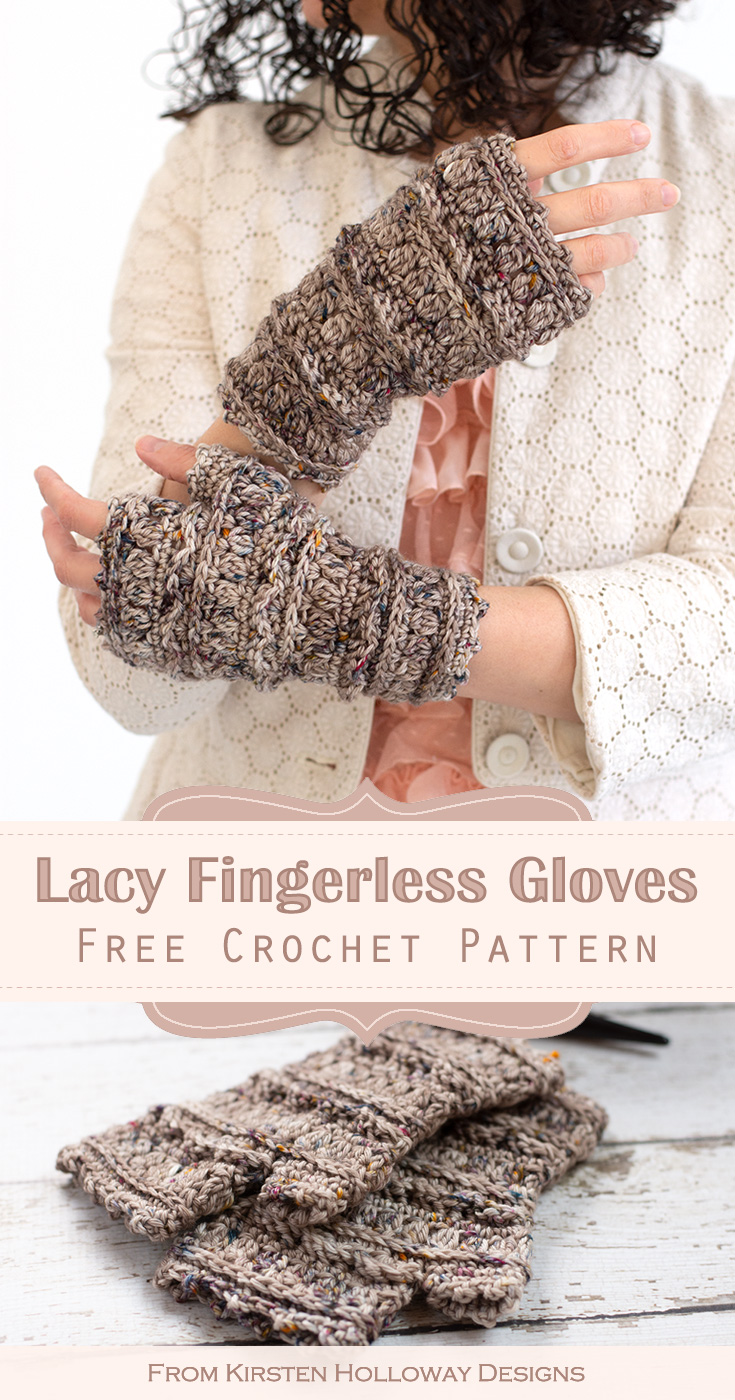
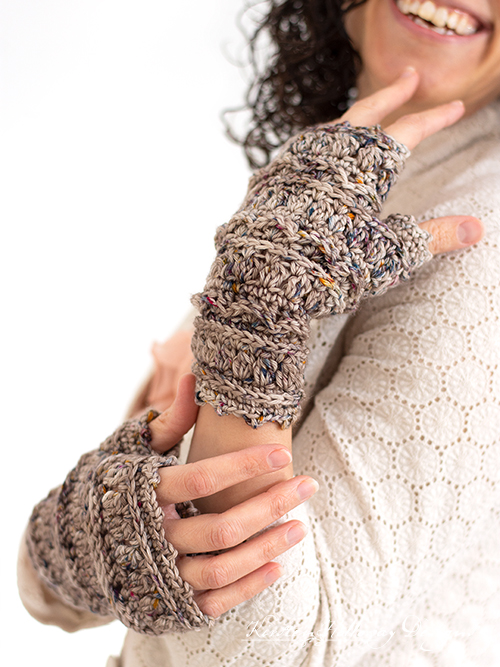
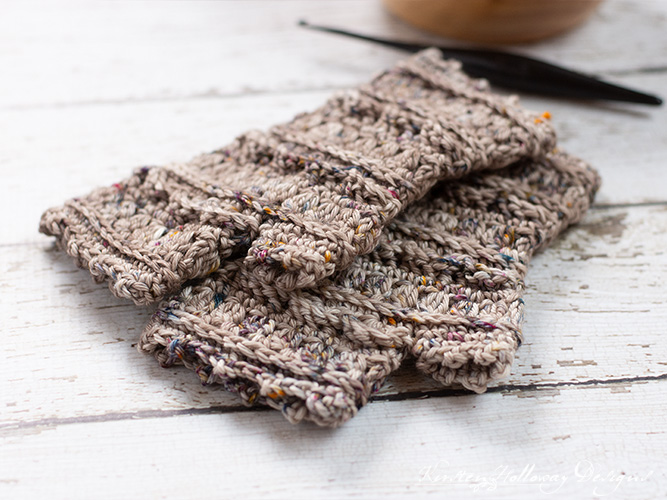
These beautifully textured, lacy fingerless gloves will keep your hands and wrists warm this winter. The crochet pattern comes in one size and will fit most women’s hands. It even has a thumb hole lined with pretty picots! Find the free crochet pattern instructions below, purchase a print-optimized, ad-free PDF by clicking here.
Click here to add this pattern to your Ravelry queue!
I’m here with more texture and lace for your winter wardrobe today! The Layer Cake set continues with the addition of these deliciously textured wrist warmers that look a bit like a slice of fancy chocolate cake.
If you want to make a matching set here are the links to the other two patterns:
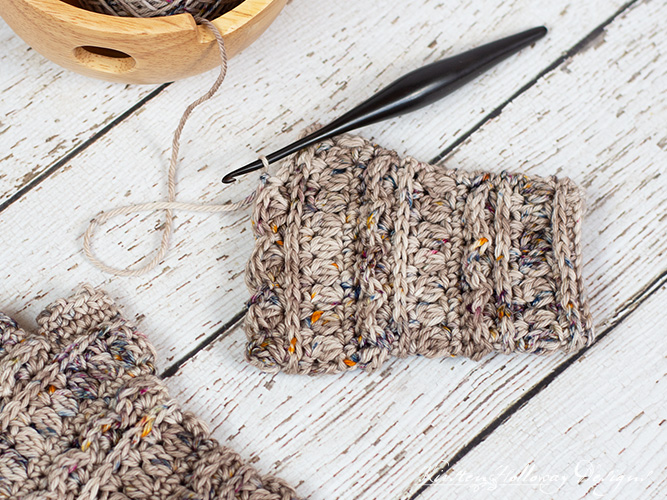
Once again I used KT and the Squid’s lovely Squid Squish Worsted yarn in ‘Bryna” to help accentuate those beautiful stitches!
The crochet stitches I used are simple: shells, clusters, and picots, and I have included some notes throughout the pattern to help you understand the directions a bit better. This may be especially helpful when working the thumb hole.
Don’t you just love how the yarn color changes mix with that glorious texture? It’s a perfect fingerless mitts pattern to crochet as a gift for someone special, or to make for yourself! Let’s get started!
Disclaimer: This post contains affiliate links. When you purchase something using these links a small percentage of the sales price goes to me. However, you do not pay any extra for the item you purchase.
Difficulty:
Easy
Materials Needed:
145-150 yards KT & The Squid Squish Worsted in “Bryna”, or #3 Bernat Baby Sport in color of choice
4.5mm hook, or hook needed to obtain gauge
Yarn needle
Scissors
Stitches Used:
ch = chain
sc = single crochet
hdc = half double crochet
dc = double crochet
3dc cluster = dc3tog in same st
BPsc = back post single crochet
BPhdc = back post half double crochet
st/sts = stitch/stitches
sp/sps = space/spaces
Additional Terms:
Picot: using tight tension, ch 2, sl st back into first st
Working in the 3rd Loop of hdc – Instructions: Look at the top of the stitch, and locate the sideways “V”, bend the stitch to look at the back and you should see another “V” made by the “yarn over”. You’ll be working into the back loop of that “V”. This is called the 3rd loop.
Gauge:
16 hdc in 4”
Measurements:
4 1/2″ wide at widest point, by 8″ tall
Additional Notes:
-ch 1 at beginning of round does not count as a stitch.
-This wrist warmer should fit the average woman’s hand. You may be able to adjust the size a little bit by going up or down a hook size.
-Your seam should run straight along the thumb-hole side of the glove. Your left and right hand glove pattern is the same.
Layer Cake Lace Fingerless Gloves (US Terms):
Click here to purchase an ad-free, print-optimized PDF of this pattern on LoveCrafts
Ch 28, join with sl st to first ch,
Round 1: ch 1, hdc in each st around, join with sl st to first hdc. (28)
Round 2: ch 1, working in 3rd loop of hdc, sc in each st around, join with sl st for first sc. (28)
Round 3: ch 1, *3dc cluster, ch 1, sk st; repeat from * around, join with sl st to first 3dc cluster. (14 3dc clusters, 14 ch-1 sps)
Round 4: ch 1, 2 hdc in each ch-1 sp around, join with sl st to first hdc. (28)
Round 5: ch 1, working in 3rd loop of hdc, sc in each st around, join with sl st to first sc. (28)
Round 6: *sk st, 4 dc in next st, sk st, sl st in next st; repeat from * across, final sl st counts as join. (7 shells)
Round 7: ch 1, *work the following sts across each shell: BPhdc around first st, BPsc around next 2 sts, BPhdc around next st, move to next shell; repeat from * around, join with sl st to first hdc. (28)
Round 8: ch 1, sc in each st around, join with sl st to first sc. (28)
Round 9: ch 1, *3dc cluster, ch 1, sk st; repeat from * around, join with sl st to first 3dc cluster. (14 3dc clusters, 14 ch-1 sps)
Round 10: ch 1, 2 hdc in each ch-1 sp around, join with sl st to first hdc. (28)
Round 11: ch 1, working in 3rd loop of hdc, *2 sc in next st, sc in next 2 sts; repeat from * around, sk final st, join with sl st to first sc. (36)
Round 12: *sk st, 4 dc in next st, sk st, sl st in next st; repeat from * across, final sl st counts as join. (9 shells)
Round 13: ch 1, *work the following sts across each shell: BPhdc around first st, BPsc around next 2 sts, BPhdc around next st, move to next shell; repeat from * around, join with sl st to first hdc. (36)
Round 14: ch 1, 2 sc in each of the next 2 sts, sc in next 32 sts, 2 sc in each of the next 2 sts, join with sl st to first sc. (40)
Round 15: ch 1, *3dc cluster, ch 1, sk st; repeat from * around, join with sl st to first 3dc cluster. (20 3dc clusters, 20 ch-1 sps)
Round 16: ch 1, 2 hdc in each ch-1 sp around, join with sl st to first hdc. (40)
Round 17: ch 1, working in 3rd loop of hdc, sc in each st around, join with sl st for first sc. (40)
In round 18 you will be creating a thumb hole. At the beginning of the round you slip stitch over 6 stitches before beginning the shells. After completing the required number of shells you will skip the rest of the stitches at the end of the round, plus the 6 stitches you slip stitched along at the very beginning of the round. This will leave you with roughly a 12 stitch gap for the thumb.
Round 18: sl st over 6 sts, sk st, [4 dc in next st, sk st, sl st in next st] 7 times, sk 6 sts, join with sl st to 6th sl st. (7 shells)
You will work the rest of the rounds for the fingerless glove around the hand hole. Don’t worry about the thumb hole for now. Once you are done with this part you will come back and work a couple of rounds to lengthen the thumb hole.
Round 19: ch 1, *work the following sts across each shell: BPhdc around first st, BPsc around next 2 sts, BPhdc around next st, move to next shell; repeat from * around, join with sl st to first hdc. (28)
Round 20: ch 1, sc in each st around, join with sl st to first sc. (28)
Round 21: ch 1, *3dc cluster, ch 1, sk st; repeat from * around, join with sl st to first 3dc cluster. (14 3dc clusters, 14 ch-1 sps)
Round 22: ch 1, 2 hdc in each ch-1 sp around, join with sl st to first hdc. (28)
Round 23: ch 1, working in 3rd loop of hdc, sc in each st around, join with sl st to first sc. (28)
Round 24: ch 1, *sc in next 3 sts, picot; repeat from * around, sc in final st, join with sl st to first sc. (28)
Fasten off, weave in ends.
Top edging:
Attach yarn to top of glove,
Round 1: ch 1, *sc in next 3 sts, picot; repeat from * around, sc in final st, join with sl st to first sc. (28)
Fasten off, and weave in ends.
Thumb hole edging:
Attach yarn to thumb hole (Round 18),
Round 1: ch 1, sc evenly around entire thumb hole, join with st st to first sc. (12)
Round 2: ch 1, *sc in next 2 sts, picot; repeat from * around, join with sl st to first sc.
Fasten off, and weave in ends.
Want more gorgeous crochet patterns, and a little encouragement for your day? Sign up for my newsletter here! That way you’ll never miss out on special events, or freebies I’m offering.
JOIN ME ON SOCIAL MEDIA
I would love to see a picture when you’re done, so please feel free to come by my Facebook group and show off your finished project! Be sure to tag @kirstenhollowaydesigns when you share pictures of your project on Instagram!
You can also follow me on Facebook, Pinterest, Instagram, and Ravelry for more beautiful crochet patterns.
PATTERN TERMS AND CONDITIONS:
You are welcome to share the link to this pattern, using one image of your choice, on your site, but please do not share the written patterns themselves, this includes my Ravelry downloads or translations of these patterns, or use additional images. You do not have permission to use my images by themselves to create pinnable graphics for Pinterest, however they may be included in a roundup pin if there are 4 or more other patterns. If you sell finished items online, please do not use my pictures for your listings. I’m positive that your work is of high enough quality for you to sell the finished piece. Have confidence in your abilities! <3 Thank you!
This pattern was made to be used by individuals and small business crocheters alike. Selling your finished pieces in boutiques, at farmer’s markets, craft shows, and other local events is encouraged! Please credit/link Kirsten Holloway Designs when selling finished products online. The only thing I require is that this pattern not be used commercially to produce hundreds of thousands of copies. If you enjoyed this pattern or found it useful, why not share a link to this post with your friends?
.sdg.


If I want to make these longer, at which round would you repeat? Thank you.
If you want to make it longer at the fingertips you’d need to repeat several rounds to keep the texture going. This would be round 18 (minus the slip stitches to move you over in the round) through round 23.
Thanks so much for the free pattern. I bought some ombre purple Caron cakes a while ago because my daughter liked them but I wasn’t happy with the way the colors blended on anything and these gloves look great. They’re very textured and cozy but still feminine and cute and the color blend is nice for this pattern. My daughter is 16, I’ll be gifting them for Christmas this year and I’m confident she will love them too. Can’t wait to make more for myself. The pattern is super easy to follow, didn’t take long and looks easy enough to tweak sizing if needed for kids or larger hands.
I made these gloves and love the pattern! Now my 4 and 6 yr old daughters want some too! Is there an easy way to adapt the pattern for a smaller size?
Hi Hilary,
You might try crocheting them with a #2 or even a #1 weight yarn and a size smaller hook and see how they come out. 😊
Hi there, I have a silly question – I’m fairly new to crochet and I think I’m doing something wrong. The texture in the pattern is on the “inside” of the glove and not the outside. I feel a little silly for asking, but what did I do wrong? Thanks!
Hi Sally,,
It sounds like you’re working into the wrong “3rd loop”. Work into the one on the back of the stitch–not the front–and your ridge should be visible on the front. 😊
Love this pattern! So we’ll written and explained beautifully! Exactly what I was looking for in a fingerless glove pattern!
Thank you! 👍🙌🌸
Thank you, Debbie! I’m glad you enjoyed crocheting them!
The yarn for this is no longer available… What type of worsted do you recommend? On the lighter side like a caron simply soft or heavy like a hobby lobby I love this yarn or something else you recommend in between? Thank you!
Hi Andrea,
I’d try something like Caron Simply Soft, or even better, Bernat Baby Softee which is listed as a #3 yarn. 😊
Hi Kirsten
I have bought your pattern for layer cake fingerless glove and having trouble with with row18. I’ve completed the seven shells and have 12 stitches left before I finish the round plus the 6 slip stitches at start of round what could I be doing wrong?
Hi Clara,
Did you have 40 stitches in the previous round? The 7 shells should cover 28 stitches leaving 12 stitches unworked (which will be the thumb hole). Each shell should take 4 stitches: 7×4=28. I hope that helps!
Hi Kirsten
Thanks for getting back so quickly. I actually did have the 40 stitches, I followed what you told me. Still left with 12 stitches at end plus the 6 slip stitches at start. I kept going and doesn’t look too bad but I might unravel and try again.
Thanks again