This easy crochet super scarf is warm, cozy, and l-o-n-g–all the things a super scarf should be! Also, the lacy details add elegance, and will keep you looking gorgeous all winter. Because this super scarf is so versatile, it can be made in a variety of lengths, and widths! Find the free crochet pattern instructions below, or purchase a print-optimized, ad-free PDF by clicking here.
If you want to make a gift set:
- Find the Primrose and Proper slouch hat pattern here.
- Find the Primrose and Proper fingerless gloves pattern here.
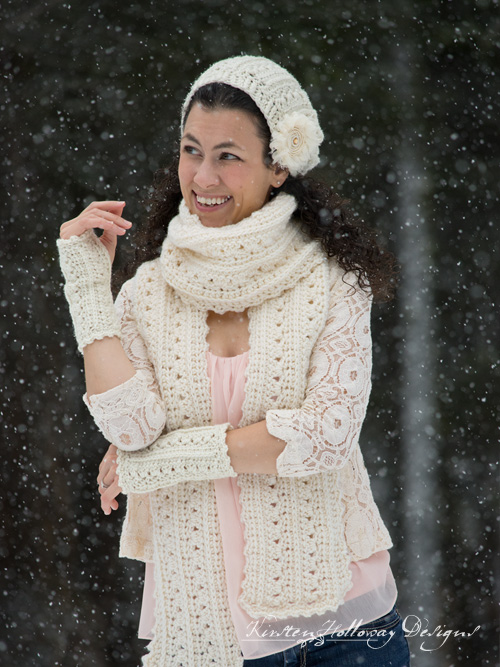
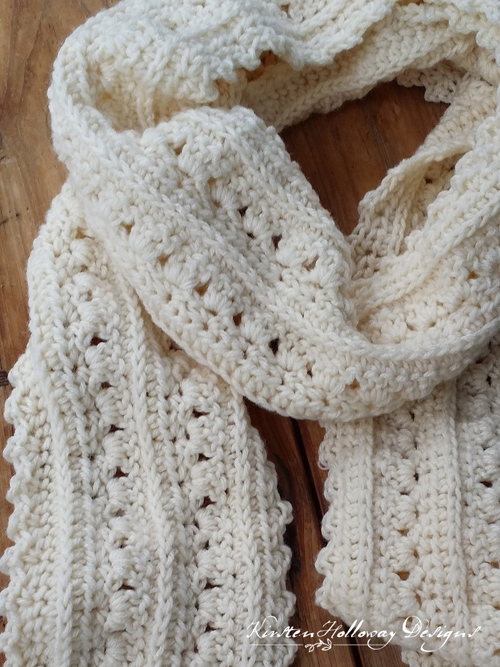
This crochet super scarf design is simple, and easy, but is perfect for any cold-weather occasion. The primrose stitch makes up the “lace” portion of the scarf giving a light and airy feel to an otherwise very warm accessory. The ridges are made using half-double crochet in the 3rd loop, a technique which gives the look of knit fabric.
Red Heart With Love is a soft, squeezable, very thick worsted weight yarn that makes excellent winter scarves! If I’m crocheting a piece that needs that extra warmth Red Heart With Love is one of my main “go-to” yarns. Because it is made from acrylic it washes and wears easily with very little special care.
I’ve had so many requests from you to turn this design into an afghan that I did that over here.
Disclaimer: This post contains affiliate links. When you purchase something using these links a small amount of the sales price goes to me to help keep this site, and the patterns on it free. You do not pay any extra for the item you purchase.
Difficulty:
Advanced Beginner/Easy
Materials needed:
5.5mm (I) hook, or hook needed to obtain measurements.
500-525 yards of Red Heart Super Saver or Red Heart With Love (for a scarf that is about 6″ wide)
Yarn needle
Scissors
Stitches used:
ch = chain
sl st = slip stitch
sc = single crochet
hdc = half double crochet
dc = double crochet
Additional terms:
sp/sps = space/spaces
st/sts = stitch/stitches
prev = previous
sk = skip
Working in the 3rd Loop of hdc – Instructions: Look at the top of the stitch, and locate the sideways “V”, bend the stitch to look at the back and you should see another “V” made by the “yarn over”. You’ll be working into the back loop of that “V”. This is called the 3rd loop. When you are working in rows, this 3rd loop will be facing you after you turn!
Still unsure of how to do this stitch? Here is a brief tutorial video that explains it, or you can click here for a detailed picture tutorial:
Measurements:
8 ft, (5 ft, 6 ft), by 6″ wide.
Additional Notes:
–Click here to see additional pictures of the steps in the crochet-a-long post for this scarf.
-Several people have asked how to shorten this pattern. Try 192 stitches (193 chains) for a 5′ scarf, and 228 stitches (229 chains) for a 6′ scarf. You could even make a longer scarf, just make sure your starting chain number is divisible by 3 + 1 (the first two chains of the row count as a stitch).
-Ch 2, and ch 3 do count as first stitch of row unless otherwise indicated.
-If you need a little more help on how to work this pattern, try watching the video below. It works for the hat, scarf, blanket, fingerless gloves, etc that use this stitch pattern:
Primrose & Proper Super Scarf Crochet Pattern (US Terms):
Click here to purchase an ad-free, print-optimized PDF of this pattern on LoveCrafts
OR
Pick up the printable version of this pattern on Etsy instead
Ch 301 (193, 229)
Row 1: hdc in 3rd ch from hook (skipped chains count as first hdc), hdc in each st across, ch 2 (counts as first hdc of next row), turn. (300 [192, 228])
Row 2: working in 3rd loop of hdc, hdc in each st across, ch 2 (counts as first hdc of next row), turn. Note: final hdc of row will be worked in top of ch-2 from prev row. (300 [192, 228])
Row 3: (sc, ch 2, sc) in next st, *sk 2 sts, (sc, ch 2, sc) in next st; repeat from * across, hdc in top of ch-2 from prev row, ch 3 (counts as first dc of next row), turn. (100 [64, 76] bumps)
Row 4: 2 dc in first ch-2 sp, *3 dc in next ch-2 sp; repeat from * across, 2 dc in final ch-2 sp, dc in top of ch-2 from prev row, ch 2, turn (counts as first hdc of next row). (300 [192, 228])
Row 5: hdc in each st across, ch 2 (counts as first hdc of next row), turn. (300 [192, 228])
Row 6: working in 3rd loop of hdc, hdc in each st across, ch 2 (counts as first hdc of next row), turn. Note: final hdc of row will be worked in top of ch-2 from prev row. (300 [192, 228])
Your scarf should measure about 3 1/4″ wide, and 102″ long at this point. You can continue repeating rows 3-6 again or add the edging.
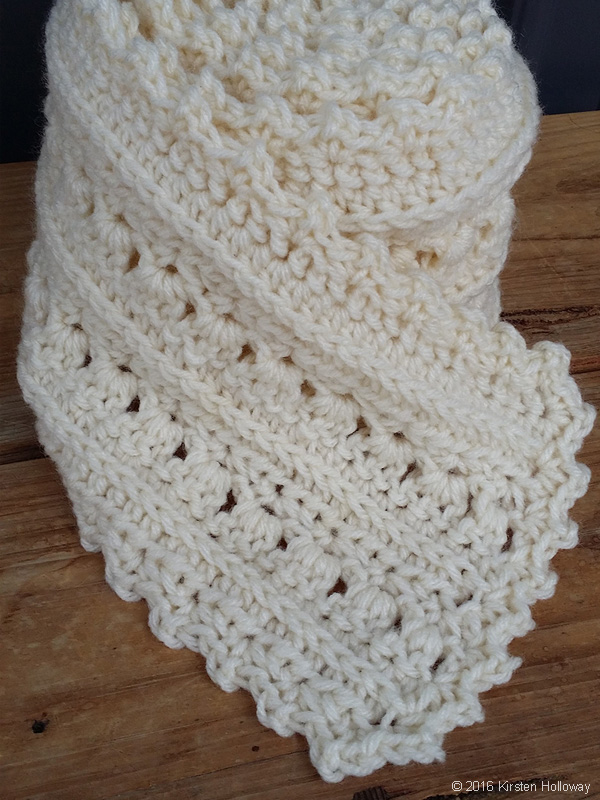
How to Add a Crochet Edging to Your Scarf:
Cut yarn, and then weave in ends.
Want more gorgeous crochet patterns, and a little encouragement for your day? Sign up for my newsletter here! That way you’ll never miss out on special events, or freebies I’m offering.
Join me on social media
I would love to see a picture when you’re done, so please feel free to come by my Facebook group and show off your project! Be sure to tag @kirstenhollowaydesigns when you share pictures of your finished scarf on Instagram, and use #primroseandpropersuperscarf!
You can also follow me on Facebook, Pinterest, Instagram, and Ravelry for more beautiful crochet patterns.
Pattern Terms and Conditions:
You are welcome to share the link to this pattern, using one image of your choice, on your site, but please do not share the written patterns themselves, this includes my Ravelry downloads or translations of these patterns, or use additional images. You do not have permission to use my images by themselves to create pinnable graphics for Pinterest, however they may be included in a roundup pin if there are 4 or more other patterns. If you sell finished items online, please do not use my pictures for your listings. I’m positive that your work is of high enough quality for you to sell the finished piece. Have confidence in your abilities! <3 Thank you!
This pattern was made to be used by individuals, and small business crocheters alike. Selling your finished pieces in boutiques, at farmer’s markets, craft shows, and other local events is encouraged! The only thing I require is that this pattern not be used commercially to produce hundreds of thousands of copies.
If you enjoyed this pattern or found it useful, why not share a link to this post with your friends?


Made this for myself using Hobby Lobby ILTY color Rosey Cheeks and “I” hook…turned out beautifully. Thank you for a VERY well written pattern!!! I did shorten it a bit to accommodate my height. I used FHDC (foundation half dbl crochet) for beginning chain, then proceeded to row 2. also chained 1 to turn where rows begin with a HDC and chained 2 where rows began with DC. My rows ended up PERFECTLY straight-NO blocking needed! Will be making several more for gifts for my nieces and their little girls! The perfect pattern for “Mommy & me” pictures!!!!!
Wonderful! I’m so glad that you are happy with your new scarf! 😄
I am struggling with row 4 are you working in every single chain spot including where you skip stitches or only the one with sc, ch2, sc?
Hi Lina,
You will need to work the majority of dc stitches from row 4 into the ch-2 sps. The only difference will be the very first and very last stitch of the row.
Thank you so much!
I love this pattern. If I want to make this scarf wider, what do you recommend? Thank you! I take the train to work everyday and the a/c hits my neck area and I like to make a scarf that’s fairly wider than usual to cover my neck without having to constantly adjust the scarf.
Hi Nicole,
You can keep repeating rows 3-6 until the scarf is as wide as you want. Then you can add the edging. 😊
Lovely scarf! I am a beginner but I love to try this pattern for Christmas present for my daughters. May be because I am in Japan I cannot open your video. Any suggestion? Thank you.
Hi Kimi,
If the video doesn’t work try the crochet-a-long post. It has lots of pictures that may be helpful: https://kirstenhollowaydesigns.com/crochet-a-longs/primrose-proper-super-scarf-cal 😊
Thank you Kirsten. You are exceptionally helpful! Kimi x
You’re welcome!
Thank you for this pattern!!! I finished the scarf in a day and a half. I am a beginner crocheter, and this is my first written pattern that I’ve used. Thank you for making it beginner friendly — I can never figure out from a written pattern whether I need to go into the turning chain or not! The scarf I made is by far my favorite piece that I’ve created so far. Thank you thank you so much!
You’re welcome! I’m so glad you enjoyed making it and are so happy with the result! 😀
Absolutely gorgeous! Making it for my sister’s 70th birthday. Using double yarn, red and grey Alpaca wool. Thank you for the pattern! And thank you for such clear detail! You made it easy to follow.
You’re welcome! I’m glad you are enjoying the pattern, Robin! 🙂
Row3
When skipping 2, the whole thing curls. What am I doing wrong?
If you are just starting the pattern it may curl. Once you get a few more rows finished it should flatten out. 🙂
What do you mean, “After finishing row 6 repeat”? I don’t understand the repeat. Am I supposed to do row 6 a second time?
The rows you will be repeating to get the pattern are rows 3-6. Once you finish that repeat (which ends on row 6) you will move to the edging. I hope that helps!
Lovely pattern stitch – would love to see Bootcuffs in this pattern.
I’m happy to write them up as bootcuffs if there is enough interest! It would be easy to do. 🙂
Oh yes, I would love the boot cuffs also.. they would be gorgeous..
Great looking pattern. Silly question but if you start with a chain of 301 stitches, and do your first hdc in the 3rd stitch, doesn’t that mean you’ll end up with 299 stitches?
The first 2 chains you skip actually count as your first stitch, and then you do 299 more. I hope that helps! 🙂
Hi Kirsten,
First of all thank you for a lovely scarf which I have just finished, it is beautiful. I have now started the hat to go with it and there is one thing I’ve noticed when I crocheted the scarf and is now happening with the hat. The edge where the tail is (where I begin the foundation chain) that edge is not straight it ends up going slightly angled and seems to happen around the ending of rows 3 and 4 even though the number of chains are correct. I don’t know why this is happening and I thought it would right itself when I did the edging but it hasn’t . It’s now happening with the hat and my concern is it will be crooked when I join the seams. I’m not sure what to do….have you any ideas as to what I’m doing wrong?
Hi Nova,
You’re very welcome!
The only thing I can think of that could be causing a slant is that you might be placing the first stitch or last stitch of the row in the wrong place. The chain 2 for the hdc rows counts as the first stitch of the row, so you’ll want to make sure you are working the final stitch of the next row into the top (2nd ch) of that ch 2. It should stay straight that way, and turn out just like the pictures. 🙂 I hope that helps!
Thank you Kirsten for the reply. Yes that’s what I’m doing as I said, I count every row to make sure I have the correct number of stitches and that was a challenge on the scarf with 300 stitches!! I count the chain 2 as the first stitch on the next row and crochet into the top of the ch2 at the end of each row, otherwise the stitches would be out. One side is straight but the side with the tail (the side of the foundation chain) is the side that seems to slant. It has me completely baffled as I’ve made baby blankets and baby garments and have never had a problem. I’m wondering if the problem is in row 3 when it says the first (sc,ch2,sc) is done in the second stitch. I am counting the ch2 as the first stitch then the next stitch would be the 2nd chain. Is that correct? Perhaps I could send you a picture if that helps ????
You’ll have a hdc in the first stitch of the row, then right after that, in the following stitch, you’ll work the (sc, ch 2, sc). There should be 11 bumps in row 5 when working the larger sized hat. The edges should be pretty straight, so I don’t know why it’s slanting for you. Hopefully this helps you out!
I looked through all the comments but did not see my questions (may have missed it). I just want to be sure I’m getting the pattern right:
On row 5 after turning, do I go to the next stitch or the one at the base of the ch 2?
On row 6 you say next back loop – is that the first one I see?
Sorry – just want to get it right. Love this scarf!
Hi Julia,
You will go into the next stitch on row 5, since the ch 2 counts as the first hdc of the row. For row 6, take a look at this video: https://facebook.com/kirstenhollowaydesigns/videos/1884031391814874/ It should help you out! Good luck on this project!
What is the gauge for the scarf? Thanks!
Gauge isn’t especially important for this, but mine was 12 stitches in 4″. Feel free to go up a hook size or two if you need to. 🙂
I made this scarf for myself last year and absolutely love it! I just made six more for my co-workers this last month. This just popped up in my Facebook feed from last year and I’m so glad I found it. I wanted to say thank you for the pattern and I can’t wait to try your other patterns and make the hat!
Stephanie, that’s wonderful to hear! You’re very welcome. 🙂 Happy Crocheting!
Love this pattern! Took me a few tries to figure it out, but I’m glad I stuck with it, turned out beautifully!
Yay! I’m so glad you are pleased with how it turned out!
I’m from the Philippines so with our climate we seldom use a scarf. This is the first scarf I crocheted; made this primrose scarf as a Christmas/birthday gift for a friend who is based in China where the scarf would be of more use.
Thank you for sharing your pattern.
Yes, you are quite a bit warmer over there than we are here in the northern US! I’m glad you were able to make this for your friend. I hope they enjoy it! 😀
Absolutely making and gifting a few of these…thank you so much, it is beautiful!
You’re welcome, Sandi! 😀
Hi Kirsten: In the Edging instructions it says Edging: After finishing row 6 repeat, ch 1, turn….
Does that mean I do row 6 twice? Sorry, I’m new at crochet. Thank you for the beautiful pattern!
Hi Caroline,
Yes, you will repeat rows 3-6 until your scarf is as wide as you’d like, then you’ll start on the edging, which is similar to repeating row 3. If you would like some more visual assistance, try checking out my CAL for this scarf: https://kirstenhollowaydesigns.com/crochet-a-longs/primrose-proper-super-scarf-cal I have included several images of the steps that may make things clearer. 🙂
Thank you Kirsten! So very helpful to me, I was afraid to mess up all my hard work! 🙂
Wonderful! I’m so glad that helped! 🙂
Gorgeous! saving this to use in the near future! the yardage of those suggested yarns would mean about 1 and a half skeins of them, right?
Thank you, Amy! Yes, I’d plan on a skein and a half if you do the full 8′ scarf. If you do the shorter 5′ version you may be able to get away with only one skein. 🙂
Thanks so much for this pattern! Have been searching for the perfect one to make for my grown daughter and was about to give up.
This is perfect and I am making some fingerless gloves to go with it.
And I am considering making one for the BFF too for her birthday in December.
Love the instructions and since I am a more visual learner your videos have been tremendous help.
Thanks again
You’re very welcome, Carol! Have fun making it! I’m sure your daughter, and your friend will look beautiful in their scarves!
When I started this, I thought I understood the pattern (I’m not terribly good at reading patterns to begin with), but after putting it down for a month, it’s making no sense to me.
When you say the 3rd loop, you say it’s in the front but then say you’ll be working into the back of it. I don’t quite understand that. And maybe I did it wrong, but my V is in the front of my work now; after the 5th row.
I’m also assuming the pattern repeats. After which point does it repeat?
Hi Amanda,
What that means is that after your turn the piece to start a new row, you’re going to be looking at the back of the stitches from the previous row that you just completed–this makes the 3rd loop appear as it is in front. It’s still the back of the stitch though. 😉
Here is a link to my CAL for this scarf. There are some additional pictures you can reference that show how the scarf should look at various points: https://kirstenhollowaydesigns.com/crochet-a-longs/primrose-proper-super-scarf-cal/primrose-proper-super-scarf-cal-part-1
In addition, you can see me demonstrate working in the 3rd loop of a hdc on my Facebook page: https://www.facebook.com/kirstenhollowaydesigns/videos/1884031391814874/
I hope that helps make things easier for you!
Thank you very much! I didn’t really want to have to undo the whole thing lol.
You’re welcome! I can’t blame you! 😀
Pattern correction. I just did the first row only to come 1 short of 300 because it says to HDC in 3rd chain from hook instead of 2nd chain from hook. Usually people do NOT count the loop on the hook as 1 chain…..they start below that so if you want it to stay that way please maybe word it to say start from 3rd chain from hook with the beginning chain being on the hook. Thanks
Hi Amanda, the reason it says to go into the 3rd chain from hook is because the 2 chains that you skip (not including the loop on your hook) count as the first stitch. 🙂 I hope that helps clarify.
If you Crochet in 3rd chain from hook you end up with 299 not 300. 301-3 is 299. It should read Crochet into 2nd chain from hook. Per your instructions you should have 300 HDC’s.
The 2 chains skipped (which counts as a hdc) is included in the stitch count. There are 299 more stitches to the end of the row. I’ve worked up several different projects from this stitch pattern, and hosted a CAL for the scarf, and each one has one more chain than the number of total stitches in the finished row. I’m sorry if it still seems unclear, and I’m happy to send you a picture of what I mean, if you’d like. 🙂
I think I understand now…because when I Crochet i’m counting the HDC’s I made which is 299 and the reason why I missed the skipped 2 as a HDC is because that is sorta squished behind instead of lifted up like the rest of the HDC’s. So sorry I misunderstood…that’s just a lot of work to think you are coming up short, grrrrrrr
I’m so glad it makes sense now, and hope the rest of the project goes smoothly!
Hi there. Love this pattern. I’m a little stuck on row 4. What does 2 space mean- is this two stitches?? I understand about putting multiple dc in the same stitch just lost on the 2 space. Thanks
Hi Selina, your previous row should have called for you to do a [sc, ch 2, sc] in the same stitch, this next row is telling you to work your dc stitches into that ch 2 space from the previous row.
Good luck! 🙂
Hi, I’m having trouble understanding row 3. Im a beginner so it’s my bad. Is there a way to write it clearer?
I’m sorry you’re having trouble. Try taking it one step at a time (the steps are separated by commas, and broken down further in brackets). So for the first stitch, chain 2, then move to the next stitch and work the sequence: “one single crochet, chain 2, then one more single crochet in that stitch”, next you’ll skip 2 stitches, and repeat the sequence you just did in that next stitch.Keep repeating this until the end of the row. When yo reach the end of the row, you should have one stitch left (it’s the top of the chain from the chain 2 you did at the beginning of row 2), and you’ll work a half-double crochet in the top of that chain. You will have a whole row of little bumps (or loops depending on how you look at it), which will be what you work row 4’s stitches into.
I hope that helps clarify a little better!
I get it now ? . Thankyou soooo much. It’s too pretty not to make. I want to make one for my MIL and my girls aswell as myself.
Thanks again
You’re very welcome! Have fun making it! 🙂
Beautiful scarf,,,, beautiful shawl with added stitches. Thanks so much for sharing SMILE Helen
You’re welcome, Helen! I’m glad you enjoyed the pattern. 🙂
When you refer to the 3rd loop is it the front or the back 3rd loop? I watched the video and it explained it really well but the pattern does not specify front or back.
It will be the loop that is at the back of the stitch. Good luck! 🙂
So I’m working on an Afghan in this pattern and for some reason it’s slanting to one side. I’m not losing or adding stitches as I go because I’ve counted, so I’m not really sure what’s happening here. I’m using the last of my lilac frosting caron cakes and I’m too far in now for frogging to still be practical :/
I’m sorry you’re having issues, Keli. I have no idea what could be causing a slant if your stitch count isn’t off, and you’re starting the design in the same stitch for each repeat. Perhaps you could try blocking it when done?
I would love to make a hat that matches, but drawing a blank on how to do it. I am on row 5 and love it so far!! Going to be hard to part with this one.
Im glad you’re enjoying it! There isn’t a hat to match because the worsted weight yarn is too bulky to pull together at the top, and working it sideways wouldn’t look right. However, there is a Primrose and Proper slouch hat pattern in my Ravelry shop that uses a lighter weight yarn. Not an exact match, but if you like the pattern, it might work. 🙂
Why don’t you just call it the back loop, 3rd loop is confusing everyone
The front and back loops are at the top of the stitch. The 3rd loop as used in this pattern is behind the stitch, so when you turn at the end of the row, it will be facing you. Here is a video where I demonstrate it: https://www.facebook.com/kirstenhollowaydesigns/videos/1884031391814874/ The “sideways V’s” I talk about are the commonly referred to “front loop” and “back loop”. The 3rd loop is different. I hope that helps clear things up!
Thank you so much for this beautiful pattern, I have made lots of scarves, I am now making a blanket in this pattern. Much love Sarah. Xx
You're welcome! someone else made a blanket from this as well, and it turned out cute! I'd love to see your blanket when you get done with it!
Here's a link to the Ravelry Project page for this scarf, if you do decide to post. 🙂
http://www.ravelry.com/patterns/library/primrose–proper-super-scarf/people
Do you work in the front of the hdc 3rd loop or the back? Can't wait to get started on this beautiful scarf!
It is the back of the stitch, however, because you will be turning at the end if the row, the back of the stitch will actually be facing you as you work into the 3rd loop. 🙂 Hope that helps!
How many skeins or ounces does it take for 500 yards? I haven't crocheted in years but ran across some beautiful yarn on sale that I had to have. Love this pattern, hope 6 skeins is enough.
From the conversion information I've found, worsted weight yarn weighs 1 oz. for 50 yards, so you'd need 10 oz. to complete this scarf. 6 skeins of worsted weight yarn should be plenty, providing they are more than a couple of oz. each! Good luck!
Thank you! I can't wait to start it.
Thanks for sharing this pattern with us. I really love it. Have a wonderful 2017, kind regards from Perú
You're welcome! Happy New Year to you as well! I'm glad you enjoyed the pattern. 🙂
You're welcome! Happy New Year to you as well! I'm glad you enjoyed the pattern. 🙂
I looked at the YouTube video mentioned. Tamara talks about using the 3rd loop in the back…am I right that for this scarf pattern we do want the 3rd loop in front??
You will be using the 3rd loop that is in the back of the stitch, however, because you turn at the end of each row, that loop will be facing you when you work that row. 🙂
I'm so lost on row four. Would you please help? Do you mean 3 dc in next chain (meaning the same stitch), 2 space or 3 dc, chain 2 and then space? Thank you for all your help. Hugs, Joanna
Hi Joanna, each ch 2 space, except for the first and last spaces in the row, get 3 dc worked into them. Think of the "bumps" as eyelets and you are working 3 dc into each eyelet. 🙂 I hope that helps!
Thank you so much! That helped me. I absolutely adore your scarf. It's the first time I've crocheted in 7 years so I'm a bit dusty. Happy Holdiays! Hugs, Joanna
You're very welcome! I'm glad you are enjoying the scarf! Merry Christmas/Happy Holidays to you too. 🙂
Just tried it. Love it so much. Working it into a baby blanket.
Awesome! I'd love to see your finished blanket if you decide to share a picture. Afghans are something I never seem to have time for, but always admire. 🙂
LOVE this, just made if using Lion Brand Landscapes yarn in Desert Spring. Turned out absolutely gorgeous!
Wonderful! I'm glad it turned out so nicely for you! 😀
Very lovely!
Thank you! 🙂
Love this scarf, so pretty. I am having trouble with the stitch count though. In Row 4, the 100 'bumps' created only leave you with 250 stitches + 2 hdc at the beginning and at the end: 252 stitches in total.
Next row is all hdc but of course you only end up with 252 stitches not 300. To me, the only way to get the proper count is to do 3 hdc for each 'bump'. thanks in advance for your help!
Ellie
The Each "bump" except for the first, and last, should have 3 dc in them. The bumps on each end are the only ones that get two dc (plus the chain 2 or dc that is the very first and last stitch of the row). I hope that helps!
Qick question – In your comments you say to make sure your starting chain is divisable by 3 – But 302 is not – so how can it work out correctly?
The pattern is multiples of 3, plus 2 for your starting stitch, however, if you count the end chains as a stitch, you can actually get away with doing 301. Hope that clarifys things!
I'm making my second one. What a great pattern! Thanks for sharing!!
Awesome! I'm glad you are having so much fun making it! 😀
I have the same question about the third loop. Canot you explain it further or share a photo? Thanks!
Check out this awesome video that explains how to work the stitch: https://youtu.be/d2nyqJZBfvA
Good luck! 🙂
Thanks, I wasn’t sure if it was the front 3rd loop or the back third loop.
In your additional terms above, it says the third loop would be in the front, but your instructions said to search for it in the back. I’m going with the videos and using the 3rd loop in the back.
Yes, it’s the 3rd loop at the back of the stitch, but when you turn at the end of the row that back loop will be facing you. I’m sorry if that wasn’t clear in the written instructions. I’m glad the video helped. 🙂
Thank you! This helped a lot. Beautiful pattern. So fun!
You're welcome! Glad it helped! 🙂
Hey Kirsten! I have a question for you. What is the 3rd loop? Without pictures it is hard to explain, but the top of a stitch is made of 2 opposing loops/strands, right? So, looking at the stitch from the back of it, we see one of the top strands, then, working downward, another strand (a back strand), next we see another strand, it is a smaller, tighter one, and finally, there are 2 more opposing strands below that (these sit pretty much vertical). These are the strands that we see from the back. If this made any sense, could you tell me which loop is the "3rd loop".
Thank you so much,
🙂
There is an excellent video put out by Tamara at Moogly that explains it beautifully. Here is the link: https://youtu.be/d2nyqJZBfvA
I hope that helps!
All right, thanks a bunch!
You're welcome! Good luck with the rest of the pattern! 🙂
Us their any way possible you could do a you tube video for this scarf? It is so beutiful abd I am still new at this and learning to read patterns but by bit ..Thank you in advanced
I'd love to do a video, but don't have the setup to make quality videos yet. Hopefully that will change soon! When it does, I'll definitely put together videos for some of my patterns. 🙂
Thank you Kirsten, the pattern is awesome! I made the scarf and loved the pattern so much I made a hat and ear warmer too 🙂
Wow! You have been busy! I'm glad you are having so much fun with the pattern. 🙂
I made the scarf and get a lot of compliments! It’s my favorite! The only thing is that the ends are not straight! Can you offer any advice?
Hi Kimberly,
Im glad to hear you are getting lots of compliments on your scarf!
The most important thing to remember about this pattern is that the ch-2 or ch-3 at the beginning of different rows counts as a stitch and should be worked into on the next row. Some people have missed it and had their projects turn out crooked/slanted.
The most fun I've had in ages, it really is a delight to do. Thank you, thank you!
p.s. posted my projects on Ravelry. 🙂
Awesome! I'll go check it out!
Love this…so pretty !! I am going to try the cowl with a Caron Cake !
That should make for a nice striped look. 🙂
Can't wait to make this one soon! Thank you!!
You're very welcome! 🙂
Thank you for this very pretty pattern. I will definitely make for gift giving and one for myself of course! Happy Holidays
You're welcome! Happy making. 🙂
This is so elegant, am will put on my list to make. Just bought some yarn that will work up real pretty with this pattern. Thanks for sharing.
You're welcome! I've seen people make it using a variety of yarns, and each one has turned out beautifully!
Do you slip stitch into the chain 2 at the end of each row?
Hi Teri, the ch 2 acts as a stitch throughout this pattern, so work into it as you would an hdc. 🙂
This is absolutely lovely! I want to make one for myself 🙂
Do it! It's good to treat ourselves every now and again (especially around Christmas). 😀
Yes lovely going to make the short scarf. I use oxygen so it would fit lovely with my coat Not sure of the colour have a pink short jacket with feathers Love the coat . The coat and I need a lift. Sandy
Enjoy! I think an off-white, cream or other light neutral would probably go well depending on the shade of pink. But, whatever makes you happy is ultimately the color to go with! ????