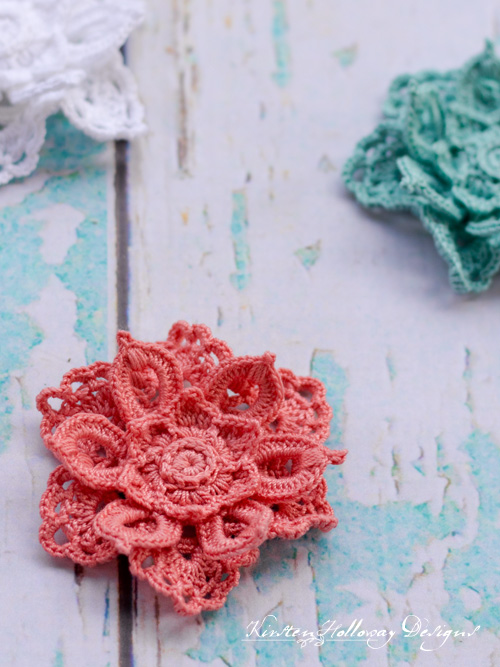
Bright colors and lots of texture make this tropical flower clip the perfect pattern to crochet for any little girls hair accessory collection. It can be crocheted in one solid color, or colors can be mixed and matched to create the tropical flower of your dreams. Find the free crochet pattern instructions below, or purchase a print-optimized, ad-free PDF by clicking here.
Click here to add this to your Ravelry queue!
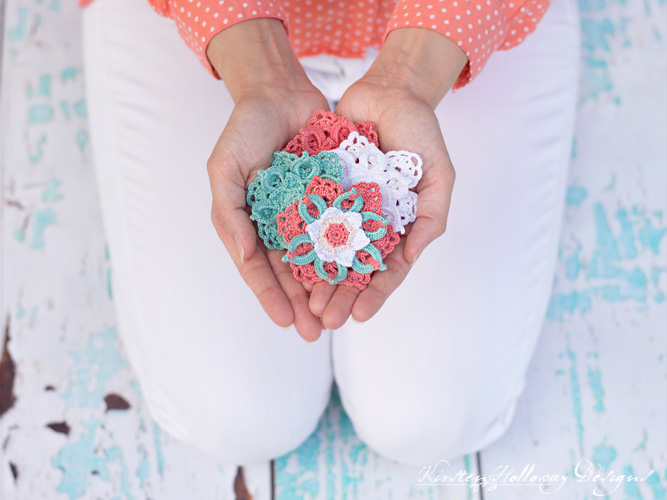
When Rachel asked me if I’d be interested in crocheting a design for the Operation Christmas Child CAL event I knew I wanted something colorful and fun for the kids who would receive the finished hair clips! This tropical flower crochet pattern is inspired by the bright colors used in the art of indigenous people from various nations along the equator.
It’s possible to change colors at almost any point in the flower including mid-round. The lace details of this pattern give even more opportunities to use color on this 3d-flower motif! I have not written specific color changes into the tutorial to allow you to change color every round or two, or whenever you want.
I know whatever you come up with will be cherished by any little girl that receives this special tropical flower as a gift!
Difficulty:
Intermediate
Materials Needed:
18-20 yds Aunt Lydia’s #10 crochet thread in 3 or 4 colors. I suggest, Aqua, Bright Coral, White, and Light Peach
1.4mm steel hook
Yarn needle
Scissors
(Optional) 13” long x 2” wide lace
1 1/4″ Alligator hair clip, 1 1/4″ hair clip, or 50mm bobby pins with pad
Felt for backing
Hot glue gun, or needle and thread for sewing flower to hair clip or bobby pin
Starching solution
Stitches Used:
ch = chain
sl st = slip stitch
sc = single crochet
hdc = half double crochet
dc = double crochet
tr = treble crochet
BPsc = back post single crochet
3dc cluster = dc3tog in same st
st/sts = stitch/stitches
sp/sps = space/spaces
prev = previous
Additional terms:
Small puff = [yo, insert hook into st, yo, draw up a loop] three times, yo, draw through all loops on hook
Puff = [yo, insert hook into st, yo, draw up a loop] five times, yo, draw through all loops on hook
Picot, ch 3, sl st back into first ch, or through center of sc if that is where you started from.
Small picot = ch 1, sl st back into ch
Gauge:
Gauge is not particularly important.
Measurements:
Completed flower measures 3” across
Additional Notes:
-Ch-1 at beginning of row does not count as a stitch
-I used a smaller hook and tighter tension than I usually use to achieve a stiffer flower
-Starching your flower once it is finished should help it hold its shape for longer
Operation Christmas Child Flower Clip (US Terms):
Click here to purchase an ad-free, print-optimized PDF of this pattern on LoveCrafts
Round 1: 6 sc in magic ring, join with sl st to first sc, but do not cinch closed. (6)
Round 2: ch 1, working over the stitches in round 1, 12 hdc in center of circle join with sl st to first hdc. (12)
Round 3: ch 1, BPsc in each st around, join with sl st to first sc. (12)
You should have a button shape now.
Make note of these slip stitches in this next round. You will be working dc stitches around them in round 6.
Round 4: *ch 2, sk st, sl st in next; repeat from * around, final sl st counts as join. (6 ch-2 sps)
Round 5: ch 1, *3 small puff sts in next ch-2 sp; repeat from * around, join with sl st to first puff st. (18)

In this round you will be working dc sts around the sl sts from round 4, and then creating a petal across the next 3 puff sts from round 5. Skipping the first puff stitch in the round centers each flower petal between the dc sts. The dc sts will create a ridge between each petal. You may change colors for the dc st if you wish to add a little more pizzazz to your flower.
Round 6: ch 1, dc around first sl st from round 4, sk first puff st, *(hdc, dc) in next puff st, (dc, tr, small picot, tr, dc) in next puff st, (dc, hdc) in next puff st, dc around next sl st from round 4; repeat from * around, join with sl st to first dc. (6 petals)
Turn your flower over and work this next step across the back side. Don’t forget to turn it back over so the front side is facing you after you end the round.
Round 7: working at back of flower, sl st across back of first petal, *when you get to the spot where the dc is between the petals ch 10, sl st into first ch creating a ring, sl st across back of next petal; repeat from * across, final sl st counts as join. (6 ch-10 “rings” or sps)
Optional: join a new color
Round 8: with right side of flower facing, *working into ch-10 sp, (12 hdc, puff st, picot, 12 hdc), sl st into center back of next petal; repeat from * around, final sl st counts as join. (6 hollow center petals)
Time to turn the flower over and work this next round at the back again. You will be placing sl sts where you made the ch-10 sps in round 7–that should be right at the bottom center of where your hollow “teardrop” shaped petals are. Eyeballing where the centers of your petals are is ok. Don’t forget to turn the flower back over so the front side is facing you after you end the round.
Optional: join a new color
Round 9: working into back of flower, *ch 6, sl st into bottom center of petal from previous round; repeat from * across, final sl st counts as join. (6 ch-6 sps)
Round 10: with right side facing, ch 1, *12 sc in ch-6 sp; repeat from * around, join with sl st to first sc. (72)
Round 11: *ch 4, sk 3 sts, sl st in next st; repeat from * around, final sl st counts as join. (18 ch-4 sps
Round 12: sl st into first 2 chs from prev round, *working in next ch-4 sp ([3dc cluster, ch 1] 4 times, 3dc cluster), sl st into next ch-4 sp, ch 3, sl st into next ch-4 sp; repeat from * around, final sl st counts as join. (6 3dc cluster petals, 6 ch-3 sps)
This next round will create a series of ch spaces above your clusters. Each cluster except for the center-most one will have a ch-3 sp above it, the center-most cluster will have a ch-4 sp above it.
Round 13: sl st into first 3dc cluster, [ch 3, sl st into next ch-1 sp] 2 times, ch 4, sl st into next ch-1 sp, ch 3, sl st into next ch-1 sp, ch 3, sl st between 3dc cluster and sl st, 4 sc in ch-3 sp, *sl st between sl st and first 3dc cluster, [ch 3, sl st into next ch-1 sp] 2 times, ch 4, sl st into next ch-1 sp, ch 3, sl st into next ch-1 sp, ch 3, sl st between 3dc cluster and sl st, 4 sc in ch-3 sp ; repeat from * around. (4 ch-3 sps per petal, 24 sc, 6 ch-4 sps)
Round 14: work (4 sc, sl st) into each ch-3 sp, work (6 sc, sl st) into each ch-4 sp, work (ch 1, puff, ch 1) over top of 4 sc between petals.
Fasten off, and weave in ends.
Decorate with beads or lace (if you choose).
Starch to help the flower hold its shape.
Cut out felt circle 1 1/2″ in diameter. Use hot glue, or needle and thread to attach felt circle to back of flower.
Attach flower to hair clip, or bobby pin.
JOIN ME ON SOCIAL MEDIA
I would love to see a picture when you’re done, so please feel free to come by my Facebook group and show off your project! Be sure to tag @kirstenhollowaydesigns when you share pictures of your finished flower clip on Instagram!
You can also follow me on Facebook, Pinterest, Instagram, and Ravelry for more beautiful crochet patterns.
PATTERN TERMS AND CONDITIONS:
You are welcome to share the link to this pattern, using one image of your choice, on your site, but please do not share the written patterns themselves, this includes my Ravelry downloads or translations of these patterns, or use additional images. You do not have permission to use my images by themselves to create pinnable graphics for Pinterest, however they may be included in a roundup pin if there are 4 or more other patterns. If you sell finished items online, please do not use my pictures for your listings. I’m positive that your work is of high enough quality for you to sell the finished piece. Have confidence in your abilities! <3 Thank you!
This pattern was made to be used by individuals, and small business crocheters alike. Selling your finished pieces in boutiques, at farmer’s markets, craft shows, and other local events is encouraged! Please credit/link Kirsten Holloway Designs when selling finished products online. The only thing I require is that this pattern not be used commercially to produce hundreds of thousands of copies.
If you enjoyed this pattern or found it useful, why not share a link to this post with your friends?


