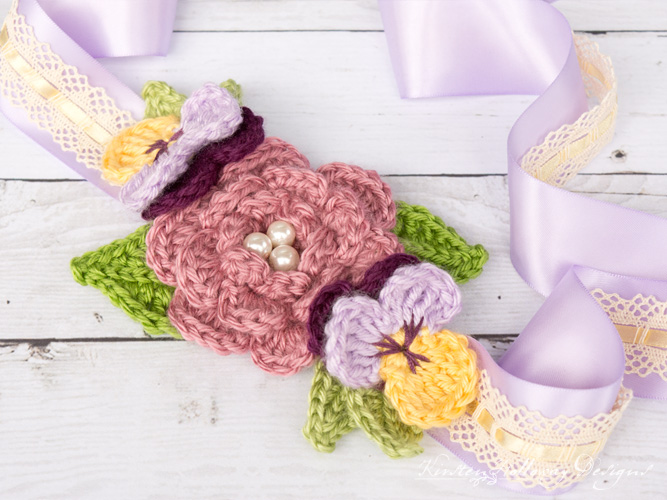
This beautiful crochet flower headband slides over a ribbon for a quick, and versatile hair accessory. Since the ribbon length determines the size, this headband pattern can fit babies, toddlers, kids, teens, and women. Find the free crochet pattern instructions below, or purchase a print-optimized, ad-free PDF by clicking here.
Nicknamed the “Swiss Army Flower” by my friend Katie from Salty Pearl Crochet, this versatile crochet accessory has you (and all the girls in your family, from toddlers to adults) covered in any crochet-related emergency. Need a headband, statement hair accessory, appliques for a blanket, bag, belt or scarf, or maybe a last minute corsage? This pattern has you covered. It can also be made in crochet thread (see the “Additional Notes” section)!
I’ve included a backing (flower holder) to sew the flowers onto, and it will work for any of the accessories in the April Flowers CAL. Slip any 1 1/2″wide ribbon through the holder loops for an endless variety of looks and styles. I’ve used a satin ribbon and a faux crochet lace ribbon in this design, but you can use any ribbon you want! Near the end of the post I’ve included basic instructions for 3 different finishing options for this headband, so it is fully customizable to fit your needs.
In addition to the 2 flower patterns shared in this post, you can find links to all my other flower patterns down in the “Additional Notes” section. There is a poppy, water-lily/lily, and several general flower patterns that you could incorporate to customize your April Flowers headband even further!
Click here to add this to your Ravelry queue!
Disclaimer: This post contains affiliate links. When you purchase something using these links a small amount of the sales price goes to me to help keep this site, and the patterns on it free. You do not pay any extra for the item you purchase.
Difficulty:
Intermediate
Materials Needed:
3.25mm hook for Johnny Jump-ups, and leaves
4mm hook for Rose, and flower holder
For Johnny Jump-ups: 5 yards or less each of Caron Simply Soft yarn in “Sunshine” (yellow), “Orchid” (light purple), and Red Heart Soft “Grape” (dark purple).
For Rose: 10-15 yards Caron Simply Soft in “Plum Wine”
For Leaves: 5 yards Caron Simply Soft in “Pistachio”, and Red Heart Soft in “Guacamole”
For flower centers: 3 yards #10 crochet thread in a dark purple color
Yarn needle
Scissors
Sewing needle
Thread to match the color of the rose
3 pearl beads, approx 10 mm across
1 yard each: 1 1/2″ lavender satin ribbon, 1″ cream Simplicity faux crochet lace trim with ribbon center
Stitches Used:
ch = chain
sl st = slip stitch
sc = single crochet
hdc = half double crochet
dc = double crochet
tr = treble crochet
st/sts = stitch/stitches
sp/sps = space/spaces
sk = skip
Additional Terms:
BLO = back loop only
Measurements:
Johnny Jump-up/Violet: 2 1/2” tall by 2” wide.
Rose: 3 1/2″ across.
Flower holder: 4 1/4″ long by 2″ wide.
Gauge:
Gauge is unimportant. This pattern can be worked in almost any weight of yarn adjusting your hook size larger or smaller as needed.
Additional Notes:
-If making these with thread, I’d recommend a size 1.5mm to 2.25mm steel hook.
-There are 3 different ways of finishing this, either leaving it as a headband that you tie in a bow, with the addition of an elastic strip sewed onto the ends to make a stretchy headband, or with ribbon clips and a clasp if you plan to wear this with an updo, or as a choker. Scroll to the bottom for more detailed explanations of each.
-You can also turn this into a hair accessory by adding a barrette to the back side of the flower holder.
-Here are links to several of my other crochet patterns that include flowers. You may use these flowers on this headband instead, if you prefer:
A water lily of sorts – Water Lily Waltz Headband
A pretty poppy – Basket-Full of Poppies Headband
3 random flowers (including a sunflower or daisy) from the Art ‘n Soul Scrappy Scarf
A small simple flower made with crochet thread – Delicate Flower Clip
Another lily flower – Lily Garden (Flower-Topped Hat)
A large generic flower from the Cover-story Cloche
April Flowers Crochet Headband / Hair Accessory Pattern (US Terms):
Click here to purchase an ad-free, print-optimized PDF of this pattern on LoveCrafts
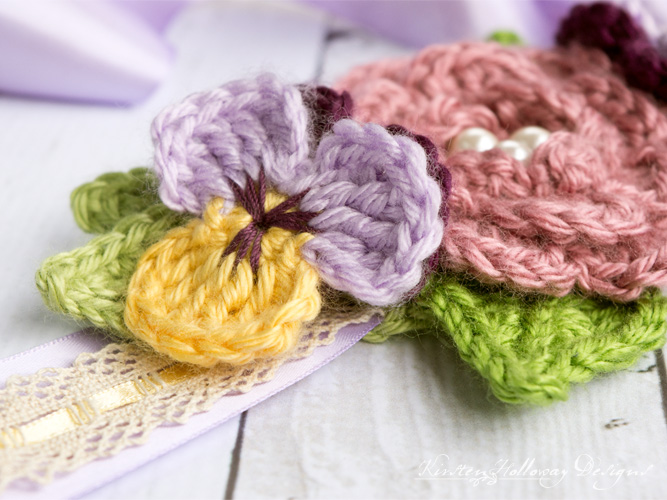
Johnny Jump-ups (similar to violets, pansies, or violas):
With yellow color, and 3.25mm hook,
Round 1: 10 sc in magic circle, join with sl st to first sc. (10)
Round 2: ch 3, 2 tr in first st, 2 tr in next st, (2 tr, ch 3, sl st) in next st, sl st in next st, insert hook into next stitch, drop yellow yarn, join light purple yarn by pulling it through the loop already on your hook. This will create another sl st, (ch 3, 2 tr) in same st, (2 tr, ch 3, sl st) in the next st, sl st in next st, (ch 3, 2 tr) in same st, (2 tr, ch 3, sl st) in next st.
Drop yarn and fasten off.
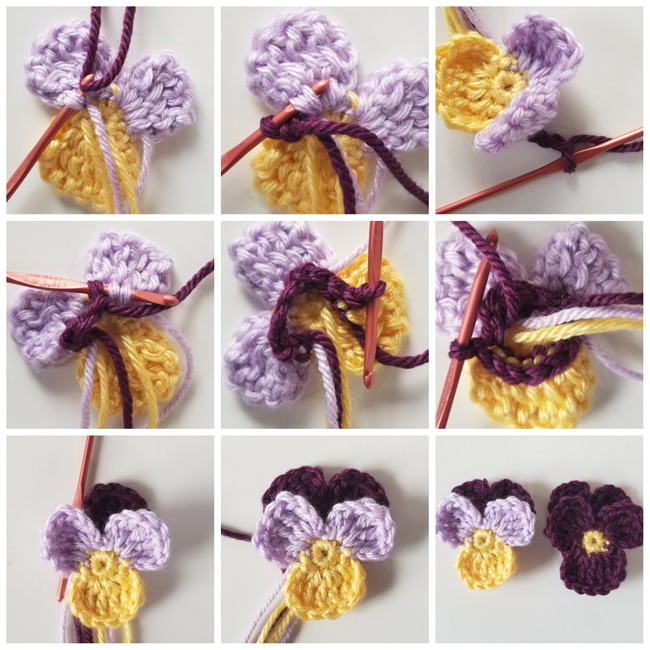
Round 3: Flip flower over and join dark purple color to lower back side (near the bottom of the round) of light purple petal, sl st over near the bottom of the round until you are at the center of the petal, ch 3, sl st into center back of next petal, sl st around the lower part of the back of the petals until you arrive back at the ch-3 sp.
Flip flower over to right side.
Round 4: Sl st into ch-3 sp, (ch 3, 4 tr, ch 3, sl st, ch 3, 4 tr, ch 3, sl st)
Note: You can turn this Johnny Jump-up to a Viola by making this modification in the ch-3 sp on round 4: (ch 3, 8 tr, ch 3, sl st)
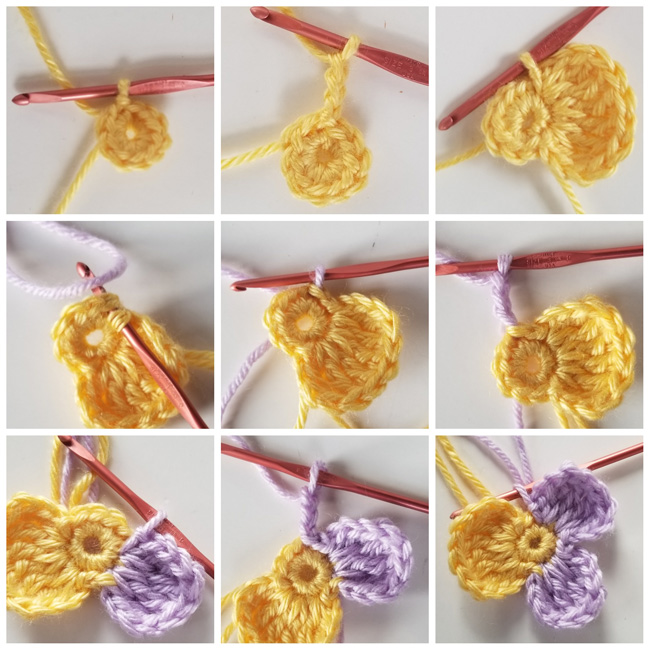
Here are some pictures to help you when making this flower. You can even make it in a solid color if you prefer:
Using crochet thread and your yarn needle, sew 3 lines through the center of the flower onto each petal. You will want to go over each line twice to darken them.
Fasten off and weave in ends.
Small Leaves – make 2 per Johnny Jump-up flower:
with 3.25mm hook,
Ch 9, sl st in second ch from hook, sl st to end of chain, ch 1, work the following sts around up the other side: sc in first st, sc in next st, hdc in next st, dc in next 2 sts, hdc in next st, sc in the next, sl st in the next, sl st into end of leaf, ch 1, sl st back into ch creating a picot. Continue around up the other side, working all stitches in the BLO (this is how you get the pretty v’s up the center of the leaf), sl st into first st, sc in next st, hdc in next st, dc in next 2 sts, hdc in next st, sc in next 2 sts, sl st into ch at the end to join.
Fasten off and weave in ends.
Rose:
With 4mm hook,
Round 1: 6 sc in magic circle, join with sl st to first sc (6)
Round 2: ch 1, 2 sc in each st around, join with sl st to first sc. (12)
Round 3: (hdc, 2 dc, hdc) in first st, sl st in next st, *(hdc, 2 dc, hdc) in the next st, sl st in next st; repeat from * around, final sl st counts as join. (6 petals)
Round 4: working at back of flower, sl st to center back of first petal, *ch 3, sl st into center back of next petal; repeat from * around, final sl st counts as join. (6 ch-3 sps)
Round 5: Turn flower over to right side. *working in ch-3 sp: (hdc, 4 dc, hdc, sl st); repeat from * around, final sl st counts as join. (6 petals)
Round 6: working at back of flower, sl st over to center back of first petal *ch 4, sl st into center back of next petal; repeat from * around, final sl st counts as join. (6 ch-4 sps)
Round 7: Turn flower over to right side *working in ch-4 sp: (hdc, 6 dc, hdc, sl st); repeat from * around, final sl st counts as join. (6 petals)
Fasten off and weave in ends.
Sew 3 pearls into the center of the flower with needle and thread.
Leaves (make 2):
with 3.25mm hook,
ch 11, sl st into 2nd ch from hook, sl st into next 9 sts (10)
ch 1, work this pattern up the opposite side of the leaf that you just slip stitched along: sc in the first st, hdc in next st, dc in next st, tr in next 3 sts, dc in next st, hdc in next st, sc in next st, sl st into next 2 sts (you should be at the end of the leaf now), ch 1, sl st back into ch forming picot,
Continue around up the other side, working all stitches in the BLO (this is how you get the pretty v’s up the center of the leaf): sl st into first st, sc in next st, hdc in next st, dc in next st, tr in next 3 sts, dc in next st, hdc in next st, sc in final st, sl st into ch at the end to join.
Flower holder:
This provides a small base to sew your flowers onto. It can be made in green to match the leaves.
With 4mm hook,
Row 1: Ch 9, sc in 2nd ch from hook and in each stitch across. (8)
Round 2: ch 1, continue working around up the other side, sc in each st across, ch 1, join with sl st to sc from first row. (18)
Round 3: ch 1, 2 sc in first st, sc in next 6 sts, 2 sc in each of the next 3 sts (one of those stitches will be the ch 1 at the end of the piece), sc in next 6 sts, 2 sc in each of next 3 sts, join with sl st to first sc. (24)
Round 4: ch 1, working in BLO, 2 hdc in first st, sc in next 9 sts, 2 hdc in each of the next 3 sts, sc in next 9 sts, 2 hdc in each of the next 2 sts, join with sl st to first hdc. (30)
Round 5: ch 1, 2 hdc in next 2 sts, sc in next 9 sts, 2 hdc in each of the next 6 sts, sc in next 9 sts, 2 hdc in each of the next 4 sts, join with sl st to first hdc. (42)
Round 6: sl st in next 16 sts, ch 6, sk 5 sts, sl st in next 16 sts, ch 6, sk 5 sts, join with sl st to first sl st. (44)
Note: Want to make this a hair barrette instead of a headband? Modify Round 6 by working slip stitches around the entire piece, not skipping any stitches. Sew or hot glue a metal barrette onto the back.
Fasten off and weave in end.
Sew flowers to the flower holder putting the largest flower in the center and the two smaller flowers on each end. Arrange the leaves under the flowers as you wish. I sewed the johnny Jump-ups and leaves to the very end of the flower holder right before the loops.
Finishing:
Cut 1 yard of 1 1/2” lavender satin ribbon, and 1 yard of 1” crochet lace ribbon, place them on top of each other, then thread through the loops at the ends of the flower holder. Tie in a bow at nape of neck.
Optional Alternate headband finishing – Some Sewing Required!:
With elastic band:
Cut a 4 1/2″ length of 1/2″ wide elastic band. Trim headband ribbons to 2″ less than head circumference of the person you are making this for. The Craft Yarn Council’s website has some average head circumferences listed here. Fold ends of ribbon up 1″ on each side and sew in place with needle and thread. Securely sew end of elastic band to inside of ribbon ends leaving at least 1/4″ of the band as a seam allowance. You may gather the ends of the ribbon together when you sew the elastic to the ribbon so that the ends of the ribbon don’t stick out beyond the elastic if you prefer. You may also take left-over bits of the ribbon and wrap those around the end where the ribbon and elastic join, and sew them in place to cover the ends if you prefer a more finished look.
With ribbon clips and clasps (for choker or to wear over top of an updo):
Note: You may need to use bobby pins to clip this in place
Measure the head size of the person you are making this for. Trim ribbons 2″ longer than head measurement. The Craft Yarn Council’s website has some average head circumferences listed here. Fold each end over leaving 1″ extra for seam allowance. Get some 20mm wide ribbon clasps with clasps and clip them to the ends of the folded ribbon. Coat the raw end with fray check Sew the raw end to the ribbon with a needle and thread, or glue with fabric glue.
Friends, if you enjoyed this pattern, don’t forget to sign up for my newsletter here! That way you’ll never miss out on encouragement, special events, or freebies I’m offering.
JOIN ME ON SOCIAL MEDIA
I would love to see a picture when you’re done, so please feel free to come by my Facebook group and show off your project! Be sure to tag @kirstenhollowaydesigns when you share pictures of your finished piece on Instagram!
You can also follow me on Facebook, Pinterest, Instagram, and Ravelry for more beautiful crochet patterns.
PATTERN TERMS AND CONDITIONS:
You are welcome to share the link to this pattern, using one image of your choice, on your site, but please do not share the written patterns themselves, this includes my Ravelry downloads or translations of these patterns, or use additional images. You do not have permission to use my images by themselves to create pinnable graphics for Pinterest, however they may be included in a roundup pin if there are 4 or more other patterns. If you sell finished items online, please do not use my pictures for your listings. I’m positive that your work is of high enough quality for you to sell the finished piece. Have confidence in your abilities! <3 Thank you!
This pattern was made to be used by individuals, and small business crocheters alike. Selling your finished pieces in boutiques, at farmer’s markets, craft shows, and other local events is encouraged! The only thing I require is that this pattern not be used commercially to produce hundreds of thousands of copies.
If you enjoyed this pattern or found it useful, why not share a link to this post with your friends?


