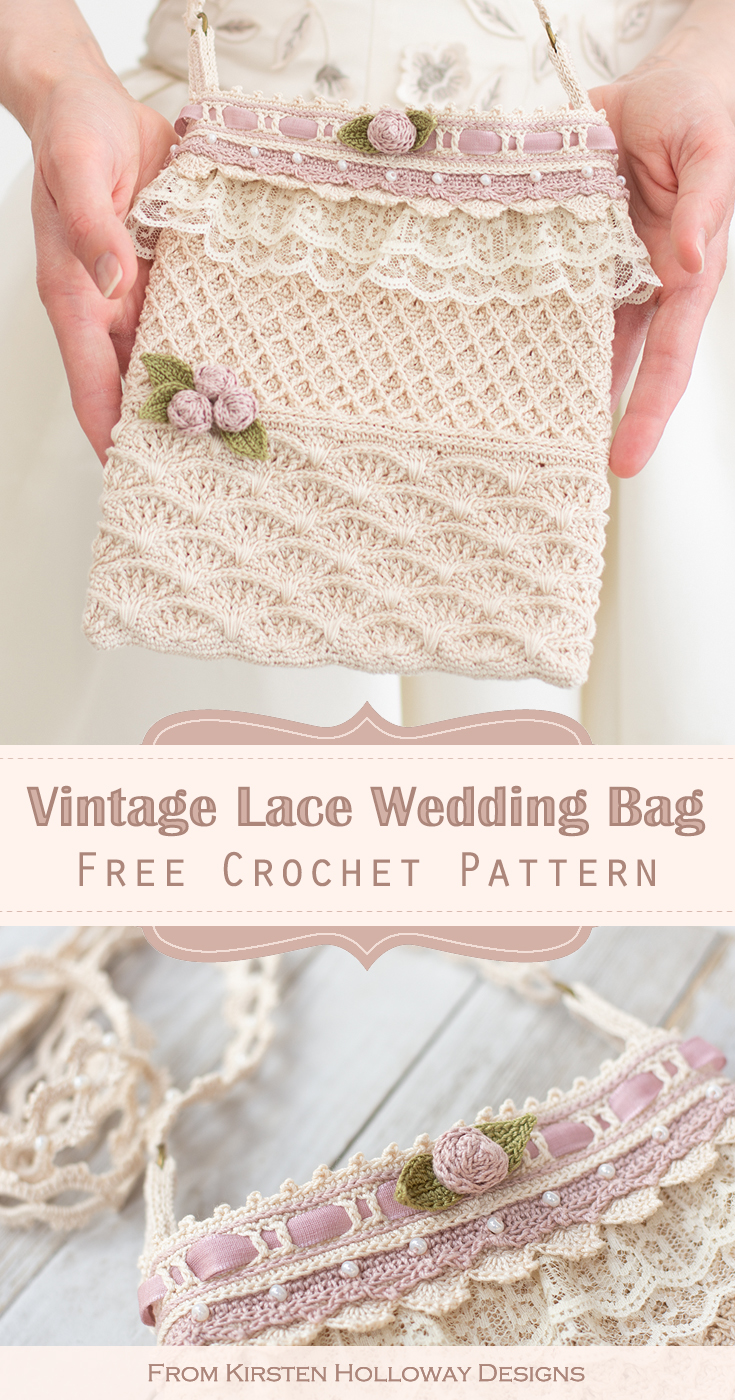
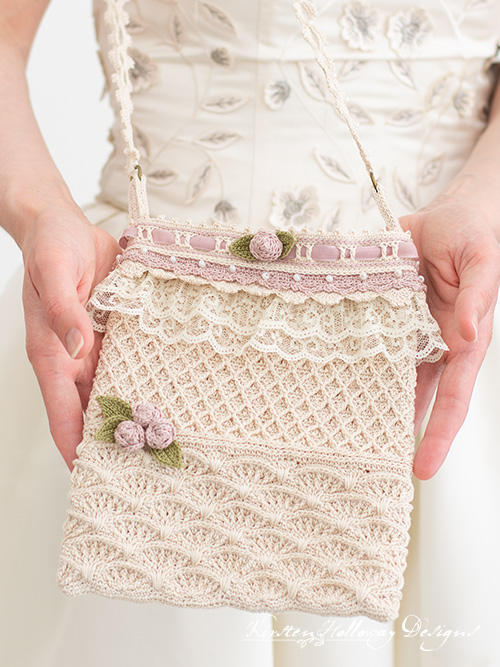
This stunning vintage-style lace wedding bag is a beautiful crochet purse that the bride will treasure for many years! It is accented with lace, ribbon, and pearls, as well as small roses with delicate leaves. This wedding bag can be made larger or smaller depending on the bride’s preferences. Find the free crochet pattern instructions below, or purchase a print-optimized, ad-free PDF by clicking here.
This bag matches the rest of my antique lace wedding set which you can find here:
Click here to add this to your Ravelry queue!
I have included a few notes throughout the pattern for turning this bag into a clutch with a wrist strap to give you some more options if you want to try something different.
Disclaimer: This post contains affiliate links. When you purchase something using these links a small amount of the sales price goes to me to help keep this site, and the patterns on it free. You do not pay any extra for the item you purchase.
Difficulty:
Intermediate/Advanced
Techniques used: post stitches, spike stitches, picots, half-double crochet in the 3rd loop.
Materials Needed:
500 yds Aunt Lydia’s #10 crochet thread in “Natural”, 8 yds “Orchid Pink” for the contrast stripe on the garter, accent stripes on the strap holders, and the rosette flowers, plus about 3 yds thread in “Olive” for the leaves
1.5mm hook – bag
1.4mm hook – rosette, leaves
Scissors
Yarn needle
Stitch markers
Sewing Pins
2 15mm metal rings for strap
1 yard 2″ 2-tier lace trim in Natural
70 #6 or #8 Pearl Beads
Flexible beading needle for stringing beads onto #10 thread
Fray check
Sewing thread to match the two main colors of the top band of the bag.
1/4 yard satin fabric for lining (optional)
Stitches Used:
ch = chain
sl st = slip stitch
sc = single crochet
hdc = half double crochet
dc = double crochet
FPdc = front post double crochet
BPsc = back post single crochet
FPtr2tog = front post treble crochet 2 together
Additional Terms:
Working in the 3rd loop of hdc: Look at the top of the stitch, and locate the sideways “V”, bend the stitch to look at the back, and you should see another “V”. You’ll be working into the back loop of that “V”, this is called the 3rd loop.
dc spike stitch: yo, insert hook in designated st (marked with stitch marker) pull up a loop, complete as you would a normal dc stitch.
Small Picot: ch 2, sl st into first ch
Picot: ch 3, sl st into first ch
st/sts = stitch/stitches
sp/sps = space/spaces
prev = previous
Gauge:
Approximately 34 hdc sts in 4″
Measurements:
Finished bag should measure approximately 9″ tall by 7″ wide excluding strap.
Additional Notes:
-Ch-1 at beginning of round does not count as a stitch.
-Pattern is worked in multiples of 12.
-This pattern is very versatile. It is possible to make this bag taller or shorter by adjusting how many times you repeat rounds 11-14, and rounds 33-36. It would be possible to turn this into a clutch by completely omitting the Diamond Stitch section. See notes throughout pattern for this modification.
-The bottom of the bag design is based on a flat stitch pattern by MyPicot.
Antique Lace Wedding Bag Crochet Pattern (US Terms):
Click here to purchase an ad-free, print-optimized PDF of this pattern on LoveCrafts
You will begin at the bottom of the bag making the shell texture as you go up.
Leaving 14″ tail, ch 120, join with sl st to first ch.
Rounds 1-2: ch 1, sc in each st around, join with sl st to first sc. (120)
Round 3: ch 1, sc in next 4 sts (place st marker in 1st st out of 4), *sk 2 sts, 5 dc in next st, sk 2 sts, sc in next 7 sts, (place stitch marker in the 4th stitch out of the 7. You will be working spike stitches through this stitch in round 7), repeat from * around, sc in final 3 sts of round, join with sl st to first sc. (10 shells, 70 sc)
Round 4: ch 1, sc in next 3 sts, sk st, *work this sequence around the dc shell made in previous round: FPdc around first st, [dc in next st, FPdc around same st] 4 times, sk st, sc in next 5 sts, sk st; repeat from * around, sc in final 2 sts of round, join with sl st to first sc. (10 shells, 50 sc)
Round 5: ch 1, sc in next 2 sts, *work this sequence around the shell made in prev round: FPdc around first st, [2 dc in next st, FPdc around next st] 4 times, sk st, sc in next 3 sts, sk st; repeat from * around, sc in final st of round, join with sl st to first sc. (10 shells, 30 sc)
Round 6: ch 1, *sc in next st, sk st, BPsc around next 13 sts, sk st; repeat from * around, join with sl st to first sc. (140)
Round 7: ch 1, *5 dc spike stitches in marked stitch from round 3 (these will cover the sc between the shells you made in the prev round), sk 3 sts, sc in next 7 sts (place st marker in 4th st out of 7), sk 3 sts; repeat from * around, join with sl st to first dc spike st. (50 dc spike sts, 70 sc)
Round 8: ch 1, *work this sequence around the dc spike shell stitches made in previous round: FPdc around first st, [dc in next st, FPdc around same st] 4 times, sk st, sc in next 5 sts, sk st; repeat from * around, join with sl st to first FPdc. (10 shells, 50 sc)
Round 9: ch 1, work this sequence around the shell made in previous round: *FPdc around first st, [2 dc in next st, FPdc around next st] 4 times, sk st, sc in next 3 sts, sk st; repeat from * around, join with sl st to first FPdc. (10 shells, 30 sc)
Round 10: ch 1, *BPsc around next 13 sts, sk st, sc in next st, sk st; repeat from * around, join with sl st to first BPsc. (140)
Round 11: ch 2, sk 3 sts, *sc in next 7 sts (place st marker in 4th st out of 7), sk 3 sts, 5 dc spike stitches in marked stitch from round 7, sk 3 sts; repeat from * around, join with sl st to first sc. (50 dc spike sts, 70 sc)
Round 12: ch 1, sk st, *sc in next 5 sts, sk st, work this sequence around the dc shell made in previous round: FPdc around first st, [dc in next st, FPdc around same st] 4 times, sk st; repeat from * around, join with sl st to first sc. (10 shells, 50 sc)
Round 13: ch 1, sk st, *sc in next 3 sts, work this sequence around the shell made in previous round: FPdc around first st, [2 dc in next st, FPdc around next st] 4 times, sk st; repeat from * around, join with sl st to first sc. (10 shells 30 sc)
Round 14: ch 1, sk st, *sc in next st, sk st, BPsc around next 13 sts, sk st; repeat from * around, join with sl st to first sc. (140)
Repeat rounds 11-14 3 more times, then repeat round 11 one more time.
Round 28: ch 1, hdc in each st around, join with sl st to first hdc. (120)
Round 29: ch 1, working in 3rd loop of hdc, hdc in each st around, join with sl st to first hdc. (120)
Round 30: ch 1, working in 3rd loop of hdc, sc in each st around, (place st marker in 2nd st of round) join with sl st to first sc. (120)
You will now begin the Diamond Stitch section of the bag. Keep your tension relaxed and even or the bag may start to narrow as you go on. You’ll be doing a lot of rounds of this stitch, so take breaks to stretch, get a drink of water, and move around, etc. as you need to.
Clutch Modifications: If you wish to make a clutch instead of a bag, you may omit this next section and head straight to making the top band of the bag, or if you want to have a more simple clutch you can leave the top band off and go straight to making the strap.
Round 31: ch 1, dc in each st around, join with sl st to first dc. (120)
Round 32: ch 1 FPtr in second st of round 30, sc in next 3 sts, FPtr2tog, placing first leg around same sc in round 30 that you just worked the first FPtr around, sk 3 sts in round 30 and place second leg of the FPtr2tog around next sc, sc in next 3 sts of current round, *FPtr2tog, placing first leg around same sc in round 30 that you put the last leg of the previous FPtr2tog, skip 3 sts in round 30 and place second leg of the FPtr2tog around the 4th sc, sc in next 3 sts of current round; repeat from * across, When you get to the last stitch in your round, FPtr around the last FPtr2tog leg you made, before you finish the FPtr, when there are 2 loops left on your hook, insert hook into last st of round, YO, and pull through all remaining loops, join with sl st to first FPtr. (120)
Round 33: ch 1, dc in each st around, join with sl st to first dc. (120)
Round 34: ch 1, sc in same st as join, sc in next st, FPtr2tog, placing first leg around the top of the first AND last FPtr in round 32 (this will pull them together to look like they are one stitch), put the second leg around the next FPtr2tog from round 32. *sc in each of the next 3 sts, FPtr2tog placing first leg around the top of the FPtr2tog in round 32 that you just came off of, place the second leg of the FPtr2tog around the next FPtr2tog from round 32; repeat from * around, (Note: The final leg of the final FPtr2tog will be worked around the same stitches as the first leg of the first FPtr2tog in the round), sc in final st of round, join with sl st to first sc. (120)
Round 35: ch 1, dc in same st as join and each st around, join with sl st to first dc. (120)
Round 36: ch 1, FPtr around next post stitch of round 34, sc in next 3 sts. FPtr2tog, placing first leg around same post stitch in round 34 that you just did the first FPtr around, move forward 3 stitches in round 34 and place second leg of the FPtr2tog around the next post stitch, sc in next 3 sts of current round *FPtr2tog, placing first leg around same post stitch in round 34 that you put the last leg of the previous FPtr2tog, skip forward 3 sts in round 34, and place second leg of the FPtr2tog around the next post stitch, sc in next 3 sts of current round; repeat from * around, when you get to the last stitch in your round, FPtr around the last FPtr2tog leg you made, before you finish the FPtr, when there are 2 loops left on your hook, insert hook through that last stitch, YO, and pull up a loop, insert your hook under the first FPtr, and then pull that loop through all remaining loops. This will join the round. (120)
Repeat rounds 33-36 until bag measures 7 1/2” tall from bottom edge (round 1), then ch 1, sc evenly in each st around, join with sl st to first sc. (120)
Leave an 18″ tail when you fasten off for sewing the bag to the top band when you are done with it. See assembly section further down for more information.
Using tail at bottom of bag, sew bottom together. Weave in ends securely when finished.
Crocheting the top band of the wedding bag
This part is nearly identical to my Antique Garter pattern–just smaller. Work over your ends whenever possible, so that you have fewer ends to weave in later.
Ch 120, join with sl st to first ch.
Round 1: ch 1, sc in each ch around, join with sl st to first sc. (120)
Round 2: ch 4 (counts as first dc + ch 1), sk st, *(dc, ch 1) in next st, sk st; repeat from * around, join with sl st to 3rd ch. (60, dc, 60 ch-1 sps)
Round 3: ch 1, sc in each st around, join with sl st to first sc. (120)
Round 4: ch 1, *sc in next 3 sts, picot; repeat from * around, join with sl st to first sc. (40 picots, 120 sc)
Fasten off, weave in ends.
Attach yarn to other side of band:
Round 1: ch 1, hdc in each st around, join with sl st to first hdc. (120)
With Orchid Pink, string 20 #6 or #8 pearl beads onto your working yarn with a flexible beading needle,
Round 2: working in 3rd loop of hdc, sc in each st around, join with sl st to first sc. (120)
I work my bead stitches a little different than most crocheters so that the beads pops out on the front instead of the back of the piece.
Watch this video before you begin the next round if you have not done so already!
Round 3: ch 1, pull up bead in first st, sc in next 5 sts, *pull up bead in next st, sc in next 5 sts; repeat from * around, join with sl st to first sc. (120)
Round 4: ch 1, hdc in each st around, join with sl st to first hdc. (120)
In this next round you will be creating little triangle shapes with a tiny picot at the point, and a ch-3 which looks like a picot between each triangle. The tiny picots create a sharp point (well, they should look sharp at least). Blocking and sewing them in place after you complete the crochet part of this band will help them live up to their full potential. Nobody likes dull picots. 😉
Round 5: *(ch 3, sl st in same st, ch 4, sl st in back into last ch made creating a tiny picot, ch 3), sk 5 sts, sl st into next st; repeat from * around, final sl st counts as join. (20 “triangle” shapes)
Drop Orchid Pink and fasten off.
With Natural,
Round 6: attach yarn to 3rd loop of hdc in round 4, working in 3rd loop of hdc, sc in each st around, join with sl st to first sc. (120)
Round 7: ch 1, sc in each st around, join with sl st to first sc. (120)
The tiny picots you made in round 5 should line up between each picot shell in the following round. The ch-3 “picot” should fall at the center of each picot shell. If they are not, adjust your sl st count over to accommodate this.
Round 8: sl st over 2 sts, ch 1, sc in same st, *sk 2 sts, (2 dc, [dc, small picot] 3 times, 2 dc) in same st, sk 2 sts, sc in next st; repeat from* around omitting last sc in final repeat. (20 picot shells)
Fasten off, and weave in ends.
With Orchid Pink, sl st around garter between rounds 3 and 4.
Fasten off and weave in ends.
With Orchid Pink, sl st around garter between round 1 and round 1 (this is not a typo, this is denoting round 1 on the top and round 1 on the bottom).
Fasten off and weave in ends.
Adding the lace ruffle:
1. Flip the top band inside out. Now is the perfect time to see if those ends you wove in earlier are staying put. With needle and thread, sew down contrasting color’s triangle picot “points” from round 5 with matching color of thread. This will help them not to flop around or curl up and hide which unassisted picots are prone to do.
2. Pin lace ruffle to sc round right above shells. Baste in place.
We’ll come back to working on the band in just a minute.
You will now crochet the rosettes and leaves. You can choose to have the rosette match the thread you used earlier on the lower part of your band, or you can make the flower a different color. You will add this to the band at the top of the bag.
Clutch Modifications: If making a clutch with wrist strap make only 1 rosette and 2 leaves.
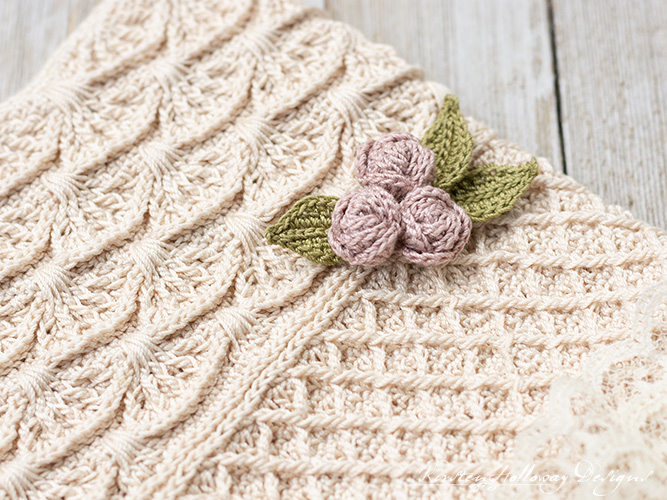
Rosette (Make 4):
With Orchid Pink thread and 1.4mm hook,
Ch 34,
Row 1: sc in second ch from hook and in each ch across, ch 1, turn. (33)
Row 2: sl st in first st, *sk st, 5 dc in next st, sk st, sl st in next st; repeat from * across. (8 shells)
Fasten off leaving 12” tail for sewing the rose together and sewing it to the band.
Roll up petals tightly with front side facing outward. Sew together using 12” tail. You should have enough leftover to sew the flower and leaves to the garter a little later.
Leaf (Make 5):
With Olive thread and 1.4mm hook,
Ch 10, sl st into 2nd ch from hook and into next 8 chains. Ch 1, continue working around other side: sc in first st, hdc in next st, dc in next 4 sts, hdc in next st, sc in next st, sl st in next st, at end of leaf work (sl st, ch 2, sl st), continue working around other side of leaf: sl st in next st, sc in next st, hdc in next st, dc in next 4sts, hdc in next st, sc in next st.
Sew the rosette to the front of the top band on round 2 (this is where you began and ended your rounds. It covers up the seam nicely). Pick only 2 dc stitches to attach it to. Do not block any other spaces or dc stitches as this is where you will weave a ribbon in the next step (it will go behind the two dc that you attach the rosette to).
Cut length of 3/8″ ribbon 1″ longer than the circumference of the garter. Thread it through round 2: Over 2, under 2. Coat the ends with fray check, then sew them together.
Position your 3 remaining rosebuds and 3 remaining leaves in a group over rounds 28 and 29 at the front, left side of the bag, and sew them in place.
You will now make the bag strap. This strap is very delicate. If you want something sturdier feel free to add a store-bought one or crochet something different. Perhaps you can try the strap on this bag over here. You will need to make it longer, however, since the weights of thread are different.
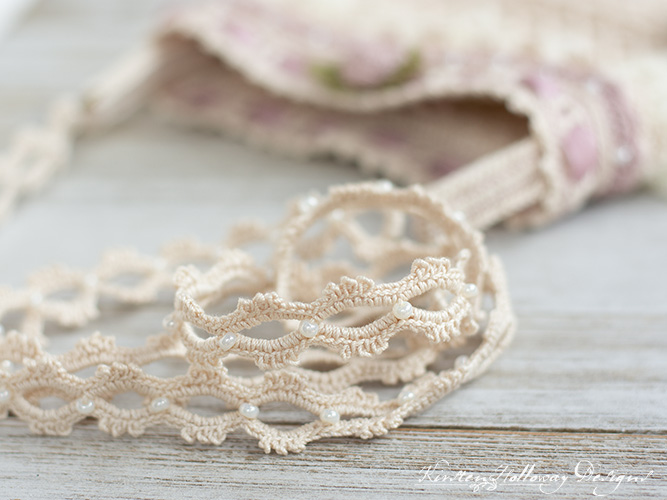
Crochet a strap for the wedding bag:
This strap is worked in multiples of 6+10. As written, mine came out about 3ft in length. You can adjust yours longer or shorter depending on your preference.
Clutch Modifications: If you wish to make a clutch with a 10″ wrist strap you may start with a beginning chain of 82 instead, then make only one strap holder beginning with a chain of 33 instead of 57. You’ll be folding the wrist strap in half and attaching it to the ring on your strap holder when you’re done.
With Natural,
Round 1: ch 10, sl st into 10th ch from hook forming a ring, ch 298, sk 9 sts, sl st into 10th ch (this will be the other end of your strap), *ch 5, sk 5 sts, sl st in next st; repeat from * across, final sl st will be worked in first sl st of row.
Round 2: ch 1, working in ch-10 sp, 3 sc, [sc, small picot] 3 times, 7 sc, [sc, small picot] 3 times, 3 sc, *working in next ch-5 sp, 3 sc, [sc, small picot] 3 times, 3 sc* repeat from * across, working in ch-10 so at end of row 3 sc, [sc, small picot] 3 times, 7 sc, [sc, small picot] 3 times, 3 sc, then repeat from * to end of row.
Fasten off, weave in ends
You will have 50 spaces on your strap if you followed the instructions the way I wrote them. Take a piece of #10 thread in Natural about 2 ft longer than your strap, and leaving a 12″ tail for sewing the end of the strap to the bag, and sew a pearl bead over every slip stitch from round 1. Weave your thread along the strap through the sc stitches in a serpentine fashion between each bead. This will help to provide a little more reinforcement to your strap. When you are done you should have another 12″ tail at the other end of your strap.
You may block and starch the band if you wish.
Strap holders (make 2):
Finished strap holders should measure about 6” long
With Natural, Ch 57,
Round 1: sc in second ch from hook, sc in each st across to end of row, 2 sc in final st, continue working around end, sc in each st across to end of row, 2 sc in final st, join with sl st to first sc.
Round 2: ch 1, sc in each st across, at end of strap work 2 sc in next 2 sts, sc along other side, at end of strap work 2 sc in next 2 sts, join with sl st to first sc.
Round 3: sl st around edges of strap. This will be the front of the strap.
Accent stripe (Optional) Round 4: turn strap over, join Orchid Pink or color of your choice, sl st around strap between rounds 1 and 2.
Fasten off leaving 12” tail for sewing strap to bag, weave in ends of accent stripe.
Assembling your wedding bag
Now that you have your pieces all made, let’s get them put together!
Position your top band so that the rosebud is centered at the front of the bag.
With needle and 18″ yarn tail left from the main part of the bag, sew the top of the bag to the band at round 2 (this will be the round where you started with your Orchid Pink accent color). I worked into the back bump of the sc, but you may work through the back half of the stitch instead. Either way you won’t want to have your thread showing through to the front of the bag.
Fasten off, weave in ends.
Fold each of your strap holders in half around a 15mm O ring. Sew ends to opposite sides of bag below the top band (You’ll have to flip your lace ruffle up out of the way to see where you’re sewing. Make sure to sew the strap itself together at the top so the ring can’t move around!
Take your strap and using the long tail at the first end, sew the tail around the ring and the end of the strap several times to secure it. Repeat for the other end. Fasten off and weave your ends into the strap to further reinforce them.
Adding a cloth lining to your bag (optional):
Take a rectangular piece of satin fabric at least 19″ tall by 8″ wide and fold it in half, front sides facing, with the fold at the bottom. Sew the sides of the liner following that 1/2″ seam allowance on your sewing machine, then zig-zag the rough edges so they don’t fray. Fold the top edges over 1/2″ and tack them in place by hand. Iron the seam and then sew by hand along the ironed seam into your purse. You may add a zipper, or snaps if you wish.
Want more gorgeous crochet patterns, and a little encouragement for your day? Sign up for my newsletter here! That way you’ll never miss out on special events, or freebies I’m offering.
JOIN ME ON SOCIAL MEDIA
I would love to see a picture when you’re done, so please feel free to come by my Facebook group and show off your finished project! Be sure to tag @kirstenhollowaydesigns when you share pictures of your wedding purse on Instagram!
You can also follow me on Facebook, Pinterest, Instagram, and Ravelry for more beautiful crochet patterns.
PATTERN TERMS AND CONDITIONS:
You are welcome to share the link to this pattern, using one image of your choice, on your site, but please do not share the written patterns themselves, this includes my Ravelry downloads or translations of these patterns, or use additional images. You do not have permission to use my images by themselves to create pinnable graphics for Pinterest, however they may be included in a roundup pin if there are 4 or more other patterns. If you sell finished items online, please do not use my pictures for your listings. I’m positive that your work is of high enough quality for you to sell the finished piece. Have confidence in your abilities! <3 Thank you!
This pattern was made to be used by individuals, and small business crocheters alike. Selling your finished pieces in boutiques, at farmer’s markets, craft shows, and other local events is encouraged! Please credit/link Kirsten Holloway Designs when selling finished products online. The only thing I require is that this pattern not be used commercially to produce hundreds of thousands of copies.
If you enjoyed this pattern or found it useful, why not share a link to this post with your friends?
Want more gorgeous crochet patterns, and a little encouragement for your day? Sign up for my newsletter here! That way you’ll never miss out on special events, or freebies I’m offering.
JOIN ME ON SOCIAL MEDIA
I would love to see a picture when you’re done, so please feel free to come by my Facebook group and show off your finished project! Be sure to tag @kirstenhollowaydesigns when you share pictures of your project on Instagram!
You can also follow me on Facebook, Pinterest, Instagram, and Ravelry for more beautiful crochet patterns.
PATTERN TERMS AND CONDITIONS:
You are welcome to share the link to this pattern, using one image of your choice, on your site, but please do not share the written patterns themselves, this includes my Ravelry downloads or translations of these patterns, or use additional images. You do not have permission to use my images by themselves to create pinnable graphics for Pinterest, however they may be included in a roundup pin if there are 4 or more other patterns. If you sell finished items online, please do not use my pictures for your listings. I’m positive that your work is of high enough quality for you to sell the finished piece. Have confidence in your abilities! <3 Thank you!
This pattern was made to be used by individuals and small business crocheters alike. Selling your finished pieces in boutiques, at farmer’s markets, craft shows, and other local events is encouraged! Please credit/link Kirsten Holloway Designs when selling finished products online. The only thing I require is that this pattern not be used commercially to produce hundreds of thousands of copies. If you enjoyed this pattern or found it useful, why not share a link to this post with your friends?


